Author: admin

  • 25 Gorgeous 2026 Fall Nails.

    25 Gorgeous 2026 Fall Nails.

    There is something magical about fall. The air becomes cooler, sweaters come back out of the closet, coffee tastes better, and suddenly everything feels a little cozier. But there is another seasonal change worth getting excited about: fall nails.

    Autumn is one of the best seasons for experimenting with your manicure because the color palette is incredibly versatile. You can go classic with burgundy and burnt orange, sophisticated with chocolate brown and caramel, dramatic with deep plum and black cherry, or modern with chrome, cat-eye, and velvet finishes.

    check out this Stressed Skin Tips That Actually Help (Simple Ways to Support Skin Recovery)

    And in 2026, fall nail trends are moving far beyond the traditional pumpkin-and-leaf manicure. Rich colors are being combined with glossy finishes, metallic details, textured effects, minimalist designs, and unexpected color combinations. Burgundy remains a major beauty favorite, while chocolate brown, warm metallics, forest green, and plum are giving classic autumn shades a fresh update. (Allure)

    So, whether you love short fall nails, elegant almond shapes, dramatic acrylics, or simple DIY manicures, there is a fall look waiting for you.

    25 Gorgeous Autumn Nail Ideas You’ll Want to Try This Season

    1. Rich Burgundy Fall Nails
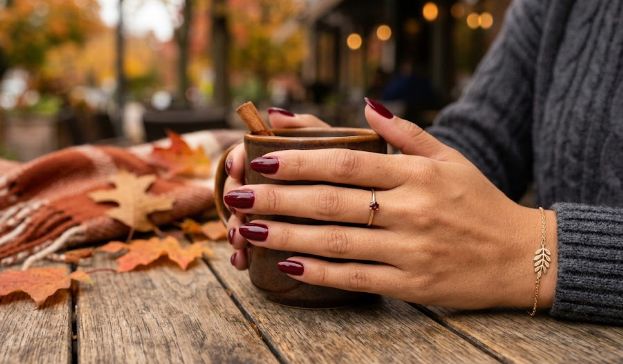
    If you want one color that instantly feels like autumn, make it burgundy.

    Burgundy nails are timeless, sophisticated, and surprisingly easy to wear. A glossy burgundy manicure gives your nails a polished, elegant appearance, while a matte finish creates a more vintage and luxurious effect.

    For 2026, burgundy is especially interesting when paired with different finishes. Try alternating glossy and matte nails, adding a subtle chrome accent, or choosing a burgundy cat-eye effect for extra dimension.

    This shade works beautifully with gold jewelry, neutral sweaters, denim, black outfits, and basically everything else in your fall wardrobe.

    2. Chocolate Brown Nails
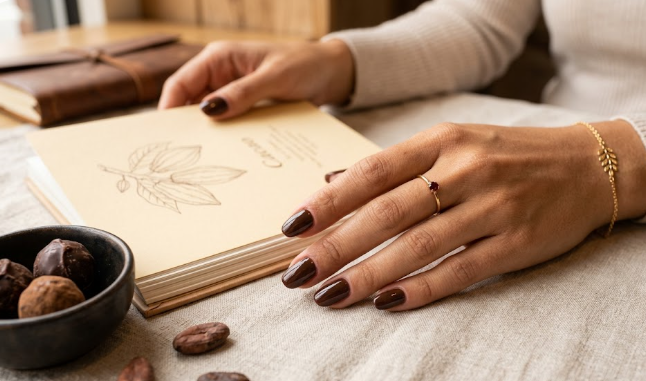
    Move over basic nude—chocolate brown is having a serious moment.

    Chocolate brown is one of the most wearable fall nail colors because it feels warm without being overly bright. It can look minimalist and sophisticated on short nails or dramatic and glamorous on long almond-shaped nails.

    For an elevated manicure, try chocolate brown with a high-shine finish. Want something more eye-catching? Add chocolate chrome swirls or combine different shades of brown across your nails.

    A mocha-and-caramel manicure can also create a beautiful coffee-inspired look without becoming overly themed.

    3. Caramel Chrome Nails
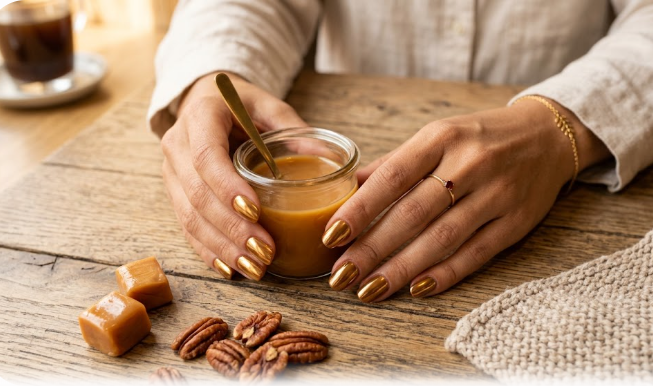
    Chrome nails are getting a warmer autumn makeover.

    Instead of relying only on silver or icy metallics, fall 2026 is bringing warmer shades such as caramel, bronze, copper, and golden brown into the spotlight. Warm chrome over a neutral or caramel-colored base creates a sophisticated manicure that catches the light without looking too flashy. (NailAtlas)

    This is an excellent option if you want something trendy but still wearable for everyday life.

    4. Burgundy Cat-Eye Nails
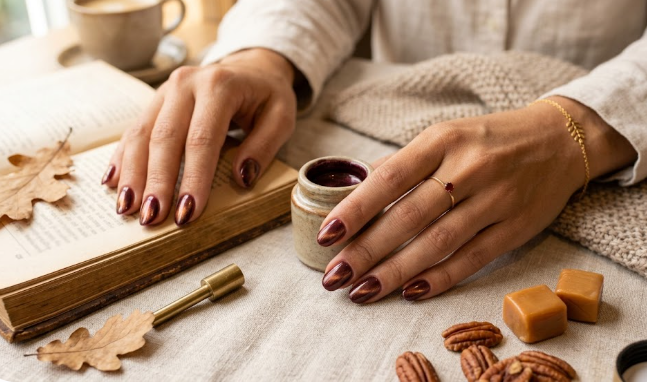
    Want your fall nails to have a little drama?

    Try a burgundy cat-eye manicure.

    The magnetic effect creates a glowing stripe across the nail, giving a simple dark color much more depth. Every time your hands move, the light catches the manicure differently.

    You can also experiment with black cherry, plum, chocolate, or deep green cat-eye polish.

    Cat-eye finishes have become particularly popular among nail enthusiasts, with recent community discussions showing strong enthusiasm for the effect. (Reddit)

    5. Short Fall Nails in Warm Neutrals
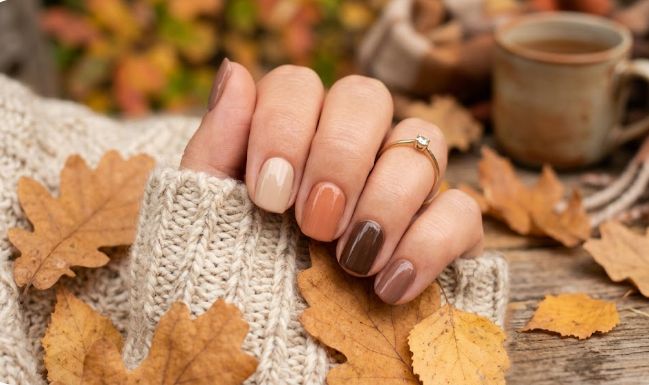
    You absolutely do not need long nails to enjoy beautiful autumn nail designs.

    Short nails look gorgeous in warm neutral shades such as:

    • Caramel
    • Taupe
    • Mushroom
    • Mocha
    • Warm beige
    • Terracotta
    • Soft brown

    These colors create a clean and sophisticated manicure while being practical enough for everyday activities.

    For an extra detail, add a tiny gold line, minimalist French tip, or single accent nail.

    6. Deep Plum Nails
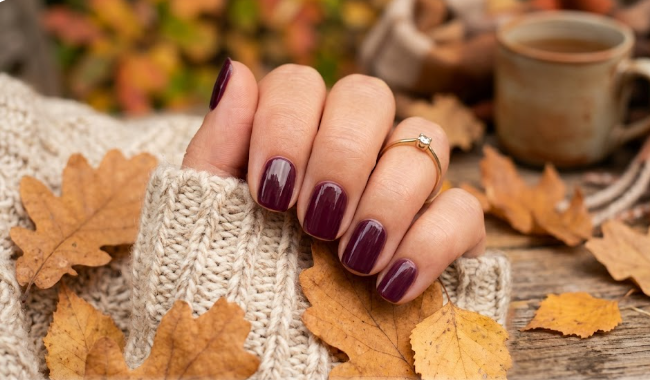
    If burgundy feels too predictable, go one shade darker and choose deep plum.

    Plum sits beautifully between purple, red, and wine, making it an ideal transitional color. It looks especially elegant in a glossy finish, but a velvet or matte topcoat can completely change the personality of the manicure.

    Deep plum is also perfect for date nights, autumn weddings, dinner parties, and other occasions where you want your nails to feel a little more glamorous.

    7. Forest Green Fall Nails
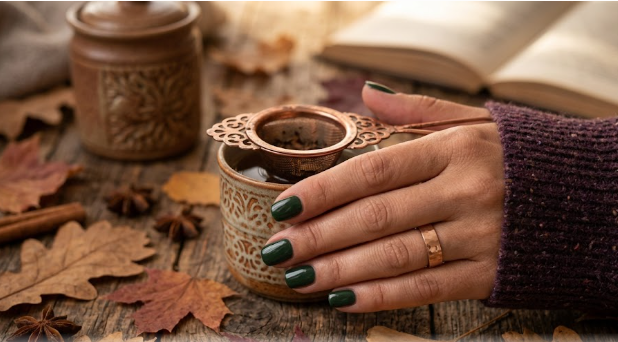
    Green may not be the first color you think about when you hear “fall nails,” but forest green is one of the season’s most beautiful alternatives to brown and red.

    A dark green manicure feels earthy, sophisticated, and slightly unexpected.

    Try glossy forest green for a classic appearance, or combine it with gold details for a luxurious autumn look. You can also create a tonal manicure using olive, moss, sage, and deep green.

    8. Black Cherry Nails
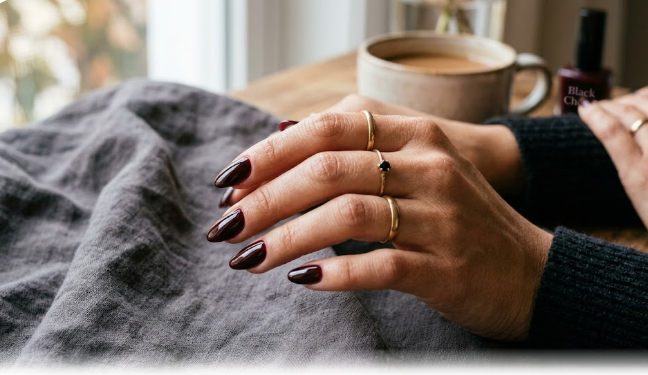
    Black cherry is perfect for anyone who loves dark nails but wants something softer than pure black.

    The color combines the richness of burgundy with an almost-black depth. Under bright light, the red tones become visible; in low light, the nails can look nearly black.

    For an especially modern manicure, add a chrome finish.

    Black cherry chrome nails are bold enough for a statement look but sophisticated enough to wear throughout the season.

    9. Fall French Tips
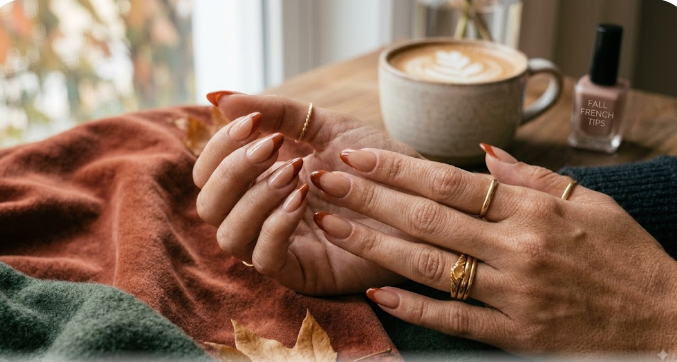
    French tips do not have to be white.

    For autumn, replace the traditional white tip with burgundy, chocolate brown, burnt orange, forest green, or black cherry.

    One of the easiest fall nail ideas is a nude base with a thin chocolate-brown French tip. It looks clean, modern, and seasonal without being too obvious.

    For something more creative, use a different autumn shade on each nail.

    10. Burnt Orange Nails
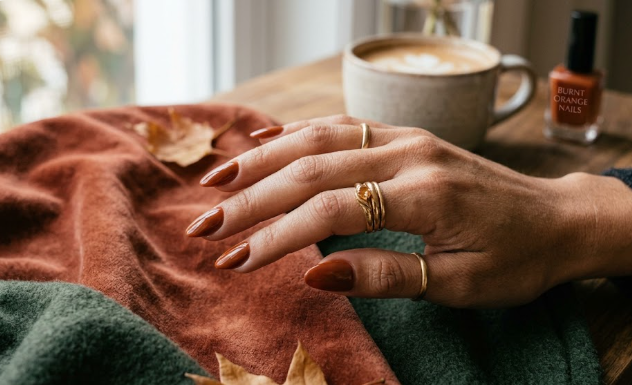
    Of course, we cannot talk about autumn without mentioning orange.

    But instead of bright summer orange, choose a deeper burnt orange or terracotta shade.

    Burnt orange works beautifully with warm skin tones and pairs naturally with fall clothing. It also looks fantastic with gold jewelry and creamy neutral outfits.

    If a full orange manicure feels too bold, use it for French tips, tiny abstract shapes, or accent nails.

    11. Tortoiseshell Fall Nails
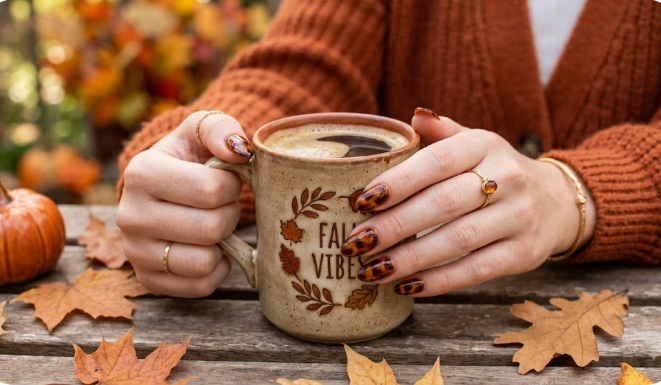
    Tortoiseshell is practically made for autumn.

    The combination of caramel, brown, amber, and black creates a pattern that resembles the warm colors of falling leaves.

    You can use tortoiseshell on every nail, but it can be even more stylish as an accent. For example, pair two tortoiseshell nails with three glossy chocolate-brown nails.

    The result feels fashionable without looking like you tried too hard.

    12. Cozy Sweater-Inspired Nails
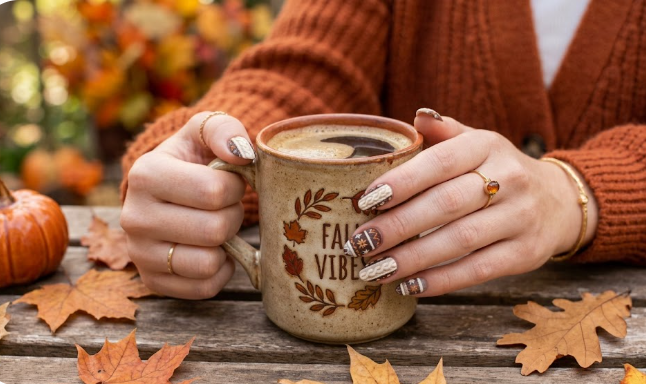
    If you love the cozy side of fall, why not put it directly on your nails?

    Sweater-inspired nail art uses textured patterns that mimic knitted fabric. Think tiny cables, ribbed lines, diamonds, and soft raised details.

    Cream, beige, taupe, brown, and muted orange work particularly well for this style.

    This manicure is especially cute for early autumn when oversized sweaters and scarves start becoming part of your everyday wardrobe.

    13. Minimalist Leaf Nail Art
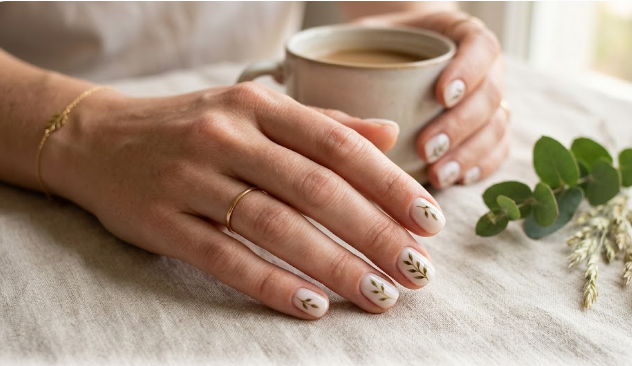
    Not everyone wants a complicated manicure.

    For a subtle seasonal look, start with a nude, cream, or sheer beige base and add tiny leaves in brown, rust, or burgundy.

    The secret is keeping the artwork delicate.

    Instead of covering the entire nail, place one small leaf near the tip or side. The result is elegant and unmistakably autumn-inspired without looking overly themed.

    14. Matte Burgundy Nails
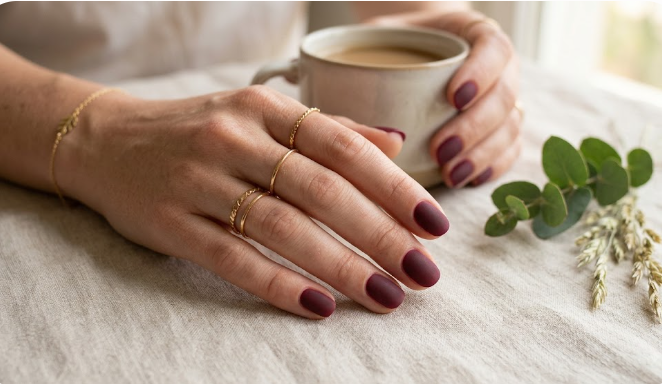
    Matte nails can completely transform a familiar color.

    A glossy burgundy manicure is classic and glamorous. A matte burgundy manicure feels moodier, softer, and more sophisticated.

    This is one of those fall nail designs that works on almost every nail shape.

    If you want a little contrast, leave one or two nails glossy while keeping the others matte.

    you will love this How to Get Glowing Skin Naturally (Simple Tips That Work)

    15. Chocolate and Gold Nails
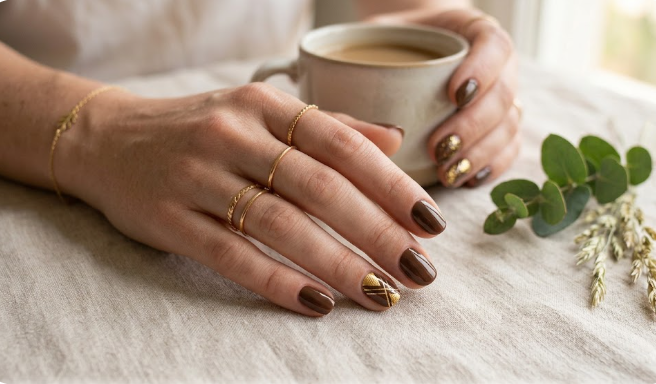
    Chocolate brown and gold are a perfect autumn combination.

    Start with a rich brown base and add thin gold lines, tiny metallic dots, or gold French tips.

    The design can be as minimal or dramatic as you want.

    For a quiet-luxury appearance, keep the gold details extremely thin. For party season, increase the metallic accents and add shimmer.

    16. Olive Green and Brown Nails
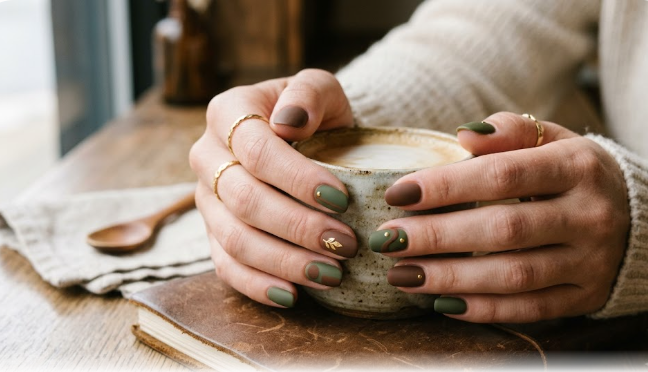
    If you prefer earthy colors, combine olive green with chocolate brown.

    These shades create a sophisticated nature-inspired palette that feels particularly appropriate for autumn.

    Try alternating the colors across your nails or using one as the base and the other for abstract swirls.

    This combination is also a great choice for people who want something different from the usual red-and-orange fall palette.

    17. Coffee Cat-Eye Nails
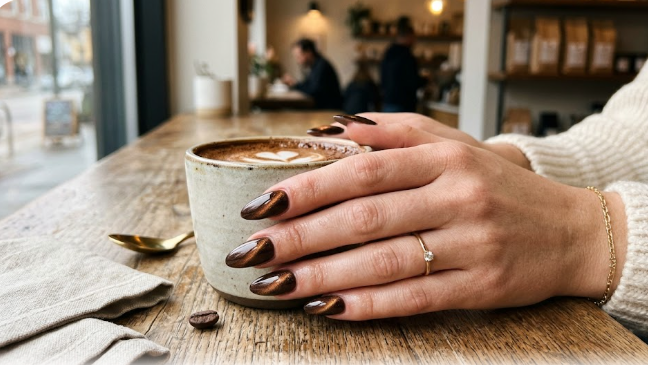
    Coffee-inspired nails are another gorgeous option for autumn.

    Imagine a deep espresso color with a subtle glowing effect running through it.

    A cat-eye finish gives brown polish dimension, making the nails look almost like polished stone or velvet.

    For an extra luxurious effect, use a magnetic brown polish with hints of bronze or gold.

    18. Autumn Aura Nails
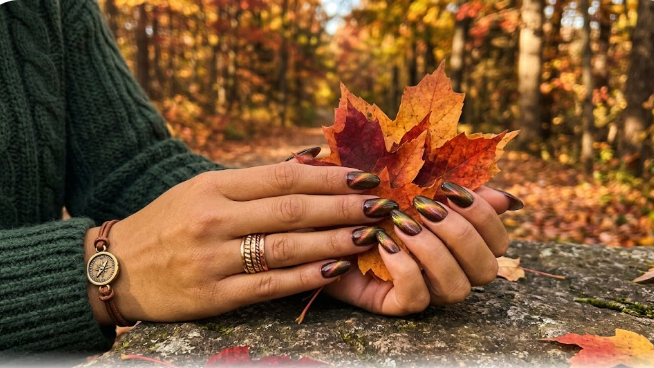
    Aura nails can easily be adapted for fall.

    Instead of bright pinks and tropical colors, use combinations such as:

    • Burgundy and caramel
    • Chocolate and beige
    • Plum and mauve
    • Burnt orange and cream
    • Forest green and brown

    The soft color transition creates a dreamy effect that feels artistic without requiring complicated nail art.

    19. Fall Floral Nails
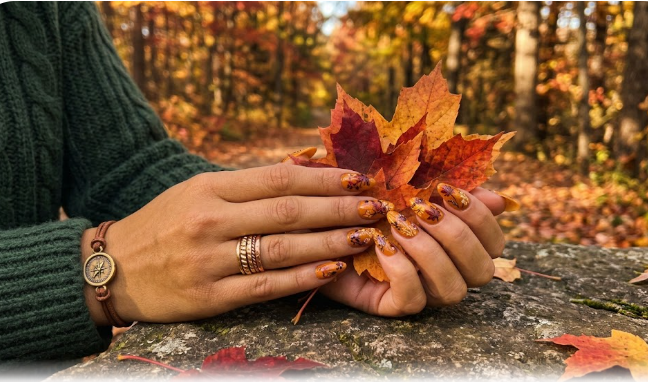
    Flowers are not just for spring.

    For an autumn version, use tiny flowers in muted colors such as rust, mustard, cream, brown, and burgundy.

    A neutral base makes the floral details stand out while keeping the manicure sophisticated.

    For something particularly elegant, use a sheer nude base and paint tiny dark flowers near the cuticle.

    20. Plaid Fall Nails
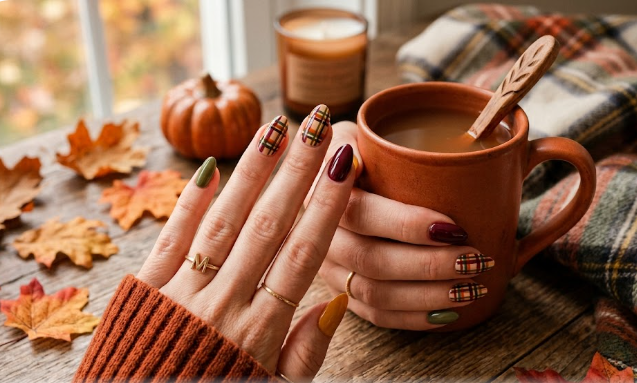
    Plaid and fall fashion go together perfectly, so why not bring the pattern to your manicure?

    A classic plaid nail could combine brown, cream, burgundy, and orange.

    If you prefer minimalist nails, use plaid on only one or two accent nails and keep the remaining nails a single color.

    Plaid is also easy to customize, which means you can coordinate your manicure with your favorite fall scarf or jacket.

    21. Metallic Velvet Nails
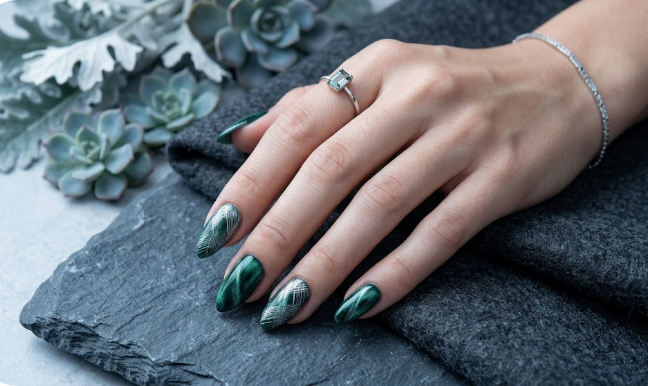
    Velvet nails are perfect for anyone who wants a manicure that looks different under changing light.

    The finish creates a soft, glowing metallic appearance that can feel almost three-dimensional.

    For fall, try velvet effects in burgundy, chocolate, olive, bronze, or deep plum.

    These shades are especially beautiful on almond and coffin-shaped nails.

    22. Negative-Space Fall Nails
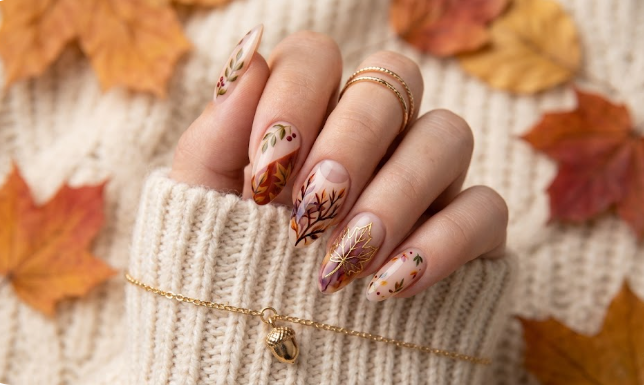
    If traditional nail art feels too busy, negative-space designs offer a more modern alternative.

    Leave part of the natural nail visible and add carefully placed lines, curves, French tips, or autumn-colored shapes.

    A clear or nude base combined with burgundy or chocolate accents can create an effortlessly chic manicure.

    This style is also ideal for people who prefer minimalist beauty.

    23. Mix-and-Match Fall Nails
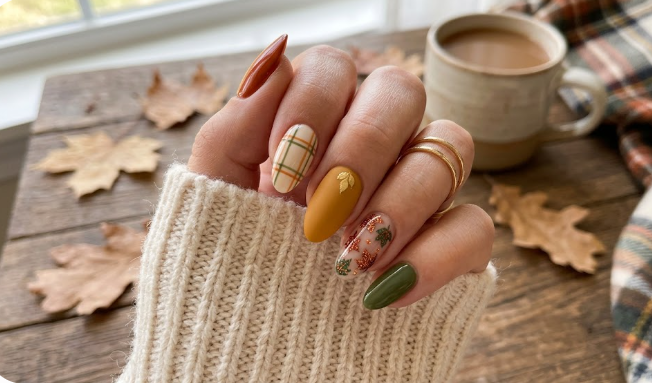
    Why choose just one design?

    Mix-and-match manicures allow you to combine several trends in one set.

    For example:

    • One chocolate brown nail
    • One burgundy cat-eye nail
    • One tortoiseshell nail
    • One caramel chrome nail
    • One minimalist leaf design

    The key is using a consistent color palette so the manicure still feels cohesive.

    This approach is perfect if you have trouble choosing between all your favorite fall nail ideas.

    24. Creamy Nude Fall Nails
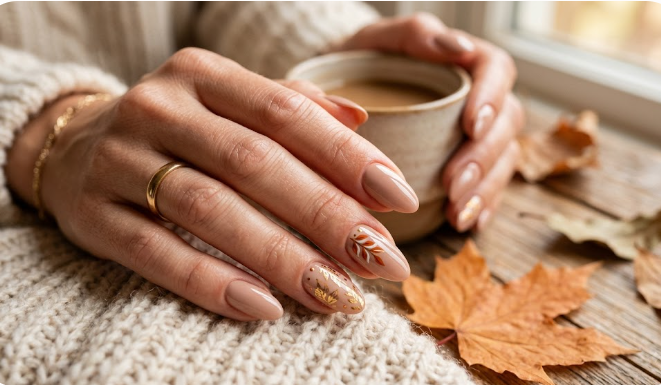
    For people who prefer understated manicures, creamy nude is an excellent autumn choice.

    Choose a warm beige, ivory, latte, or mushroom shade rather than a stark white.

    You can wear the color alone for a clean manicure or add tiny gold accents for a more polished look.

    This is also one of the easiest styles to maintain because small chips are generally less noticeable than they are with very dark polish.

    25. The “Expensive-Looking” Fall Manicure
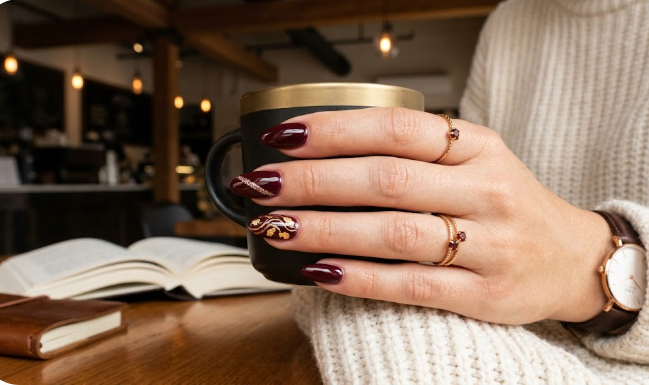
    Sometimes the best manicure is not the most complicated one.

    For a sophisticated fall look, choose one rich shade—burgundy, chocolate, caramel, deep plum, or forest green—and focus on making the finish flawless.

    Keep the nails neatly shaped, the cuticles tidy, and the polish glossy or softly matte.

    The result is simple but luxurious.

    How to Choose the Best Fall Nail Color for You

    With so many fall nail colors available, choosing just one can feel impossible.

    Start by thinking about your wardrobe.

    If you wear lots of black, cream, beige, and denim, almost any autumn shade will work. Burgundy and chocolate will create a sophisticated contrast, while caramel and taupe will create a softer look.

    If you love colorful clothes, consider a neutral manicure or choose one shade that complements your favorite pieces.

    You can also think about the mood you want.

    Elegant: Burgundy, plum, chocolate, nude

    Bold: Black cherry, burnt orange, deep green

    Minimalist: Cream, taupe, caramel, mushroom

    Glamorous: Chrome, velvet, metallic bronze

    Playful: Tortoiseshell, plaid, floral, mixed designs

    What Nail Shape Looks Best for Fall?

    The good news is that fall nail designs work on almost every nail shape.

    Almond nails are ideal for elegant and elongated designs such as French tips, chrome effects, and botanical art.

    Short square nails are perfect for simple colors, minimalist designs, and everyday manicures.

    Coffin nails provide plenty of space for detailed artwork, plaid, leaves, and dramatic chrome.

    Oval nails create a classic, feminine appearance and work beautifully with darker colors.

    Ultimately, the best shape is the one that fits your lifestyle and makes you feel comfortable.

    How to Make Your Fall Manicure Last Longer

    A beautiful manicure is even better when it lasts.

    Start by applying polish to clean, dry nails. Avoid applying extremely thick layers because they can take longer to dry and may chip more easily.

    Use a quality base coat, apply thin layers of color, and finish with a good topcoat.

    Cuticle care also makes a major difference. Applying cuticle oil regularly can help your nails and surrounding skin look healthier, particularly as the weather becomes cooler and drier.

    If you are using gel products, follow the manufacturer’s curing instructions carefully rather than trying to speed up the process.

    The Biggest Fall Nail Trend to Try in 2026

    If you want to choose just one trend, rich color plus a dimensional finish is the way to go.

    Instead of simply painting your nails burgundy or brown, experiment with cat-eye, chrome, velvet, or another finish that gives the color movement and depth.

    This reflects the broader direction of 2026 nail trends: familiar shades are being reinvented through texture, shine, and creative combinations. Burgundy, for example, is being worn in everything from classic glossy finishes to matte and more dimensional looks. (Allure)

    Final Thoughts

    Fall is the perfect excuse to refresh your manicure.

    Whether you choose classic burgundy, chocolate brown, deep plum, forest green, burnt orange, caramel chrome, or a creative mix of several shades, the best fall nails are the ones that reflect your personal style.

    You don’t need complicated nail art to make a statement. Sometimes a perfectly shaped short manicure in glossy chocolate brown is enough. Other times, you may want to experiment with cat-eye effects, metallic chrome, tortoiseshell, plaid, or tiny autumn leaves.

    The most exciting part of the 2026 fall nail trends is that there is no single “right” look. The season is giving us rich colors, interesting textures, elegant neutrals, and plenty of room for creativity.

    So grab your favorite sweater, order that cozy drink, and choose your next manicure.

    Your perfect fall nails are only one color—and maybe a little chrome—away.
  • The Art of Adorable Toddler Hairstyles with Bows

    The Art of Adorable Toddler Hairstyles with Bows

    A Complete Guide for Modern Parents

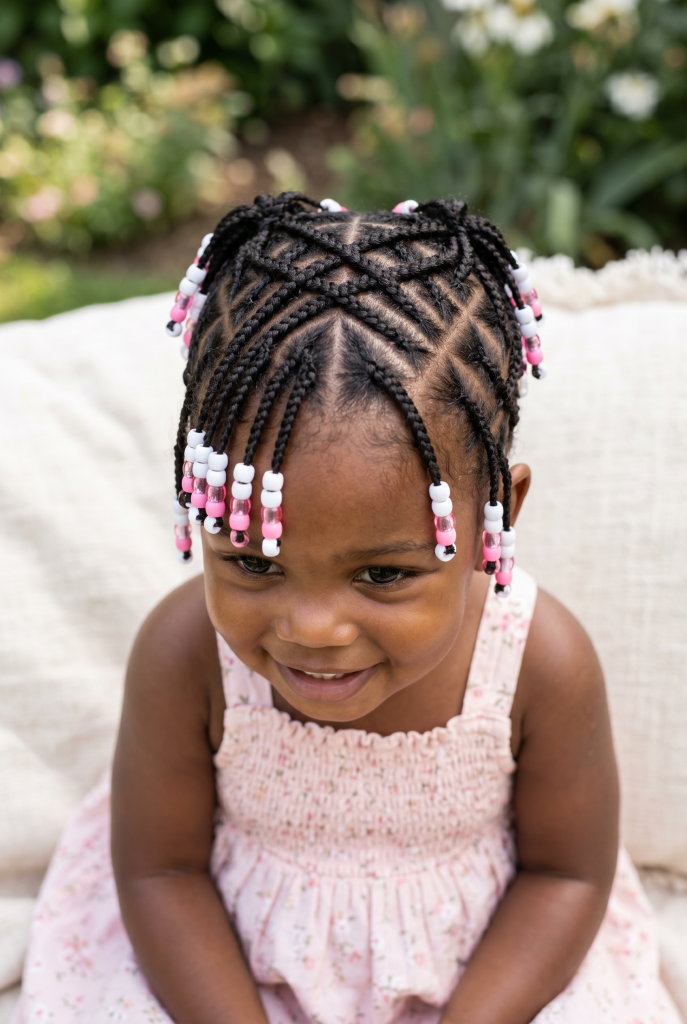
    As babies transition into the toddler years, their hair often grows thicker and longer, opening up a world of creative possibilities for parents eager to style their little ones. Among the myriad of accessories available, few have endured with such timeless charm as the humble hair bow. Whether you are preparing for a busy day at preschool or a formal family gathering, toddler hairstyles with bows offer a versatile solution that combines cuteness with functionality—keeping hair secure during playtime while remaining gentle enough for delicate scalps and fine strands.

    The Enduring Appeal of Bows in Toddler Hair Styling

    Hair bows are more than mere accessories; they are expressions of joy and creativity that can elevate a basic hairstyle into something extraordinary with minimal effort. Lightweight and gentle on tender hair, bows add a sweet touch without requiring complicated styling skills. For parents navigating the daily challenge of managing their toddler’s hair, these simple adornments transform routine grooming sessions into delightful creative experiences.

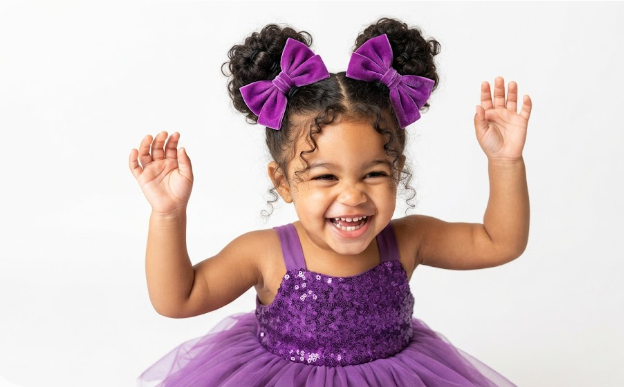
    Fashion experts note that bows are not just accessories but statements that celebrate a child’s vibrant personality. As we look toward current trends, purple hair bows, statement bow clips, and Alice bands are emerging as popular choices, with shades like violet, plum, aubergine, and orchid tones introducing depth and vibrancy to children’s hairstyles. These colors add personality while remaining wearable and stylish for children of all ages.

    Classic Toddler Hairstyles with Bows for Every Occasion

    1. High Pigtails with Bows

    Perhaps the most iconic among toddler hairstyles with bows, high pigtails remain a favorite choice for parents because they keep hair entirely away from the face during messy play or mealtime. To achieve this timeless look, divide the hair down the center and secure two even sections high on the head using soft, colorful elastics. Adding oversized fabric bows or sparkly clips provides a delightful finishing touch that coordinates with her outfit. This hairstyle works exceptionally well for toddlers with medium to long hair, providing a secure hold that lasts from morning until nap time.

    you will love this Morning vs Night Skincare Routines by Skin Type: Oily, Dry, Sensitive, and Combination

    2 Bubble Braids with Mini Bows

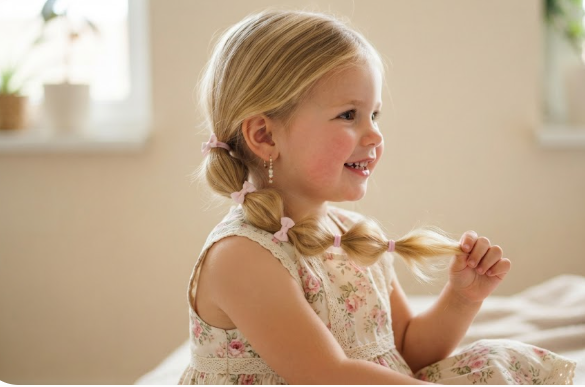
    Bubble braids with mini bows have become a very popular trend for little girls. This whimsical and easy-to-create hairstyle works beautifully on fine hair and serves as an excellent alternative to traditional braiding. Start by creating a ponytail and then adding several elastics down the length of the hair at even intervals. Gently tugging the hair between each elastic creates a “bubble” effect that looks sophisticated but takes only minutes to complete. This style is durable enough to withstand the tumbling and running of a busy toddler day and allows you to use a variety of colorful hair ties to make the look even more vibrant.

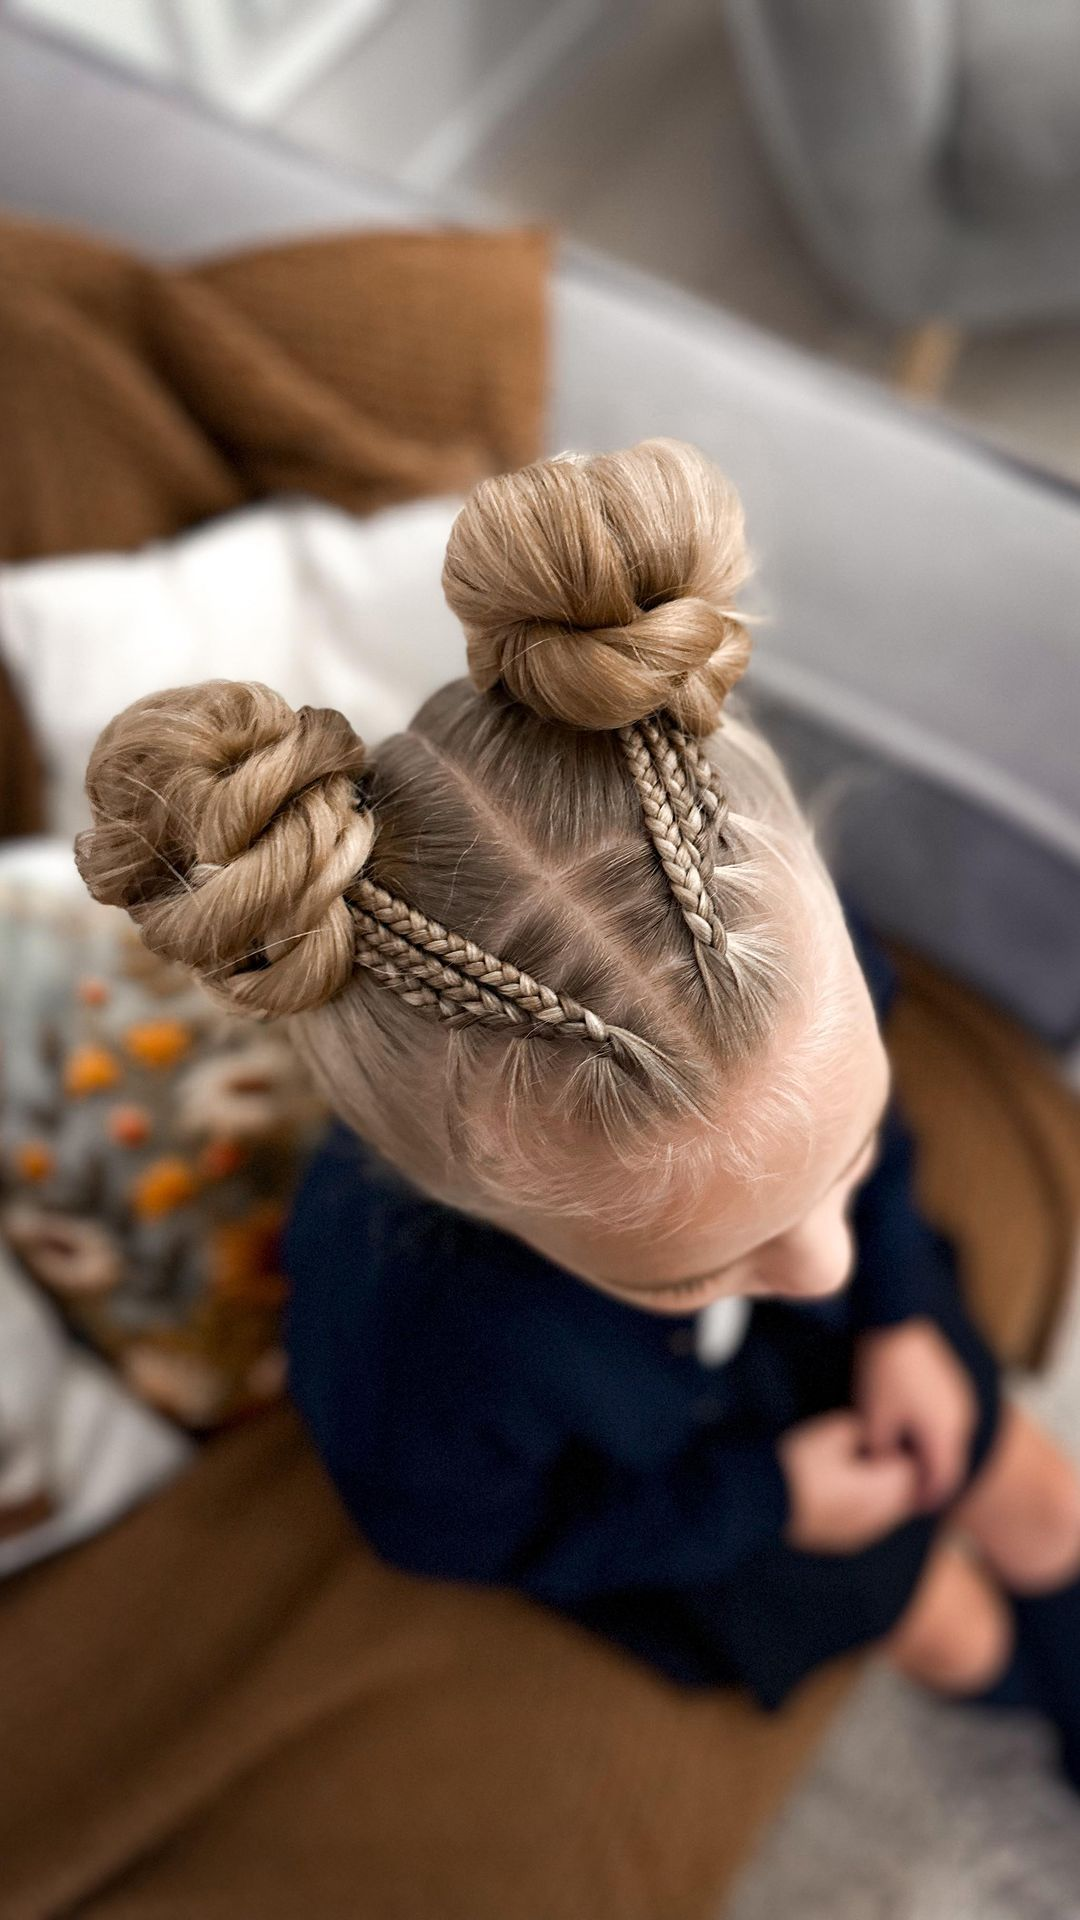
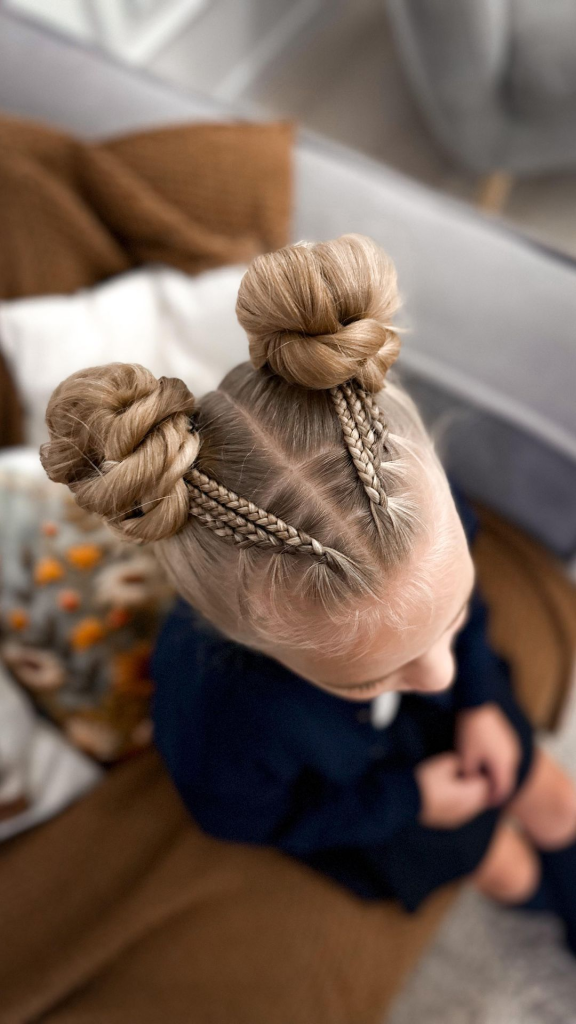
    3 Double Space Buns

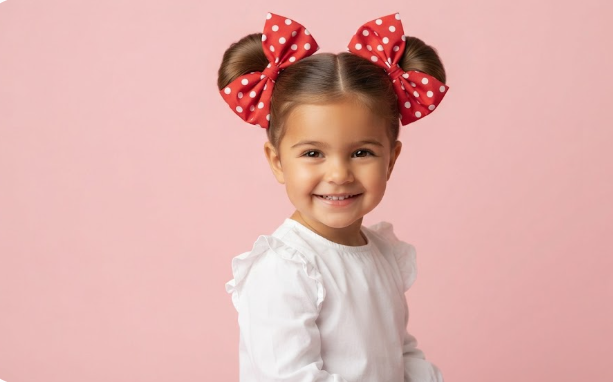
    Double space buns add a playful, modern twist to the traditional pigtail look. Often called Mickey Mouse ears, this hairstyle involves twisting two high ponytails into neat or slightly messy buns on the top of the head. It is particularly effective for keeping long hair from getting tangled during active outdoor play or sports. Each bun can be topped with a bright fabric bow, making it ideal for toddlers with thick or textured hair. This look is perfect for showing off her facial features while keeping her cool and comfortable.

    4 Half-Up Styles with Bows

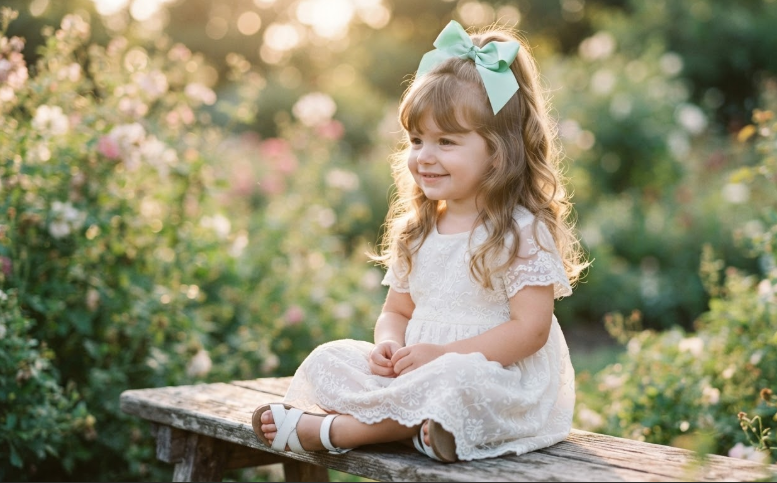
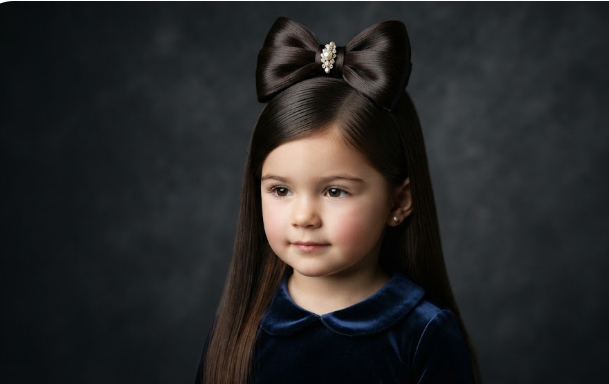
    The half-up hair bow is a classic choice for school or casual outings. Simply pull the top half of the hair back and secure it with a colorful ribbon or bow clip. This style keeps the hair out of the child’s eyes while letting the rest flow naturally down the back, making it a practical option for active girls who still want to look fancy. Choose a small clip for a subtle look or a massive velvet bow for extra drama. This versatile arrangement works well on curly, wavy, or straight hair types.

    5 French Braids with Bows

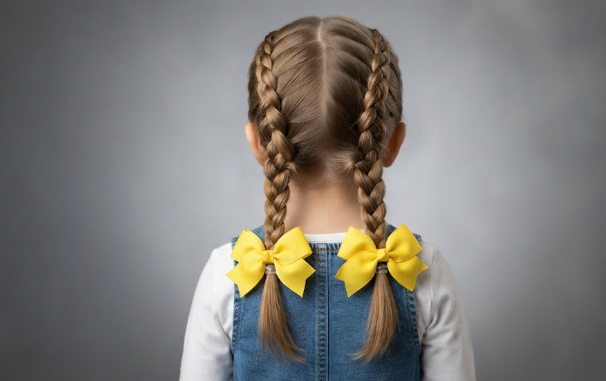
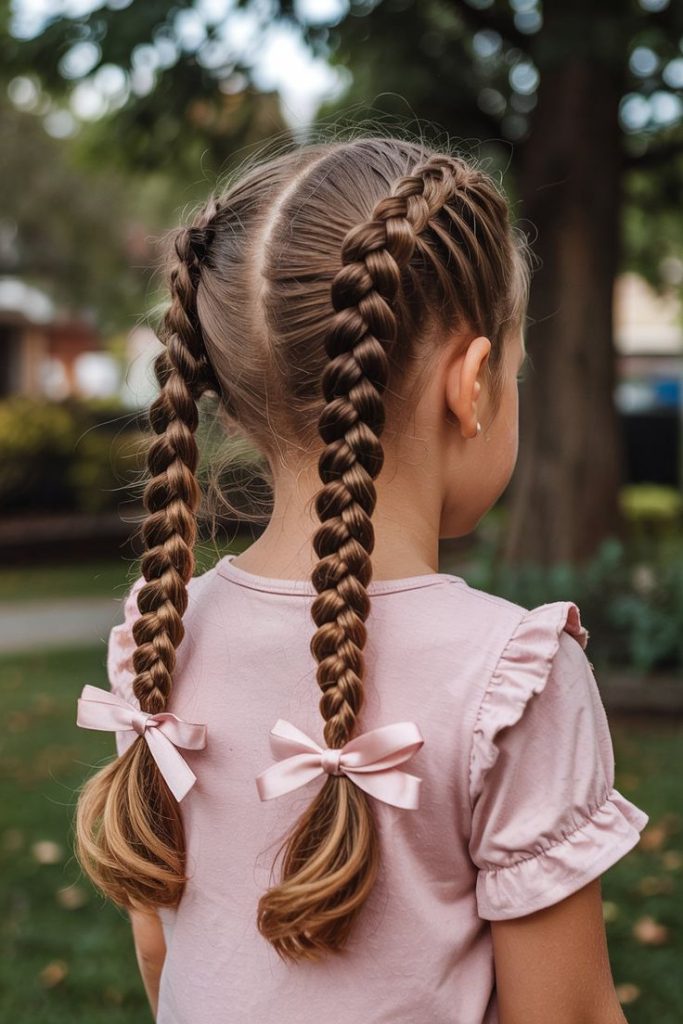
    French braids are highly regarded for their ability to tuck in shorter baby hairs and keep everything looking tidy for hours on end. By weaving three strands of hair while incorporating more from the sides, you create a flat, secure braid that sits close to the scalp. Adding a bow at the end of each braid not only looks sweet but also helps reinforce the style. This is an ideal choice for active days at daycare or during hot summer afternoons when you want to keep her neck cool.

    Creative and Unique Toddler Hairstyles with Bows

    6 Hair Bow Made of Hair

    Creating a hair bow made of hair is a stunning way to use the child’s own locks as an accessory. This technique involves forming a ponytail and looping the hair to create the two loops of a traditional bow, then using a small strand of hair to wrap around the center to hide the elastic band. It looks incredibly professional and works best on medium to long hair that has a bit of grip. A light hairspray can help keep the loops from fraying throughout the day. This look is a favorite for birthdays because it feels like a special piece of art sitting right on top of their head.
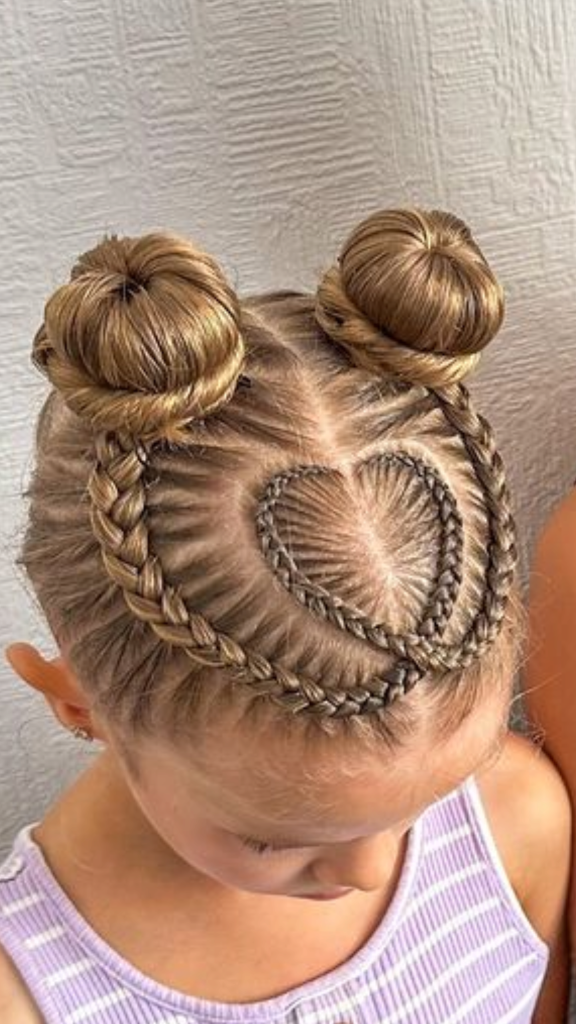
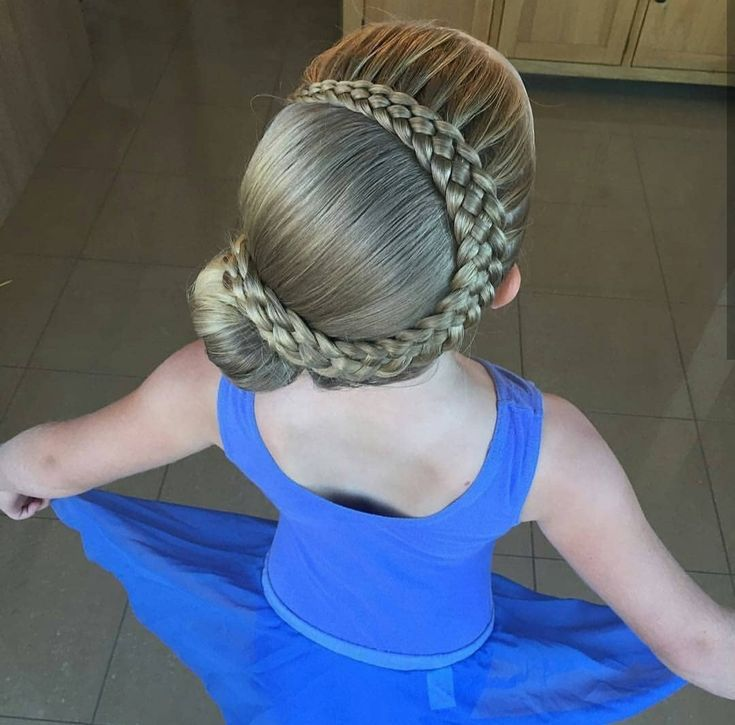
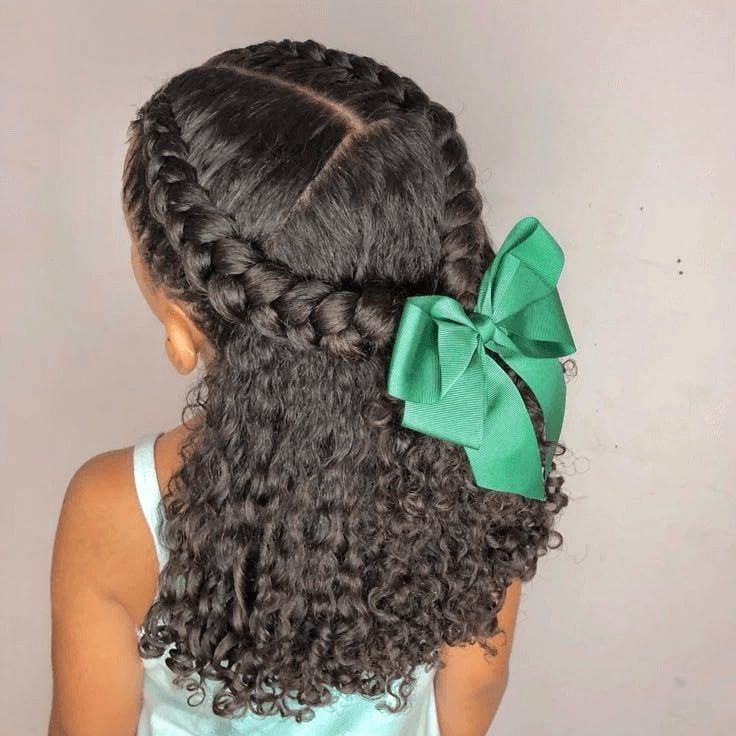
    7 Braided Crown with Bow

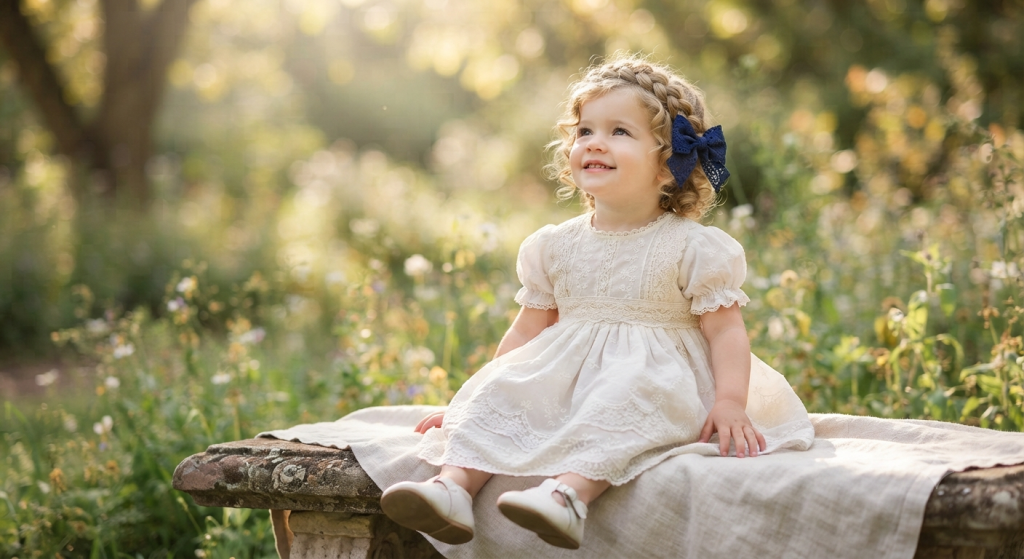
    The braided crown with bow offers a regal and sophisticated appearance for special events. Braid two sections of hair from the temples and pull them around the back of the head. Where the braids meet, secure them with a dainty bow to hide the pins. This look creates a beautiful halo effect that frames the face elegantly, making it a wonderful choice for weddings or family portraits where a timeless style is desired.

    8 High Bun with Bow

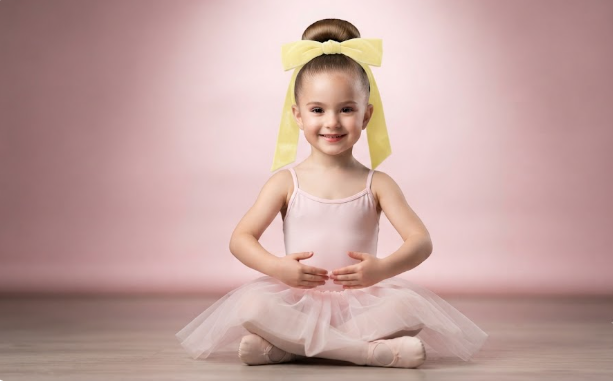
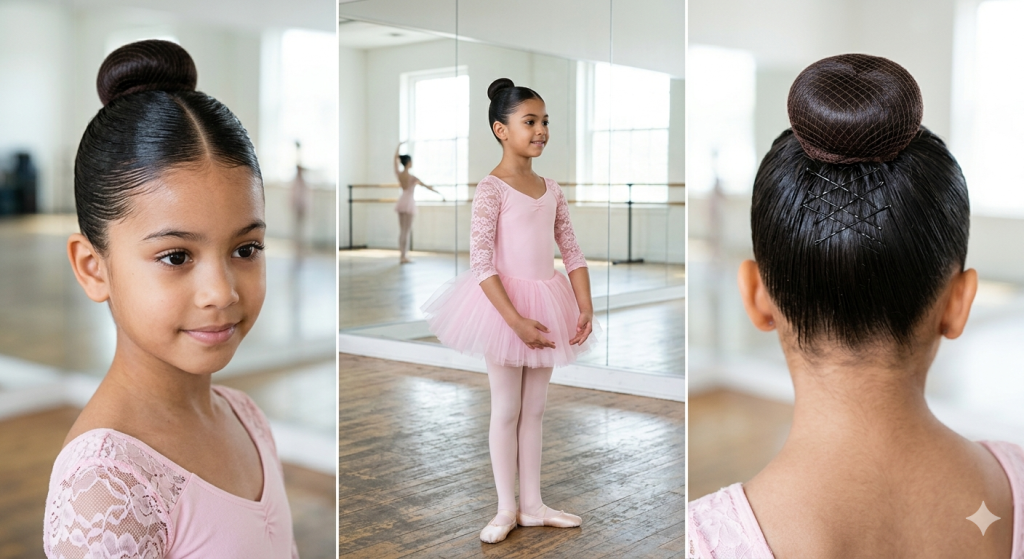
    A high bun with bow is the ultimate ballerina look that many little girls absolutely love. Gather all the hair at the crown of the head and twist it into a neat, secure bun. Adding a bow right at the base of the bun or clipped onto the top provides a focal point. This hairstyle is perfect for hot summer days when you want the hair off the neck and works brilliantly for dance recitals or formal parties where a tidy appearance is required.

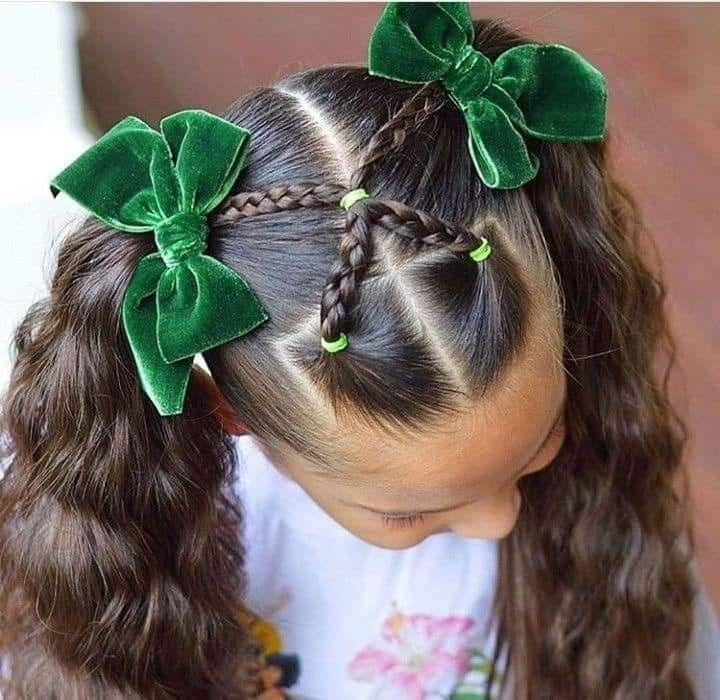
    9 Criss-Cross Mini Ponies

    The criss-cross mini pony style looks more detailed than it actually is, making it perfect for special occasions or photos. Create two small top ponytails and criss-cross them, then gather each crossed strand together with hair from the lower section and secure into two low ponytails near the nape. Twist each low ponytail into a small bun and finish with bows or clips. This keeps hair secure while still feeling soft and age-appropriate.

    Adapting Toddler Hairstyles with Bows for Different Hair Types

    Short Hair

    Parents often wonder if toddler hairstyles with bows are possible for children with shorter locks. The answer is a resounding yes. Even a classic chin-length bob can be made more stylish with colorful clips, tiny bows, or soft headbands. Simple accessories like soft headbands, tiny bows, and colorful rubber bands add charm without taking too long to apply. For babies with wispy or uneven hair growth, a side sweep with a tiny bow clip works beautifully and takes seconds to do.
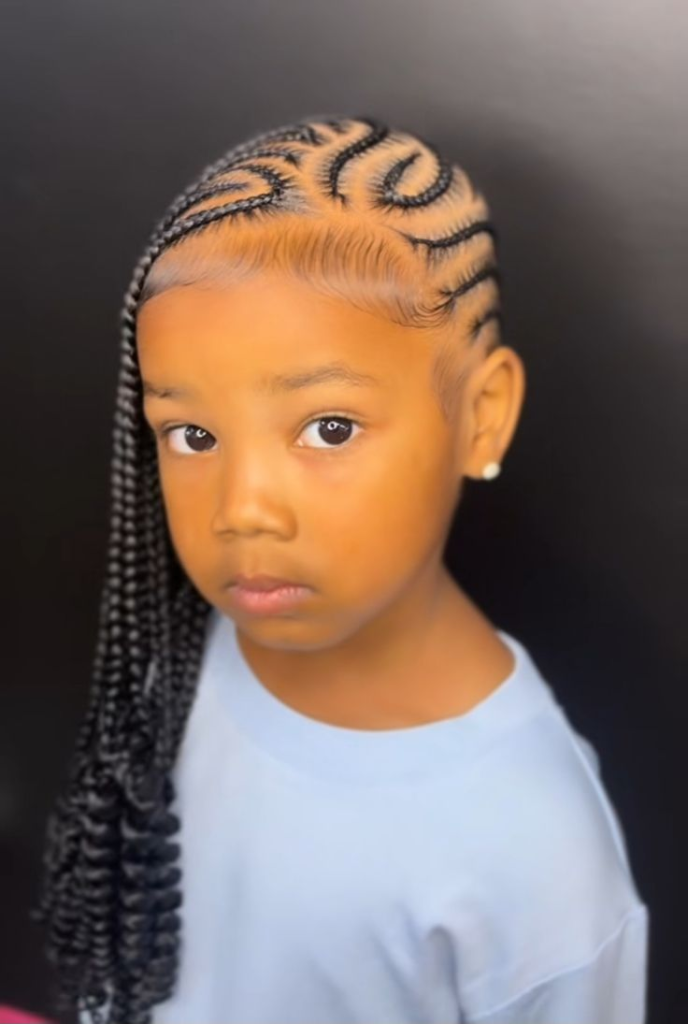
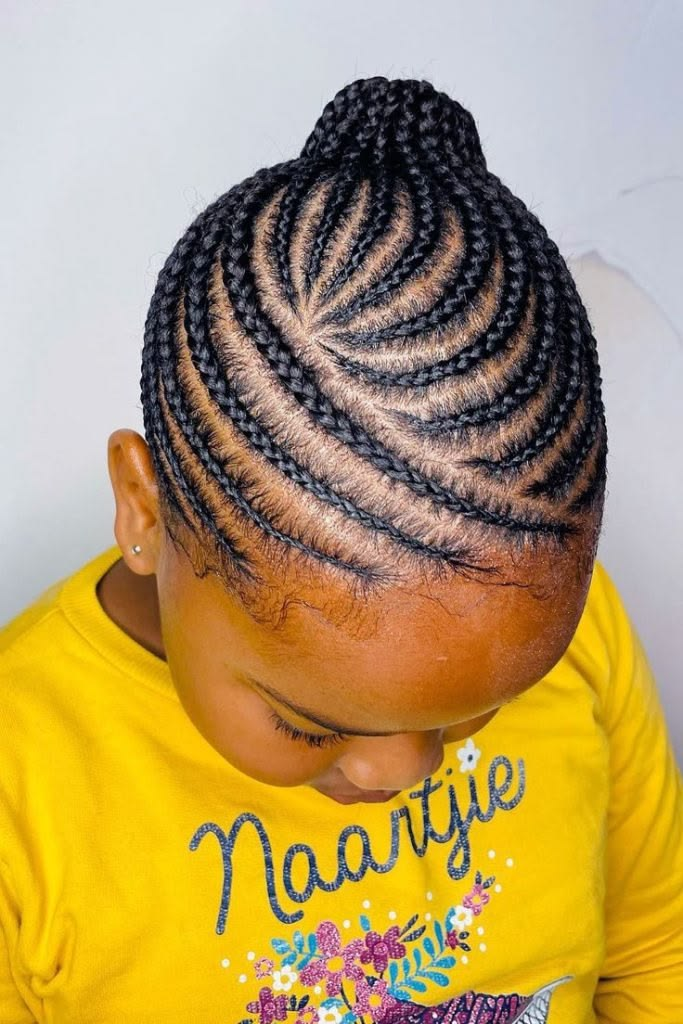
    Mini pigtails, small sections of hair pulled back from the face, or even a zig-zag pattern with colorful elastic bands are lifesavers for short hair. Rubber bands and fabric-covered elastics are your best friends when working with shorter toddler hair.

    Fine or Thin Hair

    For toddlers with fine or straight hair that tends to fall flat, bubble ponytails with bows are especially effective. Section off a ponytail using elastics every couple of inches, then gently fluff each section to add volume. A colorful bow on the end ties it all together both literally and stylistically. This style holds up well through the daily chaos of toddler life.

    Thick or Textured Hair

    For toddlers with thick or textured hair, two mini buns perched high on the head, each topped with a bright fabric bow, while the rest of the hair stays down and loose, is an ideal choice. Lopsided Dutch braids worked on both sides and connected at the nape with a single bow is another excellent option for managing thicker manes.

    Curly Hair

    Natural curls can be celebrated with styles like the rainbow puff ponytails or the sunflower puff bow bliss, where a bright bow ties the curly top into a playful bundle, keeping every strand in place while she toddles around. Side braids work wonderfully for curly hair—simply gather a section of hair from one side and do a simple three-strand braid, securing it with a small elastic and finishing with a bow.

    Essential Tips for Styling Toddler Hairstyles with Bows

    Preparation is Key

    Always start with detangled hair. A good detangling spray makes a world of difference. Using the right tools—snag-free elastics, soft-bristled brushes, and wide-tooth combs—makes the process much easier for everyone involved. A soft brush or wide-tooth comb works wonders, especially if their hair is fine.

    Choosing the Right Bows

    When selecting bows for toddler hairstyles with bows, size matters. For infants, smaller bows around 3 inches offer a delicate look, while medium bows about 4 inches are great for toddlers and children up to 3 years old. Soft, non-toxic materials that are hypoallergenic and safe for toddlers should be prioritized. Fabric bows and soft elastics help avoid pulling on sensitive scalp skin. Brands like Baby Bling Bows are made with soft stretchy fabric that is gentle even on a newborn.

    Patience and Distraction

    Getting a toddler to sit still while doing their hair can be challenging. Offering a favorite show, toy, or snack during styling can make the process much smoother. Remember that practice makes perfect—don’t worry if it’s not flawless the first time. The more you do it, the faster and neater you’ll get.

    Securing the Style

    When attaching bows, ensure they are fastened firmly but gently. Sectioning hair, securing with elastics, and attaching bows properly prevents the style from falling apart during active play. For clip-on bows, choose alligator clips that hold gently yet securely on infants and toddlers.
    Seasonal and Occasion-Based Styling

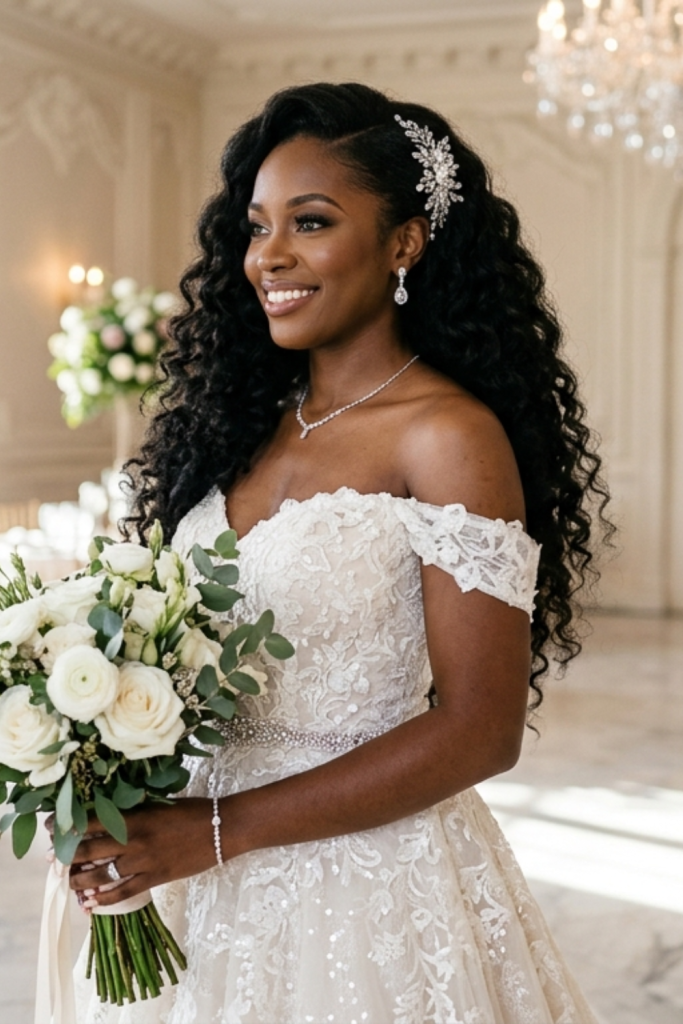
    Toddler hairstyles with bows can be adapted for any season or occasion. For summer, simple ponytails, braids, and buns that are quick to do and maintain throughout the day keep children cool and comfortable. Hair bows are the simplest way to reflect the season while keeping comfort front of mind.

    For holidays, incorporate themed accessories such as ribbons, small bows, or cute clips with seasonal colors like red, green, and gold. For weddings or formal events, the braided crown with bow or high bun with bow offers timeless elegance. For everyday wear, styles like small ponytails, half-up half-down looks, or braided pigtails decorated with colorful bows can elevate everyday looks.

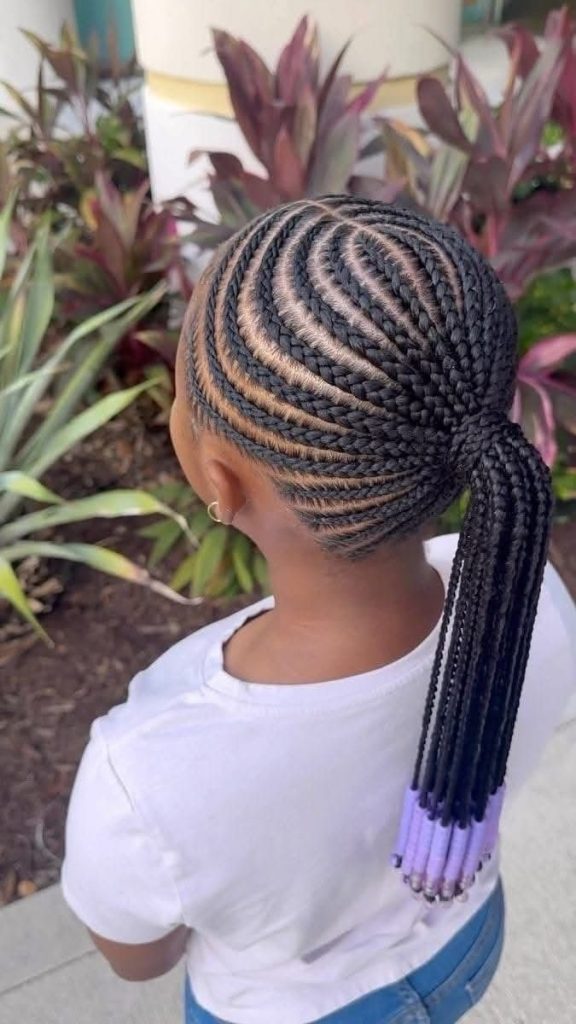
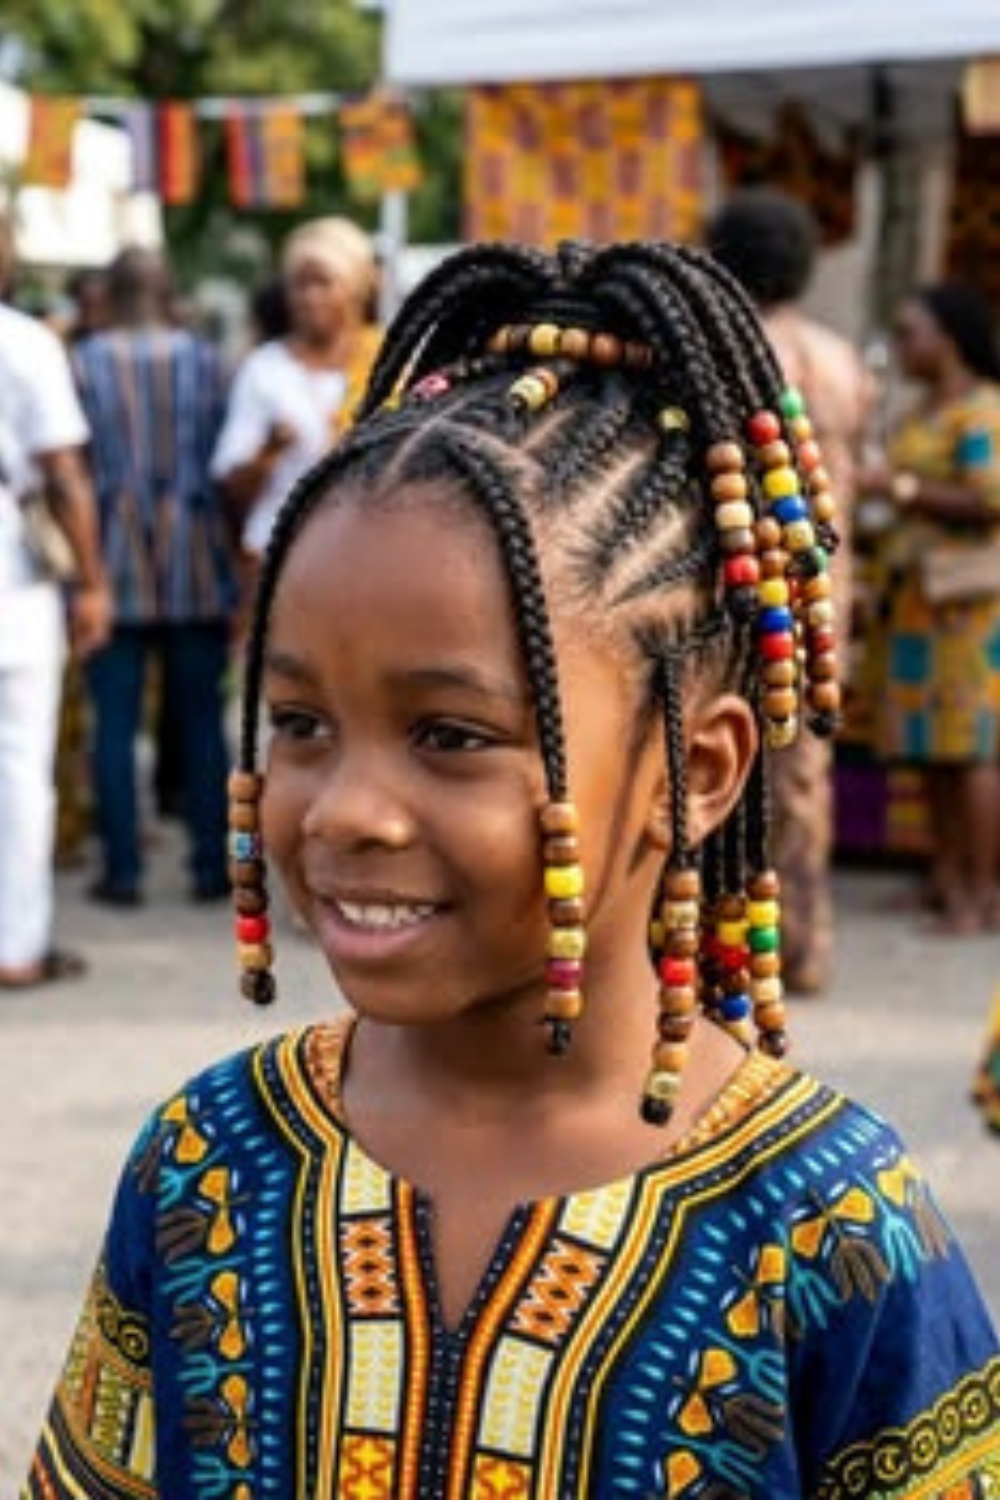
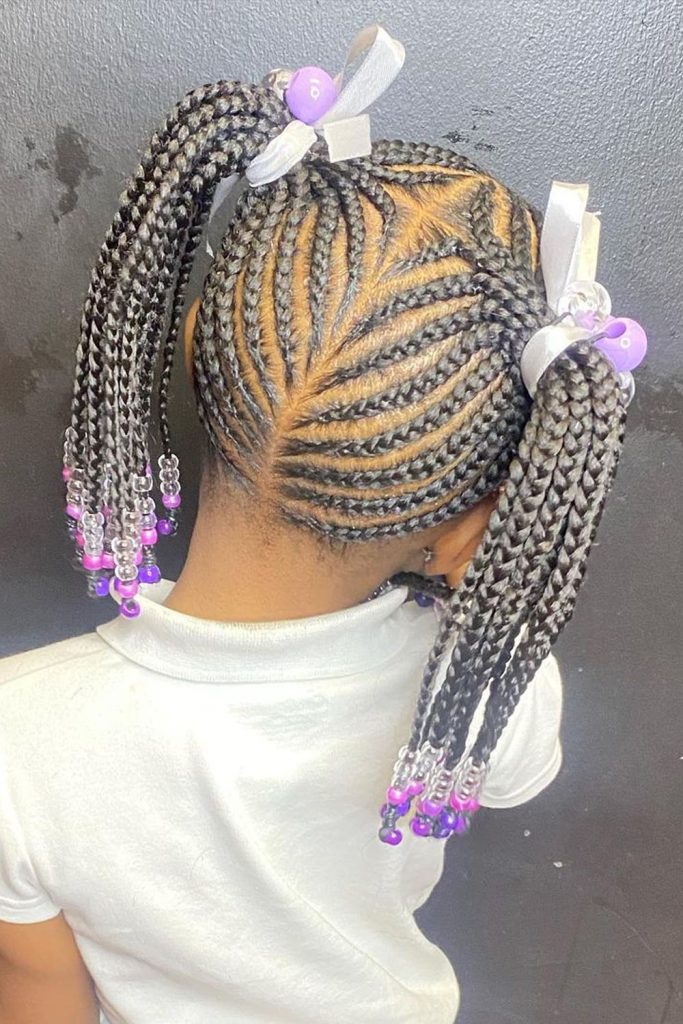
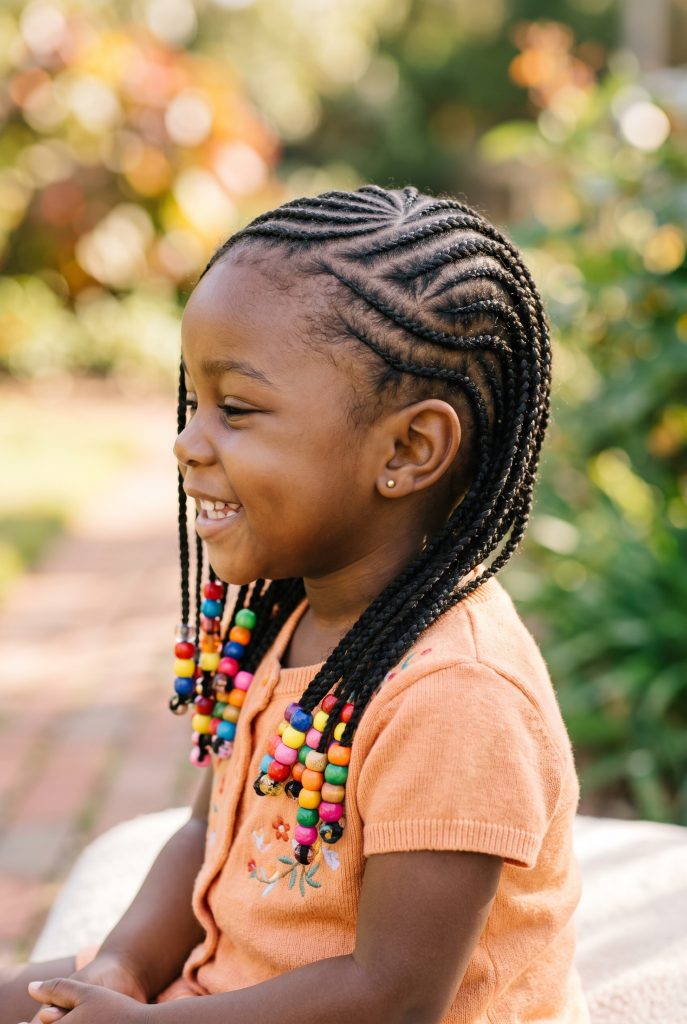
    chek out this 18 Adorable & Protective Cornrow Hairstyles for Kids (Easy to Maintain)

    The Bonding Experience

    Beyond the aesthetic appeal, styling toddler hairstyles with bows creates precious bonding moments between parent and child. Finding the perfect look for your little one can be a wonderful journey of discovery and connection. These sessions offer an opportunity for quiet interaction, creativity, and the development of trust as toddlers learn to sit still and participate in their own grooming.

    Moreover, incorporating playful bows not only adds a cute visual element but can encourage toddlers to enjoy having their hair styled. When children feel involved and see the beautiful results, they are more likely to cooperate during future styling sessions.

    Conclusion

    Toddler hairstyles with bows represent the perfect marriage of practicality and charm. From classic pigtails to intricate braided crowns, from space buns to bubble braids, the possibilities are endless. The bow—whether made of fabric, ribbon, or even the child’s own hair—adds that finishing touch that transforms a simple hairstyle into a statement of personality and joy.
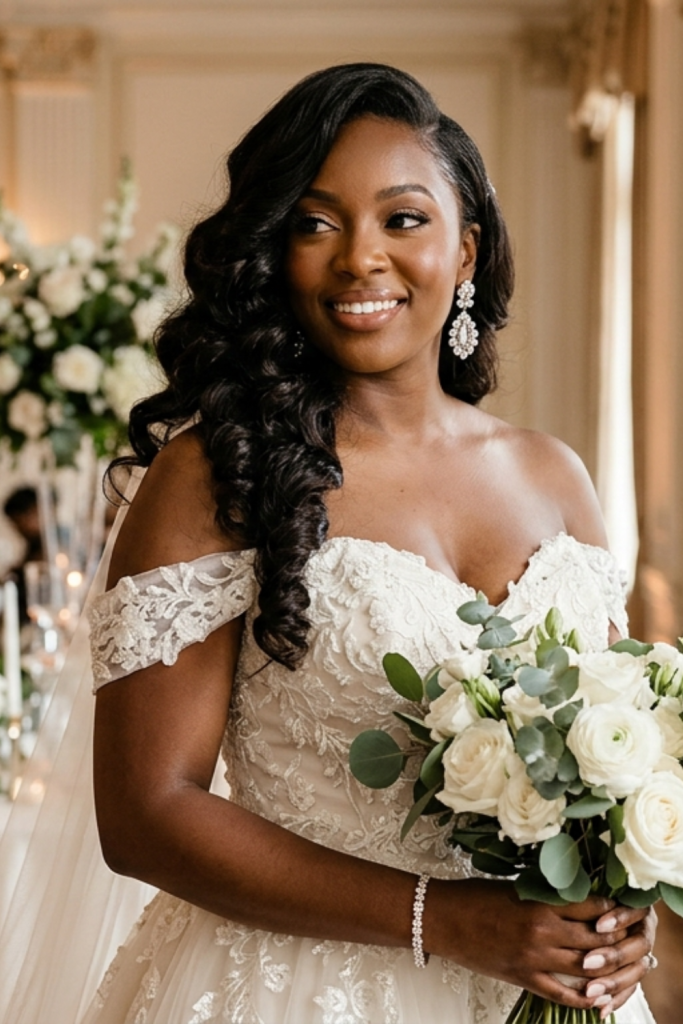
    With the right tools, a bit of patience, and a collection of beautiful bows in various sizes and colors, any parent can master the art of toddler hair styling. These looks keep hair neat, protect delicate scalps, and ensure that your little one looks adorable whether heading to daycare, attending a family gathering, or simply enjoying a day of play. In a world where trends come and go, the bow remains an enduring symbol of childhood charm—a small accessory that makes a big statement in the world of toddler fashion.
  • 15 Best Hairstyles for Kids’ Picture Day: A Complete Guide to Picture-Perfect Looks

    15 Best Hairstyles for Kids’ Picture Day: A Complete Guide to Picture-Perfect Looks

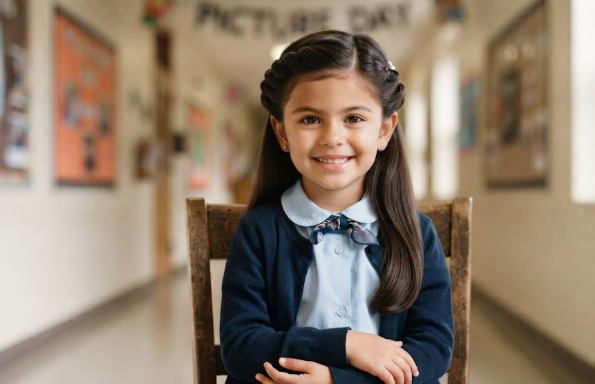
    Picture day—just the mention of these two words can send a mix of excitement and mild anxiety through any parent’s mind. It’s that one day each year when everything needs to be just right: the outfit, the smile, and perhaps most importantly, the hair. Those school photos become treasured keepsakes, appearing in family albums, holiday cards, and graduation slideshows for decades to come. Every parent wants their child to look polished, confident, and naturally adorable in these captured moments.

    The challenge, however, lies in finding that perfect balance between style and practicality. You want a look that photographs beautifully but won’t cause your child discomfort or lead to mid-day meltdowns. You need something that stays put through playground adventures, classroom activities, and cafeteria lunches, yet still looks fresh when the photographer calls their name. The right hairstyles for kids’ picture day make all the difference, offering a harmonious blend of aesthetic appeal and all-day wearability.

    Whether your child prefers something simple and understated or craves a bold, trendy statement look, this comprehensive guide covers 15 easy, creative, and timeless hairstyles that consistently look amazing in photos. We’ll walk you through each style with step-by-step guidance, share professional tips to make them last through the day without succumbing to frizz or flyaways, and help you choose the perfect look for your child’s unique personality and hair type.


    Classic and Elegant Styles

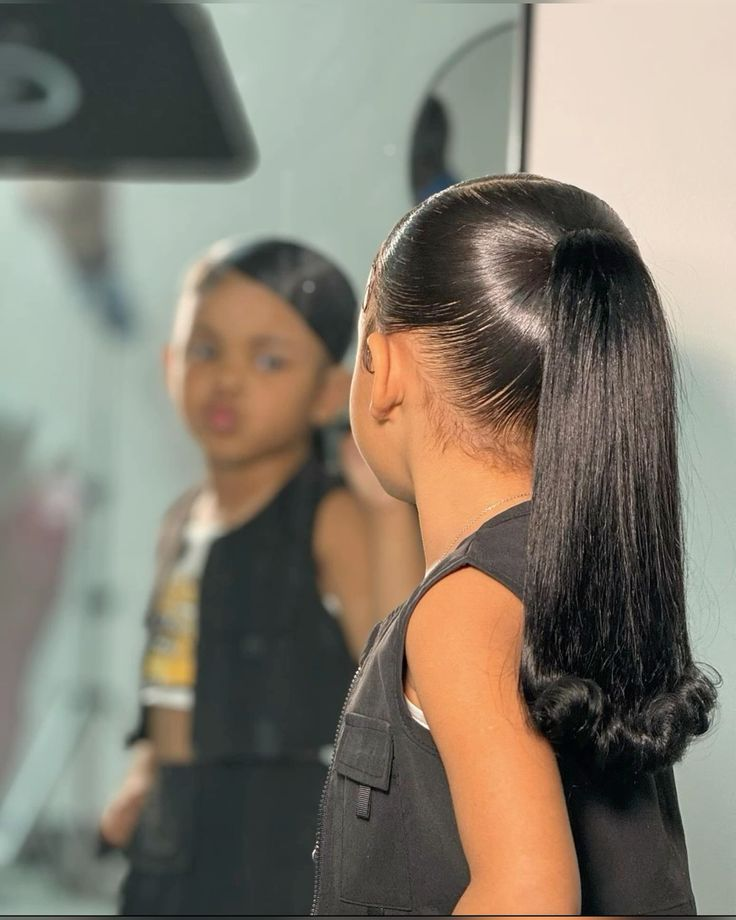
    1. Classic Sleek Ponytail

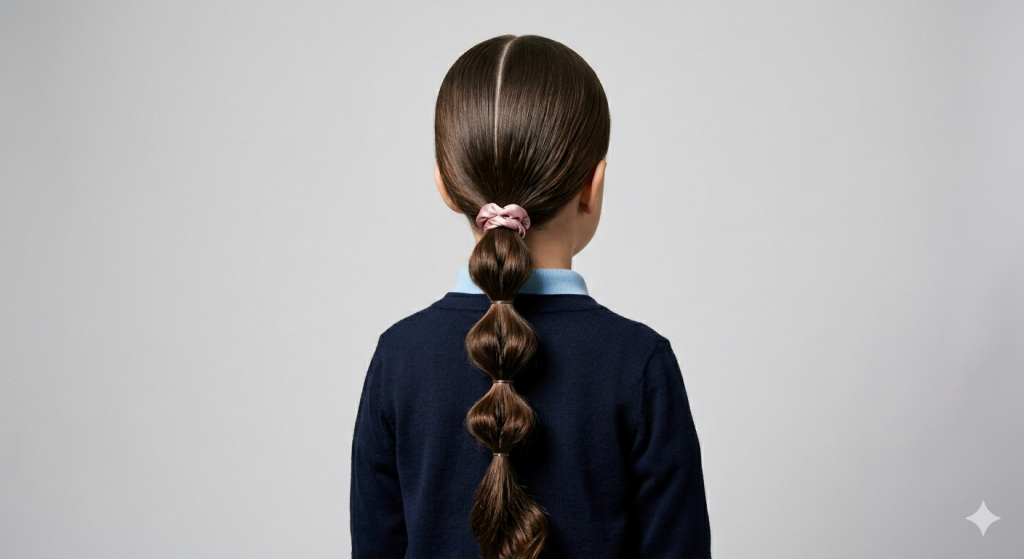
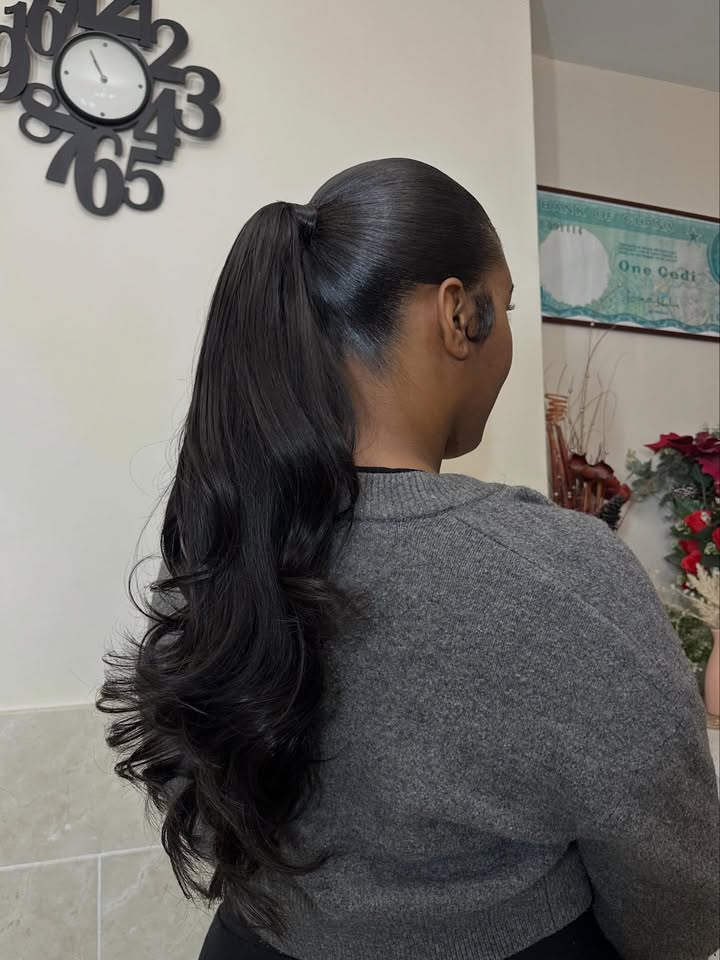
    A sleek ponytail stands as the ultimate go-to hairstyle for girls with medium to long hair. Its brilliance lies in its simplicity—it pulls the hair back from the face, allowing your child’s features and expression to take center stage in the photograph. This style photographs beautifully from every angle, offering a clean, polished silhouette that works equally well for formal and casual school picture settings.

    try this 18 Adorable & Protective Cornrow Hairstyles for Kids (Easy to Maintain)

    to consider Timeless Beauty: 12 Stunning Braid Hairstyles for Older Women.

    To achieve the perfect sleek ponytail, start with slightly damp hair and apply a smoothing serum or lightweight gel to tame any frizz or flyaways. Use a fine-tooth comb to gather the hair smoothly, ensuring no bumps or lumps disrupt the polished surface. Secure it either high on the crown for an energetic, lifted look or lower at the nape for a more sophisticated vibe, depending on your child’s outfit and personal preference. For an extra touch of charm, finish with a cute ribbon, bow, or satin scrunchie that coordinates with their clothing. The result is a timeless style that never fails to impress in photographs.

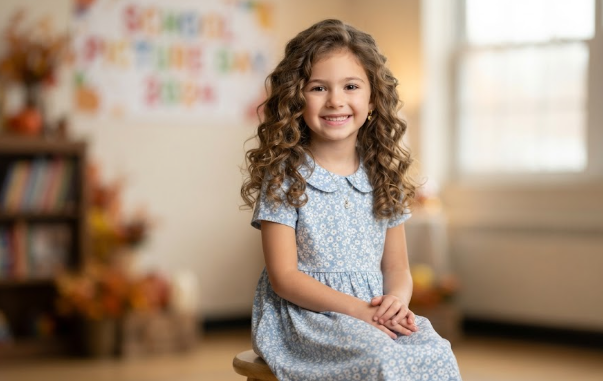
    2. Soft Loose Curls

    There’s something undeniably magical about soft, bouncy curls in photographs. They add movement, texture, and a dreamy quality that captures light beautifully and creates dimension on camera. Loose curls have the power to transform even the simplest outfit into something special, making them a perennial favorite for picture day.

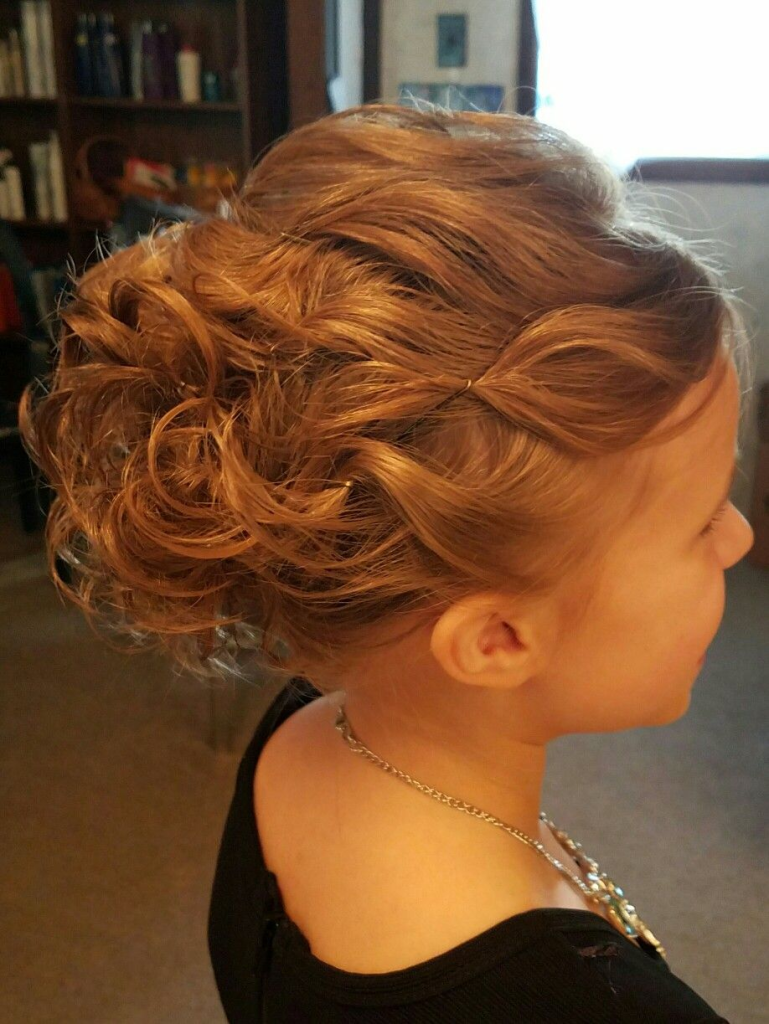
    You can achieve this look using a curling wand with a large barrel for gentle waves, or better yet, opt for overnight braids for heat-free curls that are gentler on young hair. For the heat-free method, braid damp hair in two or three sections before bed, and in the morning, release the braids and gently separate the curls with your fingers—never brush them, as this creates frizz. Add a delicate floral clip, pearl accessory, or sparkly hairpin to enhance the look without overpowering it. The curls will photograph with natural depth and dimension, creating a soft, romantic effect that parents adore.

    3. Braided Crown

    For a charming princess vibe that photographs like a fairy tale come to life, the braided crown is an exquisite choice. This elegant style encircles the head like a halo, framing the face beautifully and staying remarkably neat throughout even the most active school day.

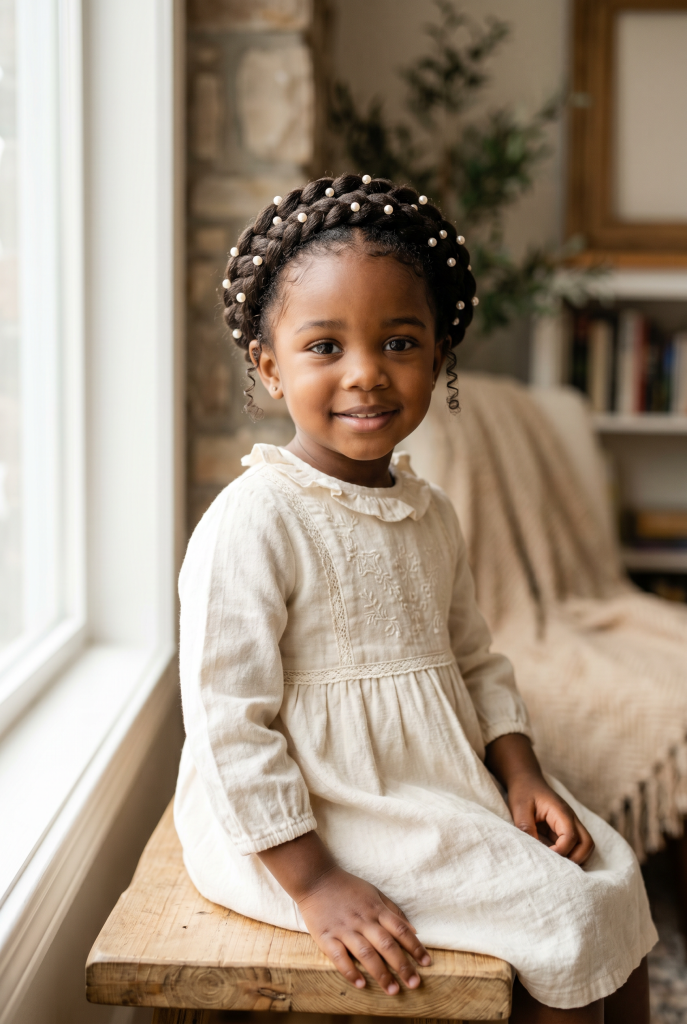
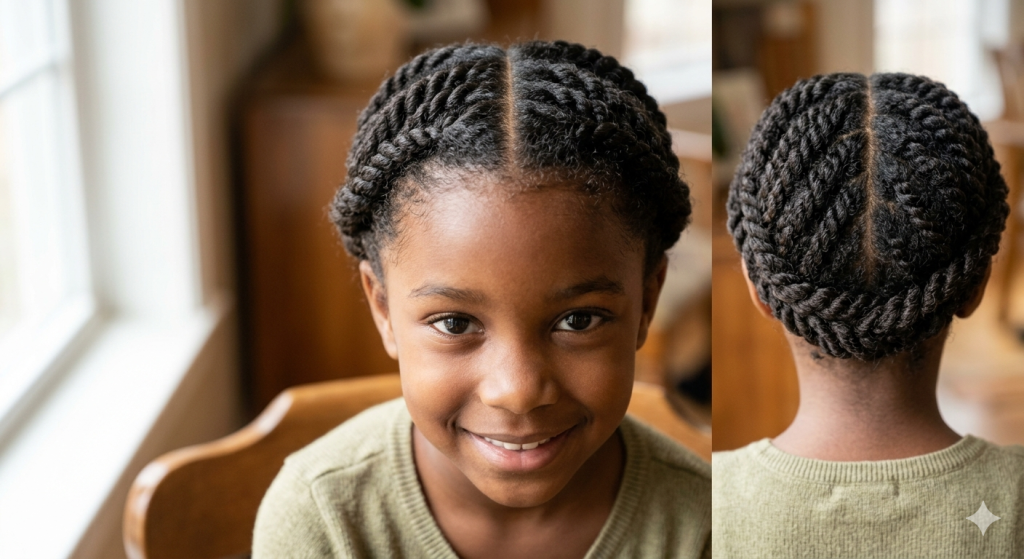
    To create this look, part the hair down the middle and create two even sections. Braid each section from the front, working toward the back. Then, wrap each braid around the head, crossing them at the back or overlapping them, and secure with bobby pins hidden beneath the braids. The symmetrical nature of this style ensures it photographs beautifully from every angle, and the braids hold their shape all day long. For an extra touch of elegance, weave a thin ribbon through the braid or add small pearl pins at the crown. This style particularly suits children with medium to long hair and works wonderfully for both casual and more formal school photos.

    4. Twisted Half-Updo

    The twisted half-updo offers the perfect middle ground for kids who want their hair down but still need it tidy and camera-ready. This sophisticated style keeps strands off the face while allowing the rest of the hair to flow naturally, creating a look that’s both elegant and effortless.

    To achieve this, take small front sections from each side of the part, twist them gently backward, and pin them at the back of the head with bobby pins or small clips. Leave the remaining hair to fall freely in its natural texture—whether that’s straight, wavy, or curly. The twisted sections create visual interest and keep hair out of the eyes without the severity of a full updo. It’s simple yet elegant, photographing particularly well because it adds dimension and shape to the overall silhouette while maintaining a soft, approachable feel.

    5. Space Buns

    Fun, playful, and undeniably trendy, space buns have become a beloved choice for energetic kids who want to express their personality through their hairstyle. This modern look radiates confidence and creativity, making it perfect for children who want their photographs to reflect their vibrant spirit.

    To create space buns, divide the hair into two equal sections, part the hair straight down the center, and pull each section high on either side of the head. Twist each section into a bun—you can make them tight and neat or loose and messy depending on the desired vibe—and secure them with elastic bands. For extra flair, add glitter clips, colorful scrunchies, or small decorative hairpins. This style holds up remarkably well through active play, and its playful nature encourages kids to be themselves in front of the camera. The two symmetrical buns frame the face beautifully and create a youthful, energetic look that photographs wonderfully.


    Short Hair and Bob Styles

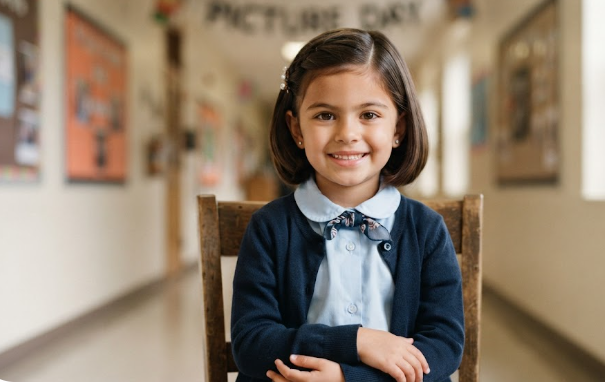
    6. Classic Bob with Side Part

    For children with shorter hair, a classic bob with a side part represents timeless sophistication that never goes out of style. This universally flattering cut frames the face perfectly, creating a clean silhouette that photographs beautifully from any angle.

    The secret to making this look picture-perfect lies in preparation and finishing. Start with freshly washed and conditioned hair, then use a round brush while blow-drying to add subtle volume at the roots. A side part adds asymmetry that’s visually interesting in photographs, creating a soft, face-framing effect. A touch of shine spray ensures the hair looks smooth, healthy, and polished under the bright studio lights. Minimal styling means less chance of things going wrong during the day, and the simplicity of this look allows your child’s natural features and expression to shine through.

    7. French Braids

    Школьные_прически

    French braids are quite possibly a parent’s best friend on picture day because they offer unmatched longevity and neatness. Once secured, these braids stay in place through anything—running, jumping, lunchtime chaos, and everything in between—ensuring your child looks just as fresh for their photograph as they did when they left the house.

    You can style one classic French braid down the back for a sophisticated, streamlined look, or create two symmetrical braids for a balanced, photo-ready appearance that frames the face beautifully. The key to successful French braids lies in keeping sections even and tension consistent throughout. For extra hold and shine, apply a small amount of hair oil or serum before braiding to smooth the hair and prevent frizz. These braids photograph particularly well because they showcase texture and technique while keeping hair completely controlled and out of the face.


    Trendy and Modern Looks

    8. Low Messy Bun

    If your child has long hair and a spirited personality, a low messy bun offers an effortlessly chic vibe that’s both practical and photogenic. This style keeps all those strands securely in place while appearing intentionally undone, creating a relaxed sophistication that photographs beautifully.

    The beauty of the messy bun lies in its versatility—it’s one of the few styles where looking slightly imperfect works in its favor. Gather the hair at the nape of the neck, twist it loosely, and wrap it into a bun, allowing a few face-framing pieces to fall naturally. Secure with bobby pins, leaving the ends slightly loose to create that coveted undone texture. This style is particularly great for kids who tend to fidget since it doesn’t unravel easily and actually looks better with a bit of natural movement. Add a satin scrunchie for an elevated finish that adds a pop of color and prevents damage from tight elastic bands.

    9. Waterfall Braid

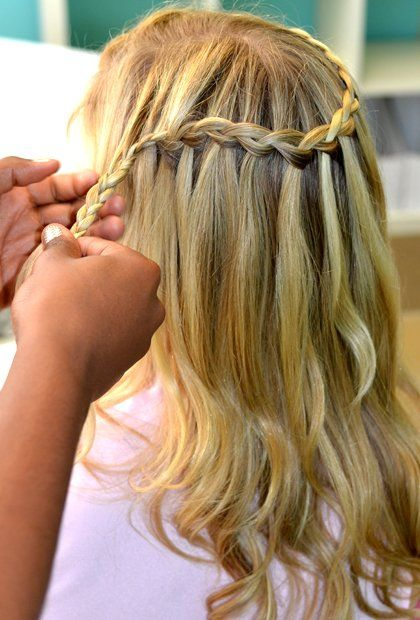
    The waterfall braid adds a whimsical, dreamy touch to picture day photos, creating a look that’s both romantic and eye-catching. This intricate-seeming style is actually simpler to achieve than it appears and works best on medium to long hair.

    To create a waterfall braid, start on one side of the head and braid across the crown, allowing sections of hair to drop down and “fall” like water as you work across. This creates a stunning cascading effect that pairs beautifully with loose curls or waves flowing beneath the braid. The partially braided look offers the best of both worlds—the control and polish of a braid combined with the softness and movement of loose hair. In photographs, this style catches light and creates beautiful depth and texture, making it a standout choice for picture day.

    10. Side-Swept Bangs with Waves

    For children with bangs, the key to picture day success lies in keeping them soft, natural, and slightly swept to one side. This approach creates a gentle, face-framing effect that softens features and adds a relaxed elegance to the overall look.

    Pair these side-swept bangs with gentle waves throughout the rest of the hair for a cohesive, stylish appearance that photographs beautifully. The waves add body and texture to the hair while maintaining a natural, effortless quality. Use a large-barrel curling iron or heatless rollers to create soft waves, then gently brush them out with a wide-tooth comb for that coveted beachy texture. The combination of swept bangs and waves creates movement and dimension in photographs while keeping the style feeling fresh and modern.


    Natural and Textured Styles

    11. Afro Puff Magic

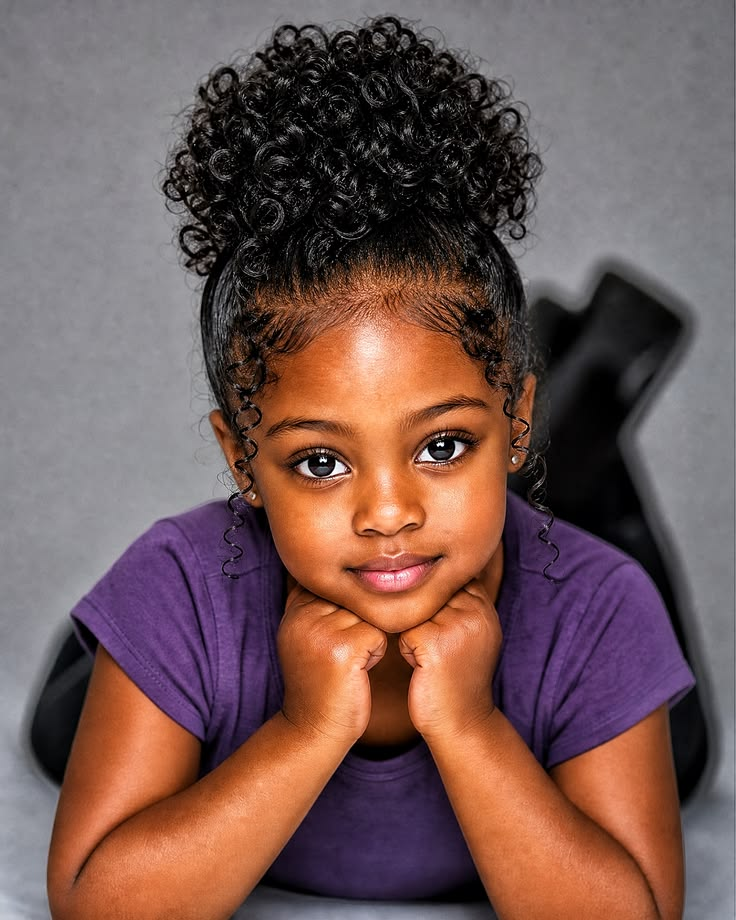
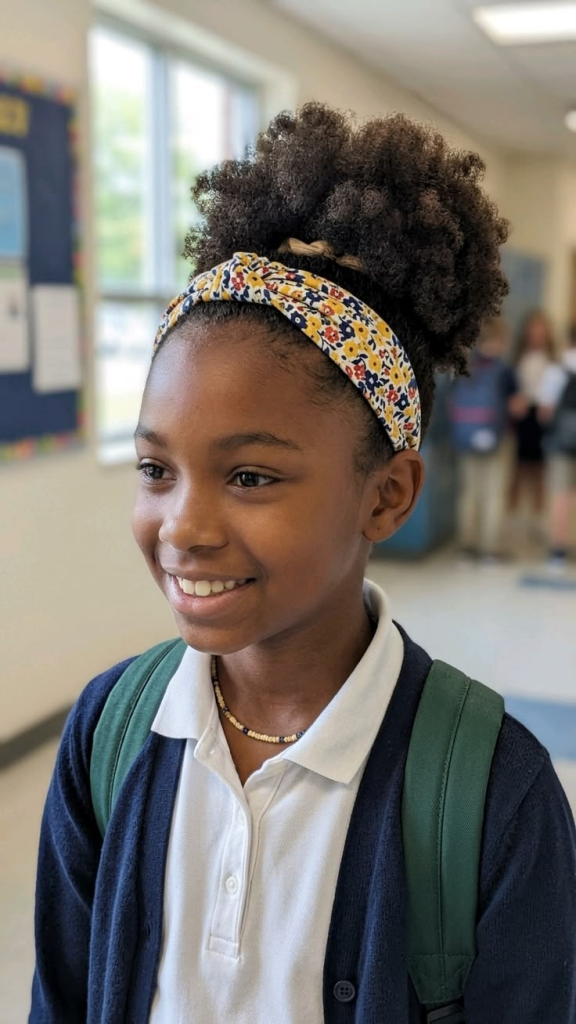
    For children with naturally curly or coily hair, the afro puff is a celebration of texture, volume, and confidence that photographs absolutely beautifully. This style embraces natural curls at their fullest, creating a stunning silhouette that radiates pride and personality.

    To achieve the perfect afro puff, start with freshly washed and deeply moisturized hair. Apply a moisturizing curl cream or defining custard to enhance and define the natural curl pattern while providing all-day hold and hydration. Gather the hair high on the crown and secure it with a soft, gentle band—never a tight elastic that causes tension or breakage. The result is a bold, beautiful puff that showcases the hair’s natural volume and texture. Finish with a colorful, oversized bow or decorative headband to add personality and coordinate with their picture day outfit. This style not only looks spectacular but also promotes positive self-image and celebrates natural beauty.

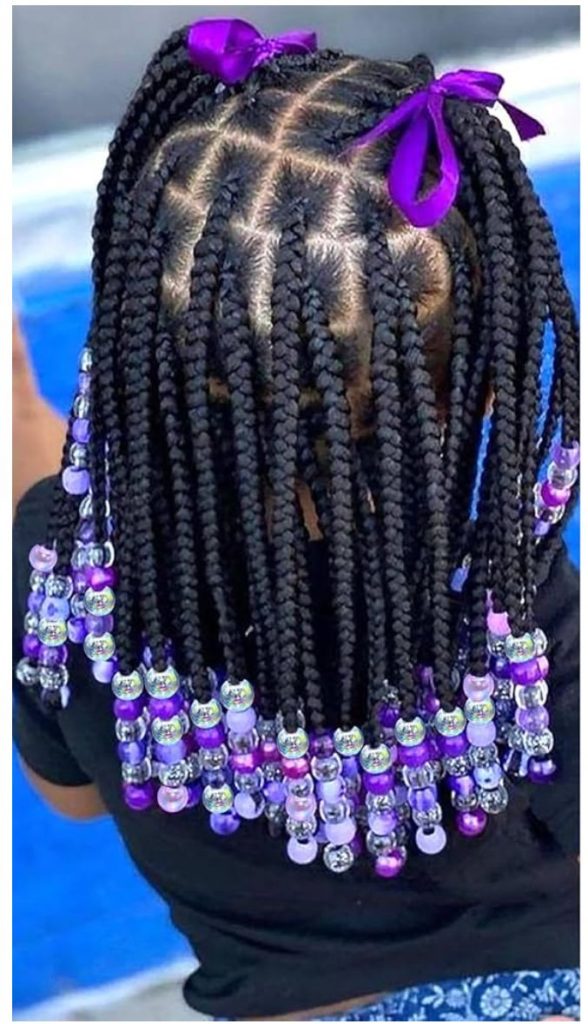
    12. Box Braids with Beads

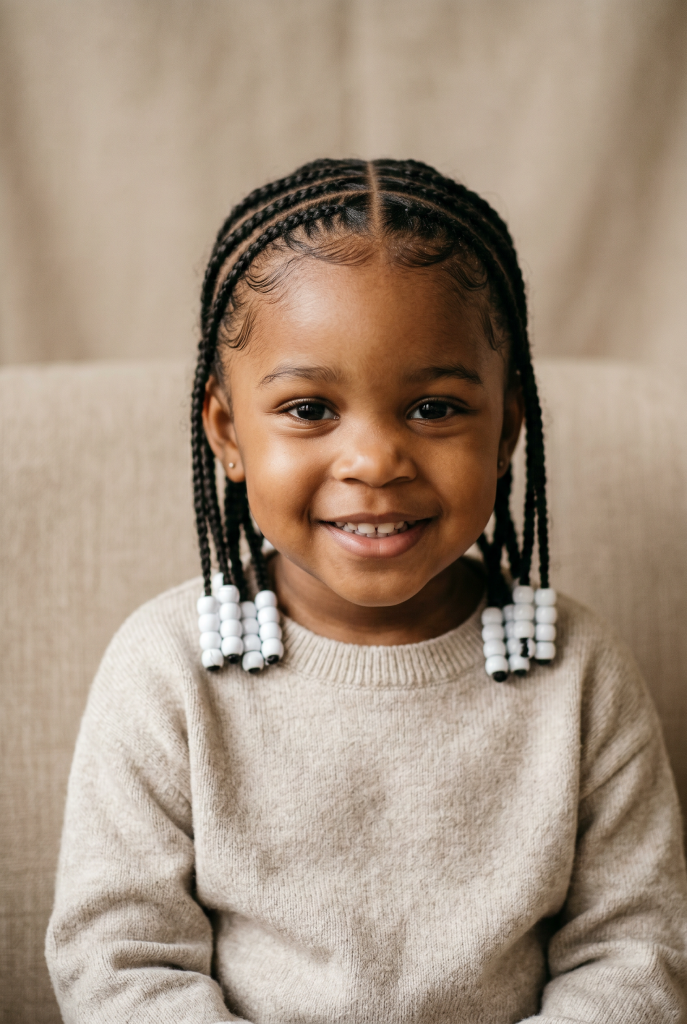
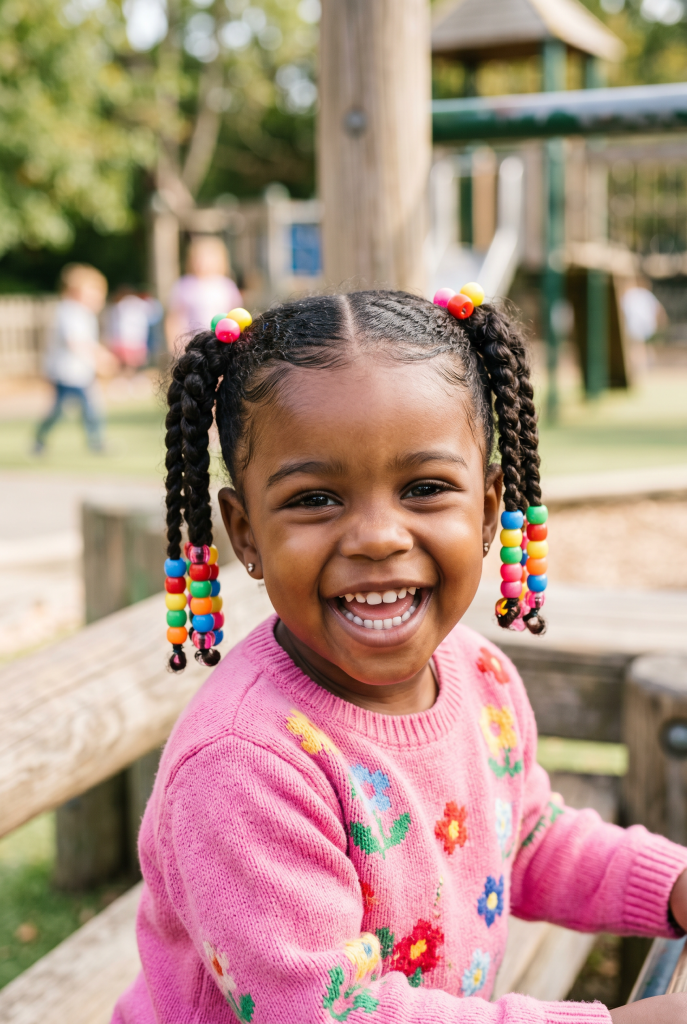
    For long-lasting style and zero morning chaos on picture day, box braids with beads are virtually unbeatable. This protective style offers weeks of hassle-free styling, making it perfect for busy families and children who prefer low-maintenance options.

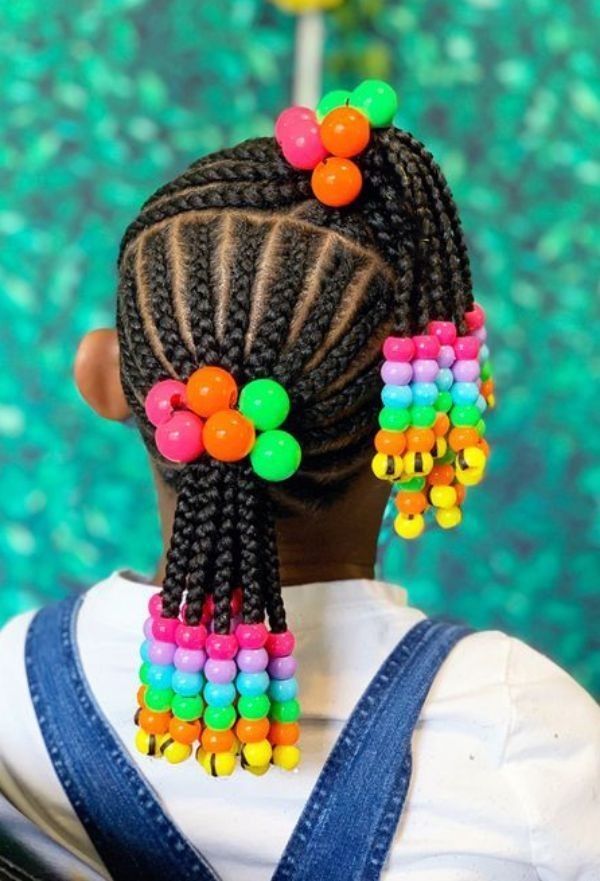
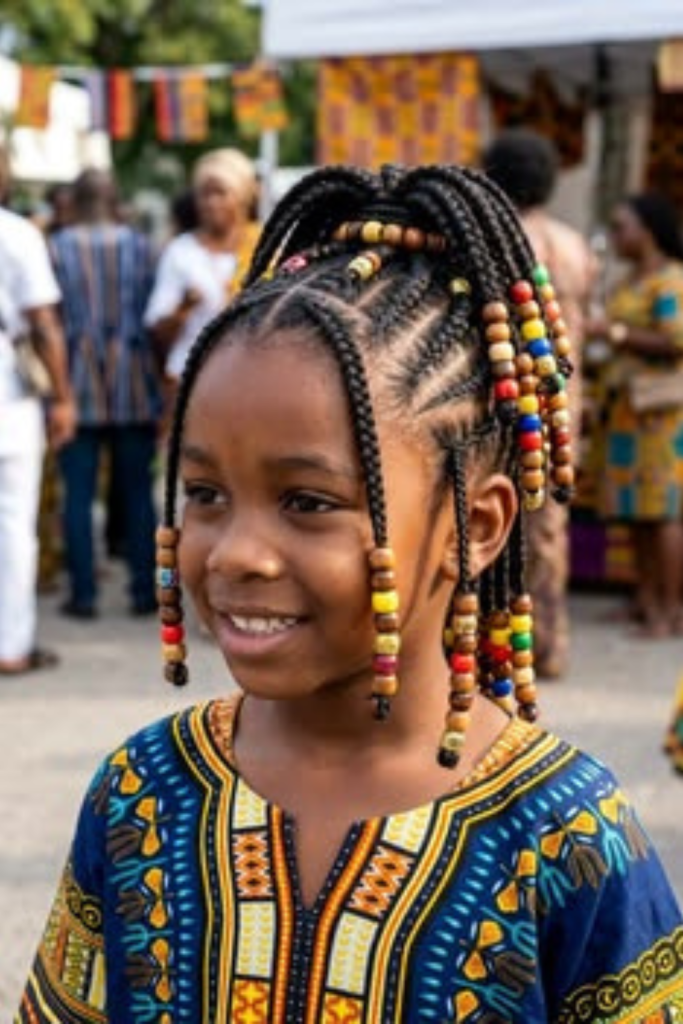
    Box braids present a clean, polished appearance that photographs consistently well, and the addition of beads allows your child’s personality to shine through. Choose matching beads for a sophisticated, coordinated look, or go with colorful, mismatched beads for a playful, creative vibe. The braids stay neat and controlled throughout the entire school day, requiring absolutely no touch-ups before the photograph. Beyond picture day, this style continues to look great for weeks, making it an investment in both convenience and consistent style.


    Stylish Boys’ Hairstyles

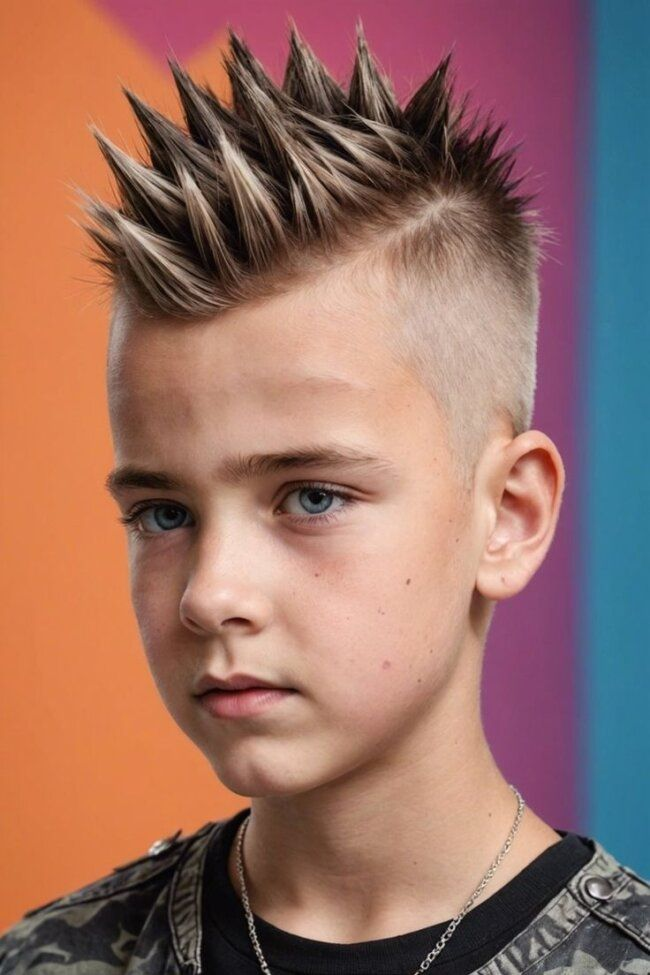
    13. Spiky Faux Hawk for Boys

    Boys deserve picture-perfect style options too, and the spiky faux hawk delivers a cool, edgy look that photographs with impressive attitude. This modern style offers a bold alternative to traditional cuts while maintaining a neat, intentional appearance.

    To achieve the perfect faux hawk, apply a lightweight styling gel or wax to damp hair, working it through from roots to ends. Use your fingers to shape the center section of hair upward into subtle spikes, creating height and texture without making the hair look stiff or unnatural. The sides should lie relatively flat, creating contrast with the elevated center section. This style pairs perfectly with button-up shirts, polos, or casual blazers, adding a modern edge to any outfit. The lightweight product ensures the hair stays in place throughout the day while maintaining natural movement and a soft finish that photographs well without looking greasy.

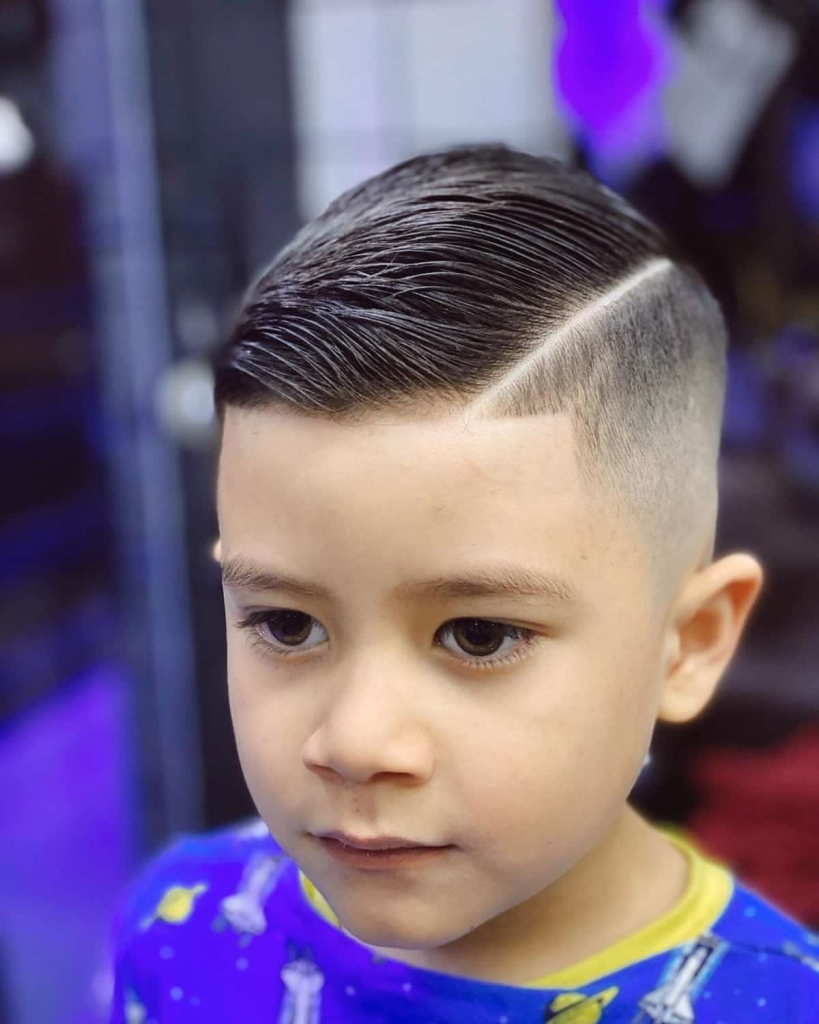
    14. Side Part with Tapered Fade

    For boys who prefer clean, classic styles that never go out of fashion, a side part with a tapered fade represents the gold standard of picture day grooming. This sharp, sophisticated look photographs incredibly well and offers minimal maintenance requirements.

    The precision of the fade creates a clean, modern silhouette, while the classic side part adds timeless elegance that works for any age or setting. The low-maintenance nature of this cut means your child can run, play, and participate fully in their school day without worrying about their hair falling out of place. A touch of pomade or styling cream adds subtle shine and keeps the part defined throughout the day. This style is particularly photogenic because it creates strong lines and angles that translate beautifully to the camera, while the fade adds depth and dimension to the overall look.


    Accessories and Finishing Touches

    15. Natural Curls with Headbands

    A soft headband can elevate natural curls effortlessly, offering both style and practicality for picture day. This simple addition transforms a casual curly look into something special while keeping flyaways in place and adding a pop of color or texture.

    Choose headbands made from satin or velvet for the most comfortable fit—these materials grip hair gently without causing breakage or slipping. The band itself becomes a decorative element, adding visual interest to the overall look and drawing attention to your child’s face. Natural curls provide beautiful texture and movement in photographs, and the headband adds a polished, intentional touch that elevates the entire style. This comfortable option is ideal for picture day comfort, allowing your child to feel like themselves while looking camera-ready.


    Pro Tips for Picture Day Success

    Prep the Night Before

    The foundation of picture-perfect hair begins the evening before. Wash and condition your child’s hair thoroughly, using products appropriate for their hair type. Apply a lightweight leave-in conditioner for smoothness and moisture, detangle gently with a wide-tooth comb, and allow the hair to air dry or blow-dry on low heat. This preparation eliminates morning rushing and ensures the hair is in optimal condition for styling.

    Use the Right Styling Products

    Different styles demand different products, and choosing the right ones makes all the difference in how the final look photographs. For sleek looks like ponytails and buns, use a smoothing serum or lightweight gel to create a polished finish and prevent frizz. For curly or wavy styles, opt for curl creams or mousses that enhance definition and provide long-lasting bounce. Always choose products that offer hold without stiffness—flexible formulas photograph more naturally than stiff, crispy finishes.

    Secure with Quality Accessories

    The right tools prevent damage and ensure longevity. Use elastic bands that are gentle on hair, satin scrunchies that prevent creasing and breakage, and no-slip clips that hold styles firmly in place. Avoid rubber bands or accessories with metal parts that can snag and break hair. Quality accessories may cost slightly more but offer superior performance and protect your child’s hair health.

    Lock the Style In

    After completing the style, lightly spritz with a flexible-hold hairspray to ensure the look lasts throughout the school day. Avoid products that make hair stiff or greasy in photographs—the goal is a natural finish that stays in place, not a helmet-like hold that looks artificial. For children with fine hair, use a lighter touch with products to avoid weighing the hair down.

    Pack a Mini Touch-Up Kit

    A small emergency kit can save the day if styling issues arise before the photograph. Slip a mini brush, a few extra bobby pins or clips, and a travel-size hairspray into your child’s backpack. A quick touch-up before the photographer calls their name can address any flyaways or displacement that occurred during the morning’s activities.


    Conclusion

    School picture day captures fleeting moments that families treasure for generations. These photographs freeze a single point in time, preserving your child’s growth, personality, and unique beauty for years to come. With the right hairstyle and a few strategic styling tricks, your child’s authentic personality can shine through while presenting a polished, confident appearance that makes them feel wonderful about themselves.

    From timeless braids that have adorned children for generations to playful space buns that capture today’s trends, these 15 best hairstyles for kids’ picture day ensure every frame becomes an unforgettable memory. Each style offers distinct advantages—some prioritize longevity, others emphasize personal expression, and many strike the perfect balance between the two.

    Remember that the most important element of any picture day hairstyle is your child’s comfort and confidence. When they feel good about their appearance, that confidence radiates through their smile and expression, creating photographs that truly capture their spirit. With the guidance provided here and your loving attention to their needs, you’ll create picture day memories that bring joy for a lifetime.

    Now you have all the knowledge and inspiration you need to make this year’s picture day the most successful one yet. Choose a style that speaks to your child’s personality, follow our maintenance tips to keep it perfect from morning until the final flash, and watch your little one shine in those cherished photographs that will adorn your walls and hearts for decades to come.

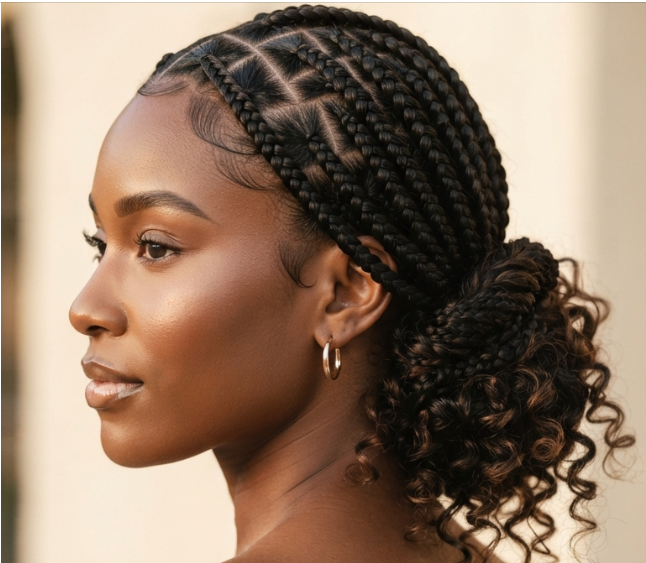
  • 6 Triangle Part Box Braids with Curly Ends: The Ultimate Style Guide

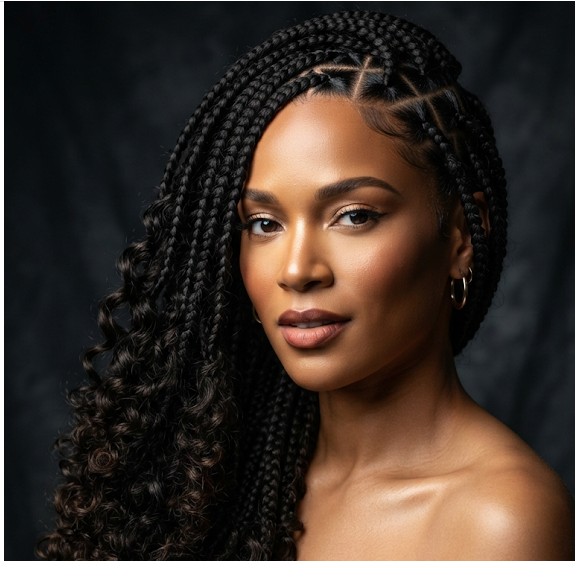
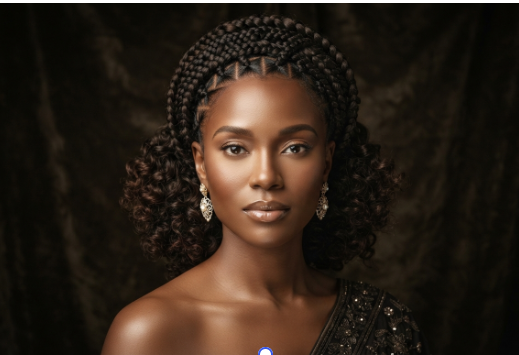
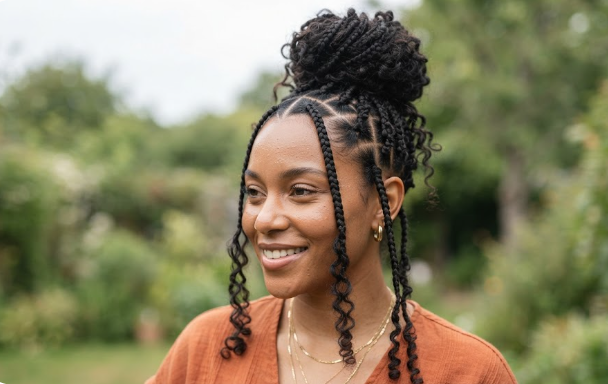
    6 Triangle Part Box Braids with Curly Ends: The Ultimate Style Guide

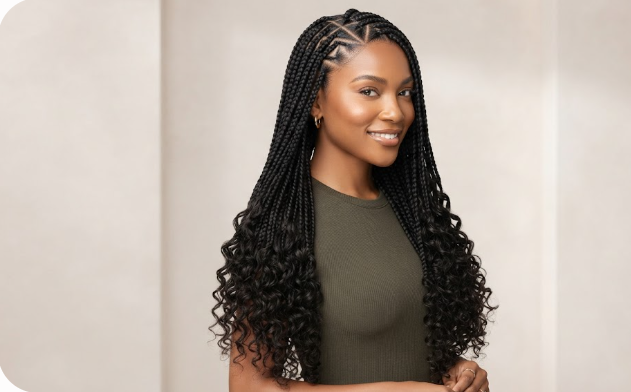
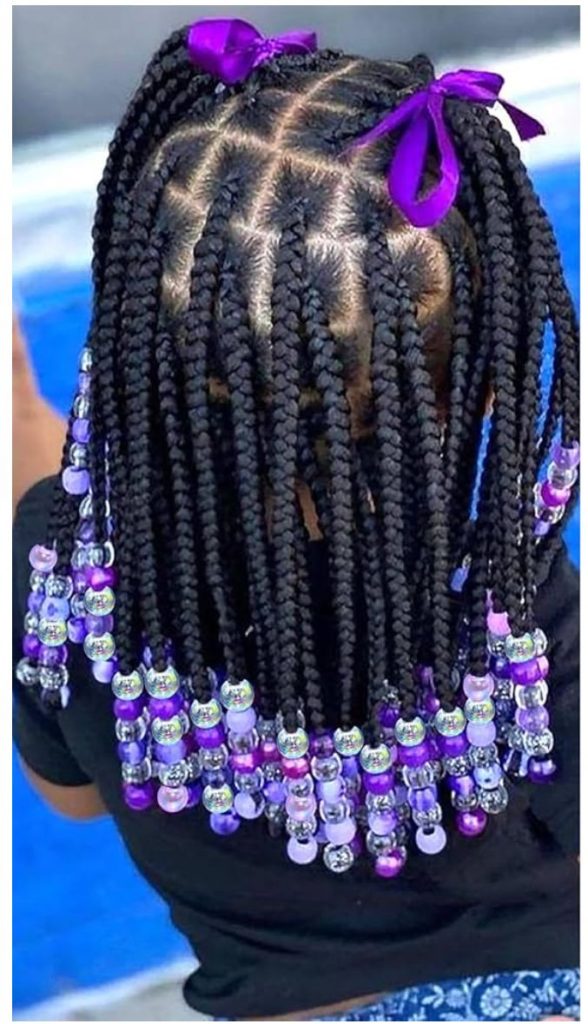
    In the ever-evolving world of protective hairstyles, few looks have captured the attention of fashion-forward individuals quite like triangle part box braids with curly ends. This innovative style takes the classic box braid and elevates it through geometric precision and playful texture, creating a look that is equal parts structured and carefree. The triangle part box braids with curly ends phenomenon has taken the hairstyling world by storm, offering a fresh alternative to traditional square-parted braids while delivering the same protective benefits that make box braids a perennial favorite.

    What sets triangle part box braids with curly ends apart is the combination of two distinct elements: the angular, architectural parting pattern at the scalp and the soft, bouncy curls that grace the ends of each braid. This juxtaposition of sharp lines and gentle waves creates a visual harmony that is both striking and sophisticated. Whether you are a longtime fan of protective styles or considering box braids for the first time, triangle part box braids with curly ends offer a unique opportunity to express your personal style while keeping your natural hair healthy and protected.

    Understanding Triangle Part Box Braids with Curly Ends

    What Are Triangle Part Box Braids?

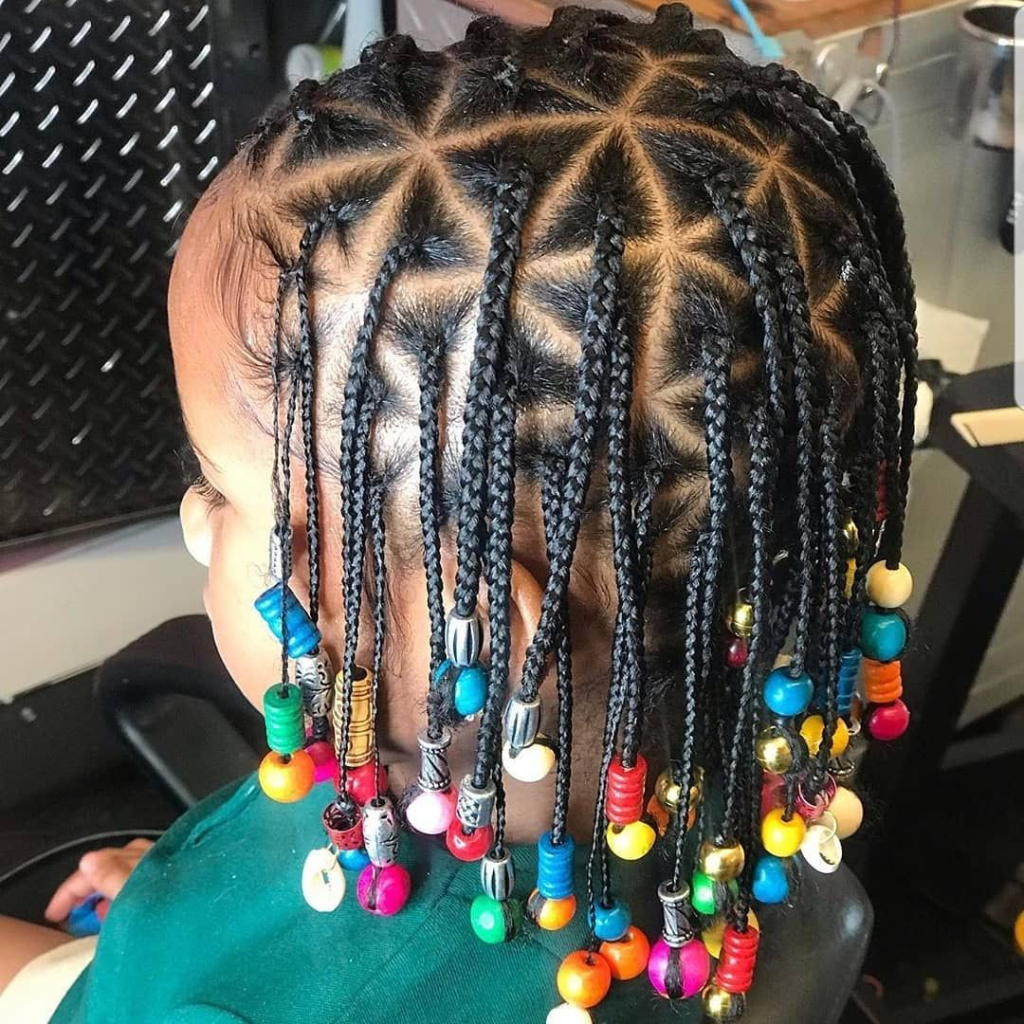
    Triangle part box braids represent a geometric evolution of the traditional box braid. While conventional box braids feature square or rectangular parting patterns, triangle part box braids with curly ends begin with hair sectioned into precise triangular shapes across the scalp. This departure from the standard grid creates a dynamic, eye-catching pattern that transforms the scalp into a canvas of interlocking angles.

    The triangular parting technique involves creating V-shaped sections rather than the typical boxes or rectangles. When executed correctly, these parts form a series of interlocking diamonds and geometric shapes that draw the eye across the head in a way that feels intentional and designed. The result is a hairstyle where the parting itself becomes a feature, contributing to the overall aesthetic rather than simply serving as a functional division of hair.

    chek out this 12 Hair Types That Completely Change How Your Hair Looks and Feels

    The Magic of Curly Ends

    The addition of curly ends to triangle part box braids introduces an element of softness and movement that balances the angular precision of the parting pattern. Curly ends transform what could be a severe geometric style into something romantic and playful. The curls add texture, dimension, and a sense of effortless beauty that makes triangle part box braids with curly ends suitable for everything from casual everyday wear to formal occasions.

    The curly ends can be achieved in several ways. Some stylists use pre-curled braiding hair that naturally forms curls at the ends. Others create curls by wrapping the ends of the braids around perm rods or flexi rods before dipping them in hot water to set the curl pattern. The result is a cascade of bouncy, defined curls that frame the face and add movement to the overall style.

    Visual Characteristics of Triangle Part Box Braids with Curly Ends

    The visual appeal of triangle part box braids with curly ends lies in the contrast between structure and softness. The geometric parting creates sharp vertices and crisp lines that give the style a polished, intentional appearance. The triangular sections create a sense of symmetry and order, with the parts appearing like a perfectly mapped-out puzzle.

    At the same time, the curly ends introduce an element of organic texture that softens the overall look. The curls create movement and volume, preventing the style from appearing too rigid or severe. This combination of sharp lines and soft curls makes triangle part box braids with curly ends incredibly versatile, working well with a wide range of personal styles and fashion aesthetics.

    The Benefits of Choosing Triangle Part Box Braids with Curly Ends

    Protective Styling at Its Finest

    Like all box braid variations, triangle part box braids with curly ends serve as an excellent protective style. The braids keep your natural hair tucked away and protected from environmental stressors, reducing the risk of breakage and damage. This protective aspect makes triangle part box braids with curly ends an ideal choice for those looking to grow their natural hair or simply give it a break from daily manipulation.

    The triangular parting pattern offers an additional benefit: it can help distribute tension more evenly across the scalp compared to traditional square parts. This even distribution can be particularly beneficial for scalp health, reducing the risk of tension-related issues that can sometimes accompany tightly braided styles.

    Long-Lasting Style

    Triangle part box braids with curly ends are known for their longevity. With proper care and maintenance, this style can last anywhere from four to six weeks, and in some cases even longer. The triangular parting pattern, when executed with precision, helps the style maintain its integrity over time, with the parts remaining crisp and defined.

    The longevity of triangle part box braids with curly ends makes them a practical choice for those with busy lifestyles. Once installed, the style requires minimal daily maintenance, freeing up time while still looking polished and put-together.

    Versatility in Styling

    One of the greatest advantages of triangle part box braids with curly ends is their incredible versatility. The style can be worn in countless ways, from sleek and professional to casual and bohemian. The curly ends add an extra dimension to styling, creating opportunities for looks that range from elegant updos to playful half-up styles.

    The geometric parting pattern becomes particularly visible when the hair is pulled back or styled up, adding an unexpected element of visual interest. This means that even the simplest styling choices become opportunities to showcase the intricate work of the triangular parts.

    How to Achieve Triangle Part Box Braids with Curly Ends

    Preparing Your Hair

    The foundation of successful triangle part box braids with curly ends lies in proper preparation. Start with freshly washed, conditioned, and thoroughly detangled hair. Clean hair provides the best canvas for precise parting and ensures that the braids will last as long as possible.

    After washing, it is helpful to stretch or blow out the hair for easier and cleaner parting. Stretched hair allows for more precise sectioning and makes the braiding process smoother. Apply a light braiding gel or edge control along the parting lines to keep them crisp and defined. This step helps lock the parts in place, giving the final style a professional appearance.

    Creating Triangle Parts

    The key to achieving beautiful triangle part box braids with curly ends lies in the parting technique. Begin by creating horizontal or vertical rows across the head using a rat-tail comb. Within each row, create triangles by drawing a V shape at the base of each section.

    Consistency is crucial when creating triangle parts. Each triangle should be roughly the same size to ensure a cohesive, balanced look. Starting from the back of the head and working forward can help maintain symmetry and keep the process organized. Take your time with each section, ensuring that the parts are precise and clean.

    For those new to triangle parting, practicing on a mannequin head or watching tutorial videos can be helpful. The technique becomes more intuitive with practice, and soon the rhythmic process of creating V-shaped sections will feel natural.

    Braiding Technique

    Once the triangle parts are created, the braiding process begins. Start braiding each section about a quarter of an inch down from the scalp, then gradually begin feeding in the extension hair. Continue this process until the desired length is achieved.

    For triangle part box braids with curly ends, the braiding technique remains largely the same as for traditional box braids. The difference lies in the parting pattern and the treatment of the ends. When you reach the end of the braid, stop braiding and allow the remaining extension hair to remain loose, creating the curly ends.

    Creating the Curly Ends

    The curly ends can be achieved through several methods. One popular approach involves using pre-curled braiding hair that naturally forms curls at the ends. This option saves time and ensures consistent curls throughout the style.

    Alternatively, the ends can be curled using perm rods or flexi rods. After braiding the hair, wrap the loose ends around the rods and secure them. Then dip the ends in hot water to set the curl pattern. This method allows for customization of the curl size and tightness.

    Some stylists also create curls by boiling the ends of the braids, though care must be taken to keep the unbraided ends out of the boiling water to prevent straightening. Regardless of the method chosen, the goal is to create soft, defined curls that complement the geometric precision of the triangle parts.

    Knotless Option

    For those seeking even less tension on the scalp and a more natural-looking finish, knotless triangle part box braids with curly ends are an excellent option. The knotless technique involves starting the braid with natural hair and gradually adding extension hair, eliminating the knot at the root.

    Knotless triangle part box braids with curly ends feel lighter and move more freely than traditional braids. They can be styled immediately after installation and offer a seamless, natural appearance that many prefer. The knotless technique is particularly popular for triangle part box braids with curly ends, as the lack of tension at the root allows for comfortable wear over extended periods.

    Maintenance Tips for Triangle Part Box Braids with Curly Ends

    Moisturizing Your Scalp and Braids

    Proper moisture is essential for maintaining triangle part box braids with curly ends. Keep your scalp and braids moisturized with a light oil or leave-in conditioner to prevent dryness and itching. Products containing coconut oil are particularly beneficial, as they hydrate hair and repair strands while protecting the style.

    When applying moisturizing products, focus on the scalp and the length of the braids, being careful not to over-apply to the curly ends. Too much product can weigh down the curls and cause them to lose their definition. A lightweight braid spray or oil can be spritzed onto the braids as needed to maintain hydration.

    Nighttime Routine

    Protecting your triangle part box braids with curly ends while you sleep is crucial for maintaining the style. Always tie your hair down with a silk or satin scarf, bonnet, or use a satin pillowcase. Satin and silk fabrics reduce friction, preventing frizz and helping to preserve your crisp parts and defined curls.

    For the curly ends specifically, consider loosely gathering the braids and placing them in a satin scrunchie or pineapple-style ponytail on top of your head. This prevents the curls from getting crushed or tangled during sleep, helping them maintain their bounce and definition.

    Washing Triangle Part Box Braids with Curly Ends

    Washing triangle part box braids with curly ends requires a gentle approach to preserve both the braids and the curls. Wash your scalp and braids with diluted shampoo, focusing on the scalp rather than aggressively scrubbing the length of the braids.

    Rinse thoroughly and allow the style to air dry or use a low-heat blow dryer. Avoid rubbing or twisting the braids while wet, as this can cause frizz and disrupt the curl pattern. For the curly ends specifically, consider using a curl-friendly shampoo or co-wash that will not strip moisture from the curls.

    Refreshing the Curly Ends

    Over time, the curly ends of triangle part box braids may begin to lose their definition or become frizzy. Refreshing the curls is a simple process that can extend the life of your style. Create a mixture containing water, leave-in conditioner, and a bit of hair oil, and spray it onto the curly ends.

    Alternatively, use a curl spray or mousse to tame flyaways and reduce tangles. For more defined curls, you can wrap small sections of the curly ends around your finger or a small rod and allow them to set. This quick refresh can make triangle part box braids with curly ends look fresh and new even weeks after installation.

    Duration and Removal

    While triangle part box braids with curly ends are long-lasting, it is important not to keep them in for too long. Most experts recommend wearing this style for four to six weeks to give your natural hair a break and prevent excessive tension or buildup.

    When it is time to remove the braids, take care to detangle gently and thoroughly. Apply a generous amount of conditioner or detangling spray to the braids before beginning the removal process. Cut the extension hair close to the natural hair, then carefully unravel the braids, working from the ends upward. Take your time to minimize breakage and preserve the health of your natural hair.

    Styling Ideas for Triangle Part Box Braids with Curly Ends

    1.Half-Up, Half-Down Styles

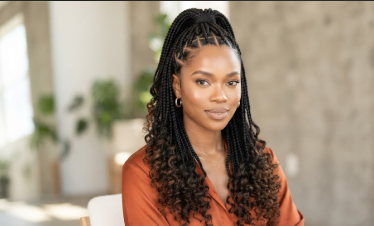
    The half-up, half-down style is a classic choice for triangle part box braids with curly ends. Pull the top section of your braids into a ponytail or bun, leaving the rest to flow freely. This style is ideal for everyday wear, as it keeps hair out of your face while showcasing the beautiful curly ends cascading down your back.

    The geometric triangle parts become particularly visible with this style, as the pulled-back section reveals the intricate parting pattern across the scalp. This makes the half-up, half-down style not just practical but also a way to highlight the artistry of the triangle part box braids with curly ends.

    2.High Ponytail

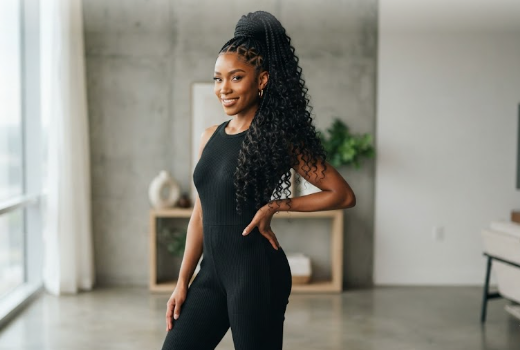
    For a bold, dramatic look, gather all your triangle part box braids with curly ends into a high ponytail. Secure the braids at the crown of your head, allowing the curly ends to cascade down like a waterfall. This style adds instant height and drama, making it perfect for special occasions or when you want to make a statement.

    The high ponytail showcases the length and texture of the braids while keeping the geometric parting pattern visible at the front and sides. The contrast between the sleek, gathered braids and the bouncy, curly ends creates a stunning visual effect.

    3.Low Bun with Curly Ends

    For a more elegant, sophisticated look, twist your triangle part box braids with curly ends into a low bun at the nape of your neck. Leave some curled ends peeking out for a romantic, soft finish. This style is perfect for formal events, professional settings, or any occasion where you want to look polished and refined.

    The low bun allows the geometric triangle parts to remain visible around the hairline and sides, while the curly ends add a touch of softness to an otherwise structured updo. This combination of structure and softness is the hallmark of triangle part box braids with curly ends.

    4.Side-Swept Curls

    For a casual, playful look, sweep all your triangle part box braids with curly ends over one shoulder and let them hang loose. This style is effortlessly chic and works well for photos, as the asymmetry creates visual interest. The side-swept style allows the curly ends to take center stage, with the bouncy curls framing your face and adding movement to your overall look.

    5.Crown or Halo Braid

    For a truly regal appearance, wrap your triangle part box braids with curly ends around your head like a crown. Pin the braids down as you go, allowing the curled ends to tuck in or hang loose. This style makes you feel like royalty and is perfect for special events or when you want to feel extra glamorous.

    The crown style showcases the geometric triangle parts along the hairline while the curly ends add a soft, romantic touch. It is a style that is both polished and creative, demonstrating the versatility of triangle part box braids with curly ends.

    6.Top Knot with Loose Curls

    For a quick, casual style, pull your triangle part box braids with curly ends up into a high bun on top of your head. Leave a few curled pieces hanging down for a relaxed, effortless look. This style is perfect for lazy days or running errands, offering a cute and practical option that still looks stylish.

    The loose curls keep the top knot from looking too serious or stiff, adding a playful element to an otherwise simple style. This demonstrates how triangle part box braids with curly ends can be dressed up or down depending on the occasion.

    Why Triangle Part Box Braids with Curly Ends Are a Trend Worth Trying

    The triangle part box braids with curly ends trend has gained significant momentum in recent years, and for good reason. This style offers a fresh take on the classic box braid, introducing geometric elements that feel modern and artistic. The triangular parting pattern transforms the scalp into a canvas of interlocking shapes, creating a look that is both striking and sophisticated.

    The addition of curly ends adds an element of softness and romance that balances the angular precision of the parts. This combination of structure and softness makes triangle part box braids with curly ends incredibly versatile, suitable for a wide range of personal styles and occasions.

    Triangle part box braids with curly ends also offer practical benefits that make them an attractive choice. The protective nature of the style helps maintain hair health, while the longevity of the braids makes them a time-saving option for those with busy lifestyles. The even distribution of tension across the scalp can also be beneficial for those concerned about hair health.

    Whether you are looking to make a bold fashion statement or simply want a stylish, low-maintenance protective style, triangle part box braids with curly ends offer a unique and beautiful option. The geometric parting pattern ensures that your style stands out, while the curly ends add a touch of softness and femininity. It is a style that is both trendy and timeless, making it a worthwhile addition to any hair journey.

    Conclusion

    Triangle part box braids with curly ends represent the perfect marriage of geometric precision and soft, romantic texture. This innovative style takes the classic box braid to new heights, introducing a dynamic parting pattern that transforms the scalp into a work of art while the curly ends add movement and femininity. The result is a hairstyle that is both striking and versatile, suitable for everything from casual everyday wear to formal occasions.

    The benefits of triangle part box braids with curly ends extend beyond aesthetics. As a protective style, they help maintain hair health and promote growth. Their longevity makes them a practical choice for busy individuals, while the even distribution of tension across the scalp can be beneficial for overall hair health. With proper care and maintenance, this style can last for weeks, providing a low-maintenance yet high-impact look.

    Whether you are a longtime fan of protective styles or considering box braids for the first time, triangle part box braids with curly ends offer a unique opportunity to express your personal style. The geometric parting pattern ensures that your look stands out, while the curly ends add a touch of softness and romance. It is a style that is both trendy and timeless, making it a worthwhile addition to any hair journey.

    As with any hairstyle, the key to success lies in proper preparation, execution, and maintenance. By following the guidelines outlined in this article, you can achieve beautiful triangle part box braids with curly ends that will turn heads and make you feel confident and stylish. Whether you choose to wear them in a sleek updo, a casual half-up style, or flowing freely, triangle part box braids with curly ends are sure to become one of your favorite go-to looks.

  • 18 Adorable & Protective Cornrow Hairstyles for Kids (Easy to Maintain)

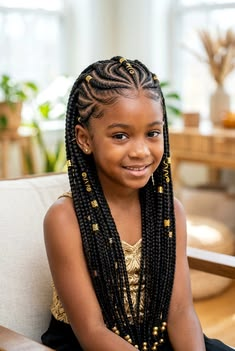
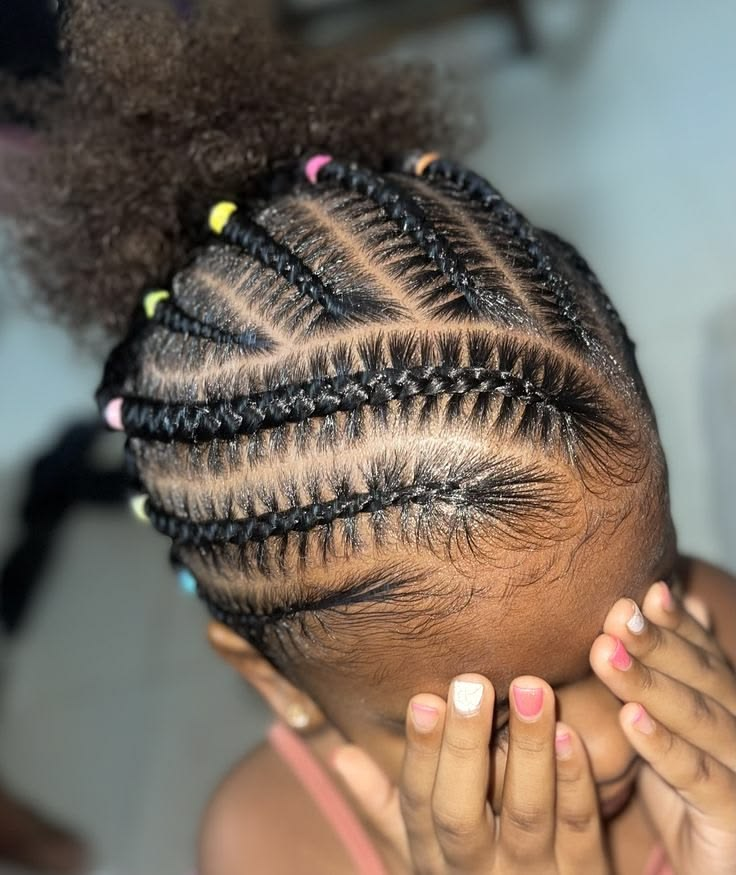
    Cornrows for kids are far more than a fashionable protective style. For parents juggling school runs, sports practices, and bath time, they represent a strategic solution to daily hair management. When installed correctly, cornrows can last two to three weeks, significantly reducing morning stress while promoting healthy hair growth by minimizing breakage and tangling.

    However, not all cornrow styles are created equal for children. Young scalps are more sensitive than adults’, and their hair textures range from fine and delicate to thick and coily. The key is selecting patterns that distribute tension evenly—never pulling too tight at the hairline—while incorporating creative elements that make your child excited to sit in the chair.

    This guide presents 18 carefully curated cornrow hairstyles specifically designed for kids. You’ll find options for every occasion, from classroom-appropriate simple straightbacks to birthday-party-ready heart patterns and feed-in braids with colorful beads. Each style includes an honest assessment of maintenance level, estimated styling time, and best-suited hair textures.

    also check this 10 Timeless and Practical Middle Part Hairstyles for Kids.

    Beyond the styles themselves, we’ll cover critical topics most blogs ignore: how to properly prep your child’s hair before braiding (including the best detangling conditioners and stretching methods), a weekly maintenance routine that preserves the style without product buildup, and five common mistakes that cause breakage. By the end, you’ll have everything you need to make cornrows your go-to protective style for the school year.

    1. Classic Straight-Back Cornrows

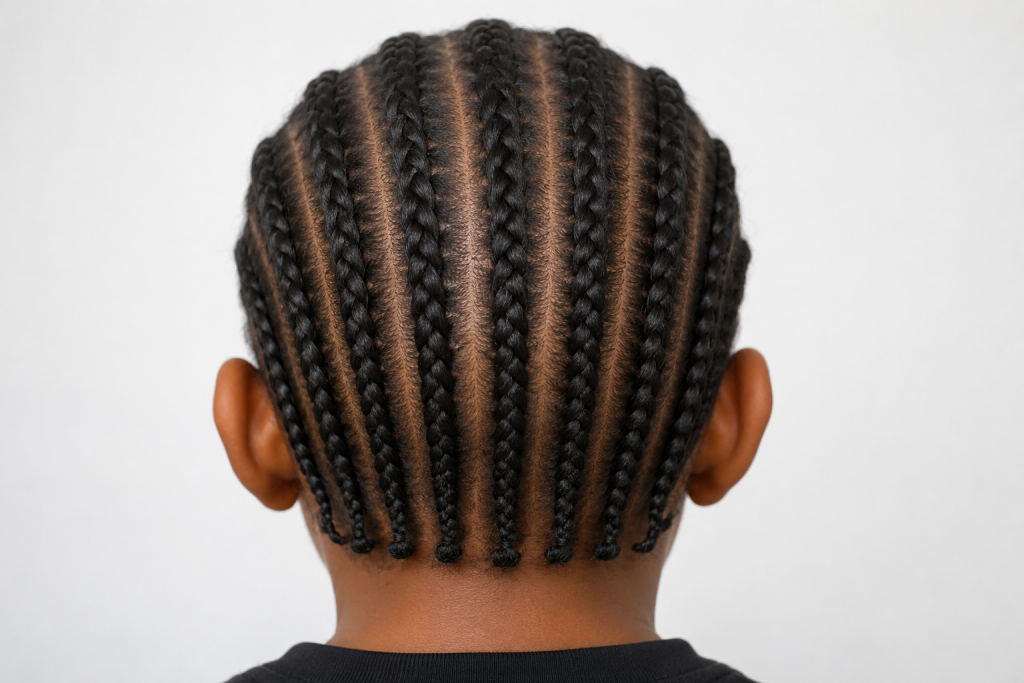
    The foundational style every parent should master. These run directly from the hairline to the nape in uniform rows, typically 6 to 10 individual plaits depending on hair density. For children with fine hair, narrower rows (¼ inch) create the illusion of fullness. The beauty lies in simplicity—no complex parting required, making installation take only 45 to 60 minutes. To reduce tension on the edges, start each row with a small “base braid” of natural hair before incorporating added extensions. Straight-backs excel for active kids because there are no loose ends to snag on backpack straps or car seat buckles. Refresh daily by spraying with a water-aloe vera mix and applying lightweight oil to the scalp every three days.

    2. Zig-Zag Part Cornrows

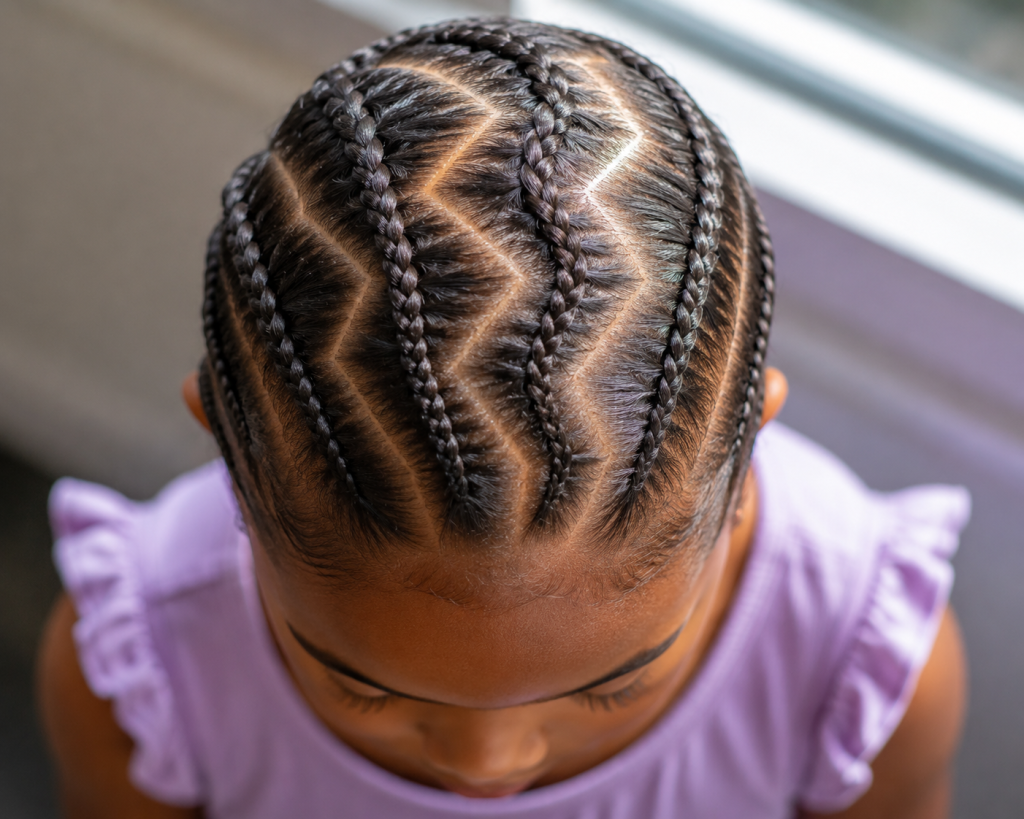
    Replace straight part lines with gentle zigzags to add visual interest without increasing complexity. Use a rat-tail comb to map the pattern from forehead to crown before braiding. The zigzags should be wide (at least one inch between points) to prevent sections from merging. This style cleverly camouflages new growth, extending the style’s wearable life by three to four days compared to straight parts. It’s particularly flattering for round face shapes as the angles create structure. To maintain crisp lines, avoid washing until day five—use a foam mousse on a soft toothbrush to clean parts instead. Pair with colorful thread wrapped around the last inch of each braid for a playful finish.

    3. Cornrows into Pigtails

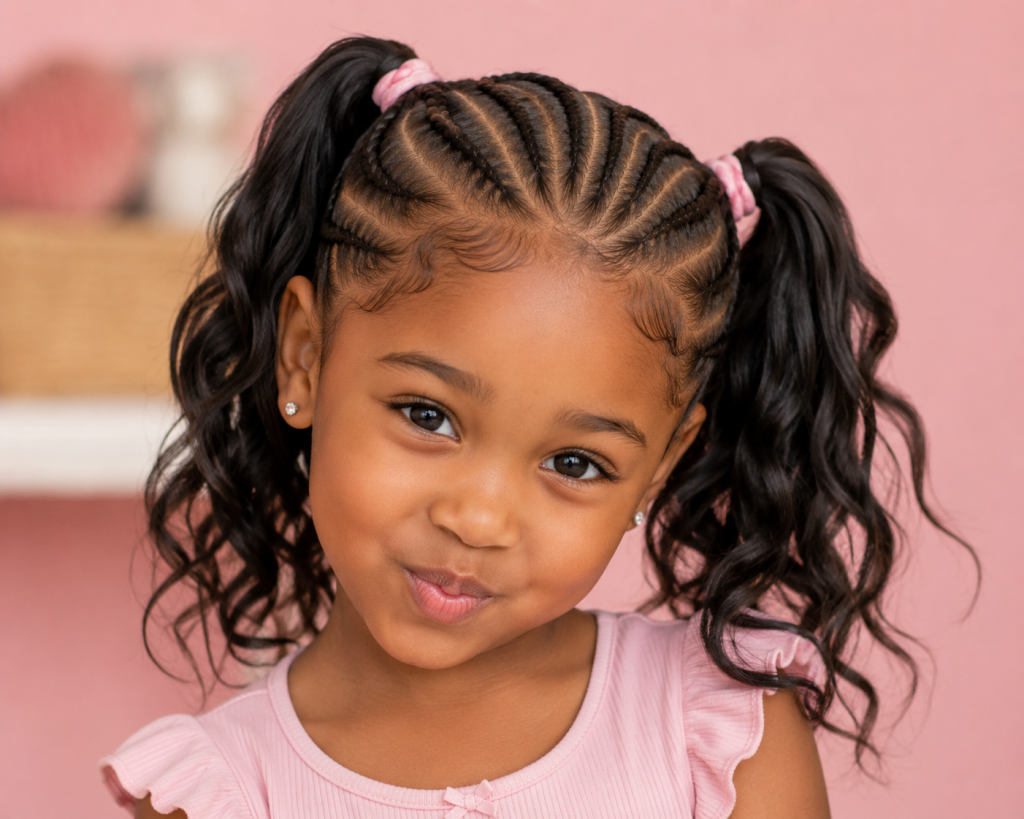
    The ultimate school-day hybrid. Braid the top half of the head in four to six straight cornrows ending at the crown, then gather the loose ends into two high pigtails. This reduces tension on the hairline since only half the head is braided. The pigtails can be left loose, twisted into buns, or braided into two-strand twists. For fine hair, add kanekalon hair only in the cornrowed section to prevent the pigtails from appearing stringy. Children love the versatility—pigtails can be worn up for sports or down for pictures. Re-moisturize the ends nightly with leave-in conditioner, and re-braid the pigtails every five days to prevent matting at the nape.

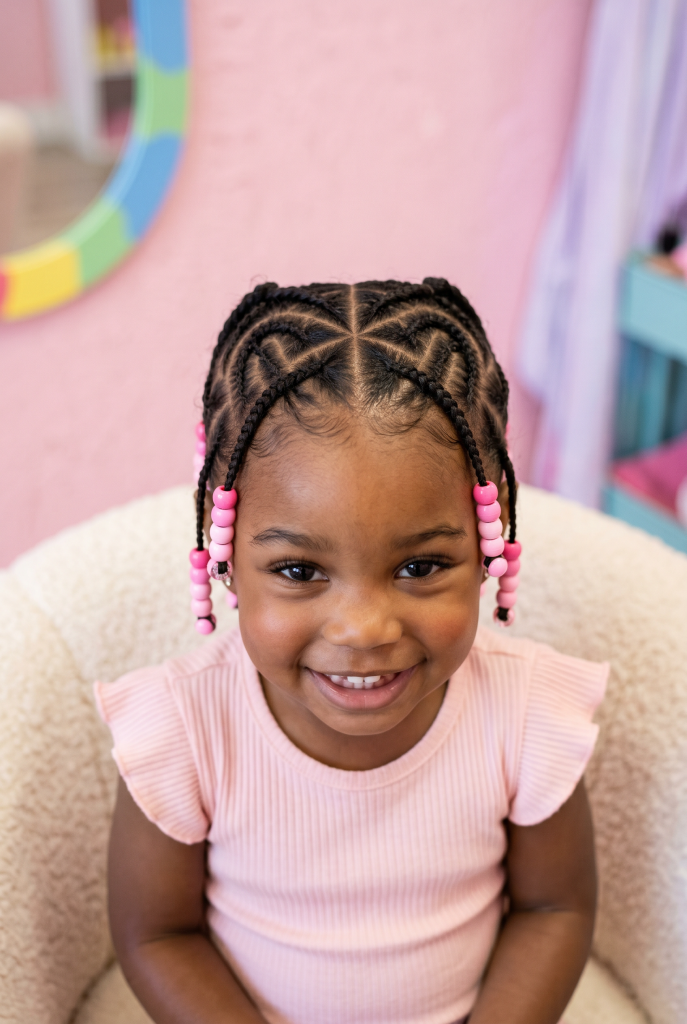
    4. Heart-Shaped Cornrows

    Perfect for birthday parties or Valentine’s week. Create a heart outline at the crown using three curved cornrows that meet at the bottom point, then fill the center with straight rows radiating outward. For beginners, draw the heart with a white eyeliner pencil first. This style requires medium-density hair—too thin and the heart lacks definition, too thick and the curves become bulky. Installation takes 90 minutes but the “wow factor” lasts a full week. To preserve the shape, have your child sleep on a satin pillowcase and avoid ponytails that would distort the pattern. Spritz with rose water daily for scent and light hold.

    5. Lemonade Braids (Side-Swept)

    Popularized by Beyoncé but perfectly scaled for kids. The hair is deeply side-parted (at the eyebrow arch) and braided diagonally across the head toward the opposite ear. Each row begins with a feed-in technique where small extensions are gradually added every three stitches. For children under eight, limit feed-ins to the first inch only to keep weight off the roots. The result is a sleek, asymmetrical look that keeps hair off the neck—ideal for hot weather. Maintain by tying a silk scarf around the edges each night, as the side-swept angle puts extra friction on the nape hairs during sleep. Lasts 10–14 days.

    6. Cornrow Bun for Kids

    A formal event favorite that transitions to everyday wear. Cornrows sweep from the hairline toward a central point at the crown, where all ends gather into a single bun. Use five to seven braids for a polished look or three chunky braids for a casual feel. The bun should be secured with a satin scrunchie rather than rubber bands, which snap delicate ends. This style excels for dance recitals and school pictures because nothing falls into the face. For young children with tender scalps, stop the cornrows two inches before the crown and braid the remaining loose hair into the bun—this creates a buffer zone of less tension. Refresh the bun weekly by taking it down, detangling, and re-forming.

    7. Stitch Cornrows (Invisible Part)

    Also called “invisible cornrows” because the parts disappear when braided tightly. Use the tip of a rattail comb to lift a thin slice of hair from each part, braiding it into the adjacent row. This technique creates a “stitched” appearance along the scalp that looks incredibly neat. The main advantage for kids is longevity—stitch braids hold twice as long as standard cornrows because the interlocking prevents slippage. However, they take longer to install (two hours minimum) and should only be done on well-moisturized, detangled hair. Not recommended for children under five or those who cry during braiding, as the tension is more intense. Use a leave-in conditioner spray daily to keep the scalp visible through the parts.

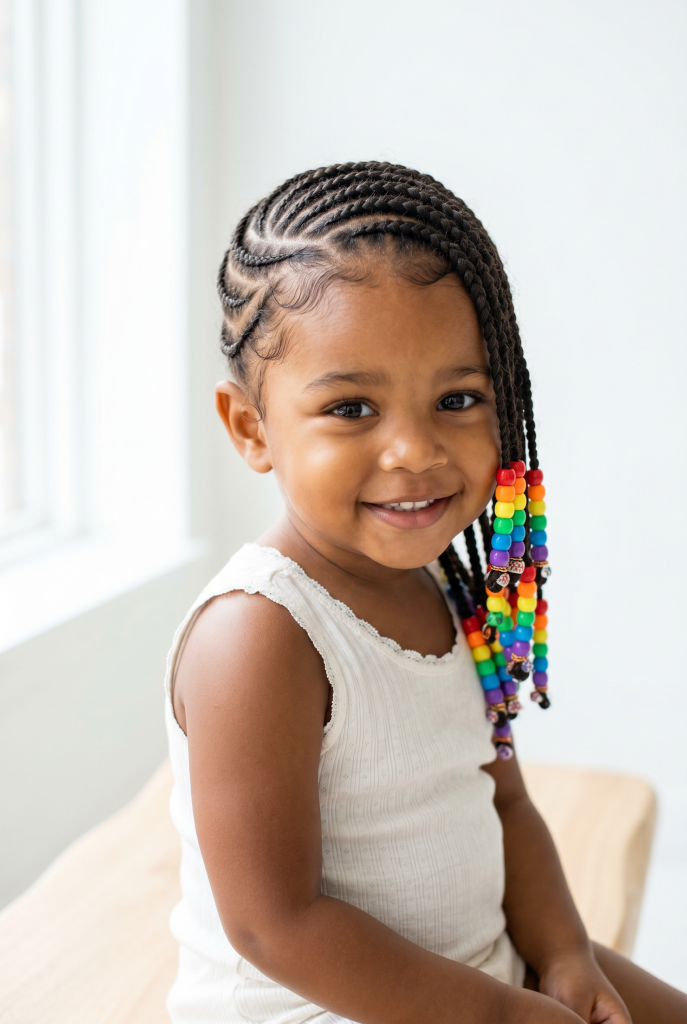
    8. Ghana Braids with Beads

    These raised, rope-like cornrows stand off the scalp rather than lying flat. Achieved by feeding in extension hair at every single stitch (versus every few stitches in standard feed-ins). The result is thicker, more defined rows that hold beads beautifully. For kids, limit bead placement to the last three inches of each braid only—full-length beads add significant weight that pulls at the roots. Choose plastic or silicone beads over metal, which heats up in sunlight. Ghana braids excel for swimming because the raised structure allows chlorine to rinse out completely. However, they require more drying time afterward. Use a microfiber towel to gently squeeze excess water from each braid after pool time.

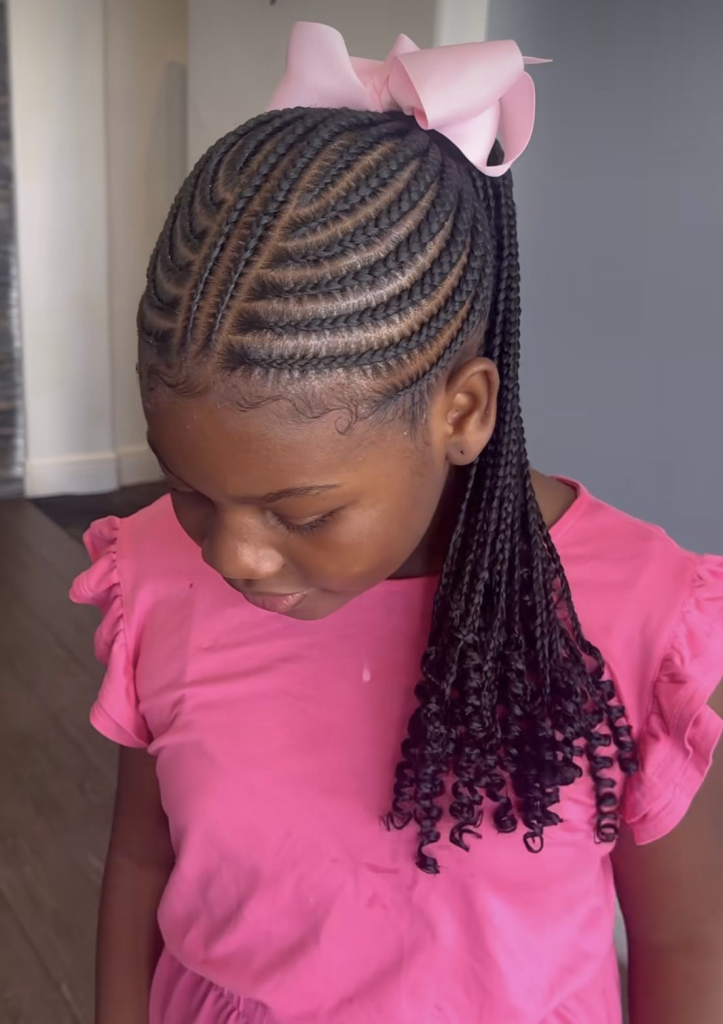
    9. Cornrow Ponytail with Curly Ends

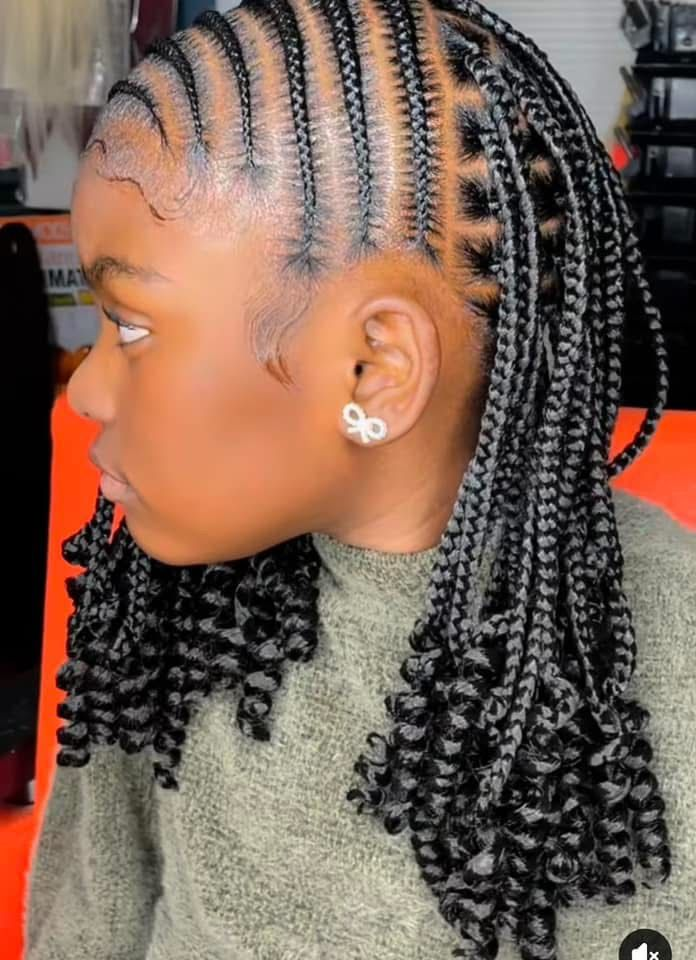
    Combine protective styling with playful texture. Cornrows cover the entire scalp in any pattern (straight-back works best), but each braid ends just below the ear. The remaining loose hair is gathered into a single ponytail and either curled with flexi-rods or left in its natural texture. This style protects 80% of the hair shaft while leaving ends accessible for moisturizing. For children with type 4 hair, stretch the ponytail ends gently before curling to prevent single-strand knots. The real time-saver: ponytails last longer than fully braided ends because they’re easier to re-moisturize without frizzing the cornrows. Apply mousse to the ponytail only, not the braids, every morning.

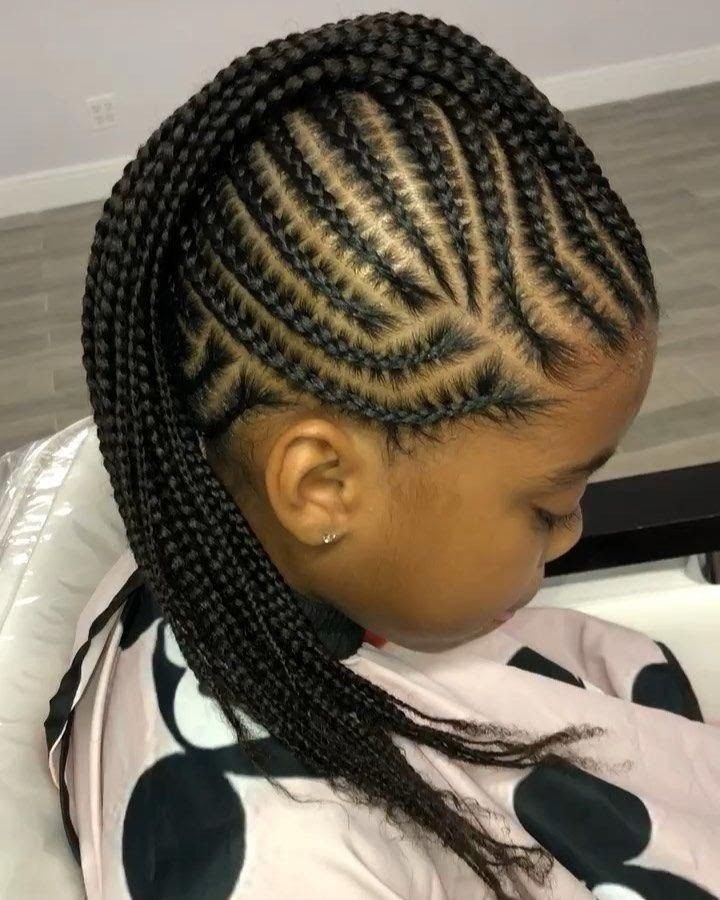
    10. Cornrow Mohawk for Kids

    Bold but practical for very active boys and girls. Cornrows run from forehead to crown only along the center of the head (about two inches wide), while the sides are either shaved or tapered short. For parents who prefer not to shave, simply leave the sides in a short wash-and-go. This dramatically reduces total braiding time to 30 minutes because only the center strip requires styling. The mohawk works best on kids with medium-to-thick density—fine hair may not have enough volume to create the “ridge” effect. Maintain by trimming the sides every three weeks if shaved, or refreshing with curl cream weekly if left natural. The open sides also mean less product buildup, reducing scalp irritation.

    11. Crochet Cornrows for Fine Hair

    A game-changer for children with naturally thin or damaged hair. Instead of braiding their real hair, you create a few loose cornrows (the “foundation”) and then loop pre-braided crochet hair through using a latch hook. This puts virtually zero tension on fine strands because their hair never carries the weight of extensions. For kids recovering from traction alopecia, crochet cornrows allow healing while still achieving a braided look. Installation requires learning the latch hook technique (15-minute learning curve) but saves hours compared to individual feed-ins. The crochet hair can be reused twice if cared for properly. Style lasts 7–10 days maximum—longer than that risks tangling at the roots in fine hair.

    12. Cornrow Crown (Circle Style)

    A princess-approved style where cornrows radiate outward from a center point like bicycle spokes, then circle the head’s perimeter. Start at the crown (the highest point of the skull) with a small circular braid, then work outward in rings. This style eliminates all part lines, which means no visible new growth for weeks. It’s the longest-lasting cornrow style for kids who hate frequent re-braiding, often stretching to four weeks with proper care. The downside is installation difficulty—mapping concentric circles on a moving child requires patience. Use a spray bottle with diluted conditioner to keep sections damp. At night, cover with a mesh wig cap to prevent individual braids from separating.

    13. Jumbo Cornrows with Color Thread

    Perfect for kids who want “fun hair” without chemical color or synthetic extensions that cause itching. Braid only six to eight very thick cornrows (each about an inch wide), then wrap colorful cotton embroidery thread around every other braid. The thread adds zero weight and comes in hundreds of colors, including glow-in-the-dark and metallic options. To secure thread ends without glue, tuck the final inch under the previous wrapped section using a needle. Jumbo braids install quickly (40 minutes) but don’t last as long as smaller ones—expect 7–10 days before frizz appears. The thicker sections also dry faster after washing, reducing mildew risk. Change thread colors monthly for a fresh look without re-braiding.

    14. Fishbone Cornrows

    An intricate pattern where two smaller cornrows twist around each other to form a single, braided “bone.” On children’s heads, fishbones work best as accent strips (two or three rows) rather than full-head styles. For example, create a fishbone down each side of a mohawk, or one vertical fishbone down the center with straight backs on either side. The effect is stunning but requires advanced parting skills—each section must be exactly symmetrical. The tension is actually lower than standard cornrows because the twisting distributes stress across more points. Fishbones last three weeks easily because the interlocking prevents loosening. Refresh the scalp with a dropper bottle of diluted tea tree oil to reach between the tight twists.

    15. Curved Cornrows (Half-Circles)

    Arcs that follow the natural curve of the skull, usually starting at one temple and ending at the opposite nape. Unlike straight backs that run front-to-back, curved cornrows flow across the head horizontally or diagonally. This style flatters children with prominent foreheads or uneven hairlines because the curves soften features. The technique requires consistent tension around each arc—too loose and the curve loses shape, too tight and the hair pulls at the turn points. Install in three wide curves for a modern look or eight narrow curves for traditional styling. For maintenance, focus moisturizer only on the ends; product on the curved sections can weigh them down and straighten the arcs.

    16. Braided Space Buns

    Combines two kid favorites: cornrows and buns. The front half of the head is braided into four to six cornrows that end at the crown. From there, the remaining hair is divided into two sections (left and right), each twisted into a bun over the ears. This keeps all hair off the neck and face simultaneously. For children with very long hair, the space buns can be quite large—flatten them into “donut” shapes using bobby pins for a sleeker look. The cornrowed front section protects the delicate hairline while the buns offer easy access for re-moisturizing ends. Re-twist the buns every three days to prevent matting. Great for dance class and gymnastics where low-profile styles are required.

    17. Cornrow Triangle Parts

    A geometric twist on standard cornrows where part lines form interlocking triangles instead of straight rows. Each triangle is filled with a short cornrow that follows the shape’s internal angles, creating a mosaic pattern across the scalp. This style works best with an undercut (shaved sides) so the triangles pop visually. For kids without undercuts, limit triangles to the crown area only as a focal point. Installation requires mapping the entire head first—use a protractor comb or measure with your fingers. The triangles actually reduce total scalp tension because each braid is shorter than a full-row style. However, loose ends at each triangle tip require sealing with a knot or bead to prevent unraveling.

    18. Cornrows with Ribbon Weave

    For formal occasions or everyday flair, satin ribbon woven through cornrows adds elegance without beads getting caught in car seats or school desks. After braiding standard cornrows (any pattern), thread a plastic yarn needle with ¼-inch satin ribbon and weave it over-and-under each braid. The ribbon should be twice the length of the braid to allow for weaving. Unlike elastic bands that cause breakage, ribbon applies zero tension and can be removed and re-woven daily to match outfits. For school dress codes that prohibit “distracting” hair accessories, use ribbon in the child’s uniform color (navy, white, or red). The ribbon also protects braids from absorbing chlorine during swimming. Change ribbon weekly without re-braiding.


    Why Choose Cornrows for Kids?

    Cornrows offer unique advantages over other protective styles for children. Unlike loose hairstyles that tangle overnight or individual braids that take six hours to install, cornrows keep the entire hair shaft neatly secured against the scalp. This prevents the two biggest sources of child hair damage: friction from pillowcases and matting at the nape from coat collars.

    For parents managing natural hair, cornrows significantly reduce detangling sessions. A child with loose type 4 hair may require 30 minutes of detangling daily, while cornrowed hair needs only a five-minute moisture refresh each morning. Over a two-week period, that’s nearly six hours of saved time.

    Cornrows also promote hair growth by eliminating daily manipulation. The less you comb, brush, and style, the less breakage occurs at the delicate ends. Many parents report seeing noticeable length retention after just three months of consistent cornrow rotation.

    Additionally, cornrows build confidence in young children. A neat, creative braided style often reduces teasing compared to “messy” natural styles in schools where textured hair is less understood. And when your child can wake up and go without a 20-minute styling battle, everyone starts the day happier.

    How to Prepare Your Child’s Hair Before Braiding

    Proper preparation determines whether cornrows last two weeks or two days. Start three days before braiding with a clarifying wash to remove product buildup. Use a sulfate-free shampoo followed by a deep conditioner with slip (slippery elm or marshmallow root are excellent natural options). Rinse thoroughly but leave 20% of the conditioner in.

    Next, detangle in sections. Divide damp hair into four quadrants. Apply a leave-in conditioner and a detangling brush like the Tangle Teezer, working from ends to roots. For severe tangles, pre-treat with apple cider vinegar diluted 1:3 with water to close the cuticle and reduce friction.

    Stretch the hair before braiding to prevent shrinkage that causes tension at the roots. The easiest method: band the hair into 8–10 loose ponytails with satin scrunchies and allow to air dry completely overnight. Alternatively, blow dry on cool using a comb attachment, but never on high heat for children’s fine strands.

    On braiding day, create a comfortable setup. Place a small pillow behind your child’s neck and play a tablet show at eye level. Have a spray bottle with diluted aloe vera juice (no alcohol) to keep sections damp. Part with a metal rattail comb—plastic combs snag fine hair.

    Finally, apply a light holding product. For normal to thick hair, use a botanical gel like Uncle Funky’s Daughter. For fine or damaged hair, skip gel entirely and use only foam mousse. Never use rubber bands at the roots; they cause the most damage. Use a small amount of edge control only on the hairline, not throughout.

    How to Maintain Kids Cornrow Hairstyles

    Nightly maintenance is non-negotiable for cornrow longevity. Your child must sleep on a satin or silk pillowcase. Even better: a satin bonnet or scarf. If your child removes head coverings during sleep, try a satin-lined sleeping cap with an elastic chin strap designed for kids.

    Morning refresh takes two minutes. Lightly mist braids with a spray bottle containing water, aloe vera juice, and five drops of rosemary essential oil. Avoid spraying the scalp directly if your child has sensitive skin. Smooth any flyaways with a soft toothbrush dipped in a tiny amount of aloe gel.

    Scalp care happens every third day. Use a dropper bottle to apply jojoba or grapeseed oil directly to the parts—these oils mimic the scalp’s natural sebum without clogging pores. Massage gently with fingertips, not nails. If you see white buildup, clean parts with witch hazel on a cotton swab.

    Wash cornrows only when necessary. For most kids, once during the two-week style is sufficient. Use a diluted shampoo in a squeeze bottle applied directly to the parts, not rubbed over the braids. Rinse thoroughly but quickly to avoid frizz. Allow to air dry completely—never put a child to bed with damp cornrows as this causes mildew and odor.

    Re-braid edges every 5–7 days. The hairline and nape experience the most friction and will loosen first. You don’t need to redo the whole head; just re-braid the first inch of any loose rows and secure with a small elastic (cut the elastic out rather than pulling it off to prevent breakage).

    Common Mistakes Parents Should Avoid

    Braiding too tightly is the number one cause of traction alopecia in children. Signs your child’s braids are too tight: small bumps (folliculitis) at the hairline, complaints of headache or “pulling” sensation, or redness that persists an hour after braiding. The correct tension allows you to gently lift a braid away from the scalp—if it lies completely flat with no give, it’s too tight.

    Using rubber bands at the roots creates concentrated tension that snaps fine hairs. Substitute with small silicone elastics designed for natural hair, and always cut them out rather than pulling. Better yet, finish braids by tucking the ends under the previous stitch (a technique called “tying off”) which requires no elastic at all.

    Skipping the stretch phase leads to shrinkage that pulls braids upward, increasing tension throughout the week. Always stretch before braiding, even if your child has heat-trained or relaxed hair. Unstretched hair shrinks back within 48 hours, causing previously comfortable braids to become painful.

    Letting cornrows stay in too long causes matting and loc-ing. For children under 10, two weeks is the maximum. After 14 days, shed hairs accumulate at the roots and begin knotting around the braid. Removing matted cornrows requires cutting, which damages length.

    Ignoring scalp complaints is the most dangerous mistake. Children often don’t articulate pain clearly—they may simply become fussy during braiding or touch their head repeatedly. If your child resists braiding more than usual, stop and assess. The style isn’t worth permanent hair loss.

    Best Accessories for Kids Cornrow Hairstyles

    Silicone beads (not plastic) are safest for young children. They’re flexible, won’t crack into sharp pieces, and come in easy-open designs. Avoid metal beads that heat up in sun and wooden beads that absorb moisture and mildew.

    Pre-cut satin scrunchies in small sizes protect ends when cornrows transition into ponytails or buns. The wide satin surface reduces friction compared to standard elastic bands. Keep a pack of 30 in your bathroom drawer.

    Edge control with aloe not petroleum jelly. Most drugstore edge controls contain mineral oil that builds up on young scalps. Look for water-based formulas with aloe vera as the first ingredient. Apply only with a clean toothbrush, never with fingers.

    Spray bottle with continuous mist prevents over-wetting. Standard spray bottles release uneven droplets that soak sections; continuous mist bottles distribute a fine even layer. Fill with water and vegetable glycerin (one tablespoon per cup) for humidity resistance.

    Silk pillowcases in fun prints increase the chance your child will actually use them. Let them pick their own pattern—unicorns, dinosaurs, or space themes. Have two in rotation so one is always clean.

    Frequently Asked Questions

    How long can kids keep cornrows in?
    Maximum two weeks for children under 12. Younger children (under 6) should not exceed 10 days because their hair grows faster relative to their head size, causing tension sooner. Between 12–14 days, remove the style even if it still looks neat.

    Are cornrows painful for kids?
    Properly installed cornrows should cause zero pain. Mild discomfort during the first hour is normal as the scalp adjusts. Sharp pain, headaches, or burning sensations indicate excessive tension. If your child complains of pain while you’re braiding, stop immediately.

    Can kids swim with cornrows?
    Yes, but with precautions. Rinse hair with fresh water before entering chlorinated or salt water—dry hair absorbs more chemicals. After swimming, rinse again and apply leave-in conditioner. Never let a child sleep in wet cornrows; mildew develops within hours.

    How often should I wash cornrowed hair?
    Once during the two-week style is sufficient for most kids. Use a shampoo bottle with a pointed tip to apply directly to the parts. More frequent washing causes frizz and shortens the style’s life.

    At what age can a child get cornrows?
    Hair texture matters more than age. Once a child has enough length to grip between your fingers (typically 2–3 inches, around 18 months for most toddlers), cornrows are possible. However, wait until age 3 for feed-in or extension styles, as the added weight can strain immature follicles.

    How much do kids’ cornrows cost professionally?
    $60–$150 depending on complexity and location. Simple straight-backs for a child under 8 average $65. Heart patterns or stitch cornrows run $100–$150. Many salons offer “child rates” that are 20–30% lower than adult prices.

    Can cornrows damage edges?
    Yes, if installed or maintained incorrectly. To protect edges: never braid hair that is wet (it shrinks and tightens), always start braids ⅛ inch away from the actual hairline rather than on it, and never apply glue or heavy gels to the perimeter.

    Stronger Conclusion with Call to Action

    Cornrows are more than a hairstyle—they’re a tool for stress-free mornings, healthy hair retention, and creative expression for your child. The 18 styles outlined here offer options for every skill level, from beginner-friendly straight-backs to advanced heart patterns and Ghana braids. What matters most isn’t perfection, but consistency with preparation and maintenance.

    Start small. Choose one style from this list—perhaps the classic straight-backs or the cornrow ponytail with curly ends—and practice on a weekend when you’re not rushed. Take photos of each section before you begin so you can replicate your parting pattern. And remember: if your child resists or complains of pain, listen. No style is worth their comfort.

    Now it’s your turn. Which of these 18 cornrow styles will you try first? Save this article to your “Kids Hair” Pinterest board, share it with another parent who struggles with morning hair battles, or leave a comment below with your child’s favorite braided style. For weekly natural hair tips delivered to your inbox, join our newsletter using the form in the sidebar. Your easiest school mornings start with the right protective style.

  • 15 Adorable Toddler Hairstyles with Beads.

    15 Adorable Toddler Hairstyles with Beads.

    They Are Cute, Protective, and Easy to Maintain

    Finding the perfect hairstyle for your little one can be both exciting and challenging. Parents want hairstyles that are adorable, comfortable, long-lasting, and gentle on delicate hair. That’s exactly why toddler hairstyles with beads continue to be one of the most loved choices for young girls around the world.

    Beads add personality, color, and movement to braided hairstyles while also allowing parents to customize every look. Whether you prefer bright rainbow beads, clear crystal beads, wooden beads, or classic white accessories, there’s a beaded hairstyle for every toddler and every occasion.

    Besides looking beautiful, many braided styles help protect your child’s natural hair by reducing daily manipulation, minimizing tangles, and encouraging healthy hair growth.

    In this guide, you’ll discover 15 beautiful toddler hairstyles with beads that combine style, comfort, and practicality.


    Why Choose Toddler Hairstyles with Beads?

    There are many reasons why parents love beaded hairstyles.

    Some of the biggest benefits include:

    • Protect delicate natural hair
    • Reduce daily styling time
    • Keep hair neat for several weeks
    • Allow endless creativity
    • Perfect for school, church, birthdays, and family events
    • Fun colors that toddlers love
    • Help minimize breakage from constant combing

    When installed correctly without excessive tension, braided hairstyles with beads can be both stylish and healthy for growing hair.


    1. Classic Straight Back Cornrows with White Beads

    Simple never goes out of style.

    Straight-back cornrows finished with white or clear beads create a timeless look that’s suitable for school, family gatherings, and everyday wear.

    This style is easy to maintain and keeps hair neatly secured for two to three weeks.

    Best for: Everyday wear

    you will love this; 10 Timeless and Practical Middle Part Hairstyles for Kids.


    2. Heart Braids with Pink Beads

    Heart-shaped partings instantly make any hairstyle more playful.

    Small cornrows are carefully braided into heart designs before colorful pink beads are added to the ends. This hairstyle is especially popular for birthdays and family photos.

    Best for: Birthday parties


    3. Box Braids with Colorful Beads

    Mini box braids give toddlers plenty of movement while keeping the hair protected.

    Parents can mix colorful beads in different patterns to create a cheerful, personalized style that reflects their child’s personality.

    Best for: Active toddlers


    4. Side-Swept Cornrows with Rainbow Beads

    Instead of braiding straight back, all the braids are directed toward one side of the head.

    The asymmetrical design looks modern, while rainbow beads add a playful finish that toddlers absolutely love.

    Best for: Stylish everyday looks


    5. High Braided Ponytail with Beads

    A high ponytail instantly creates a fun and youthful appearance.

    The braids are gathered at the crown, allowing the beaded ends to swing freely while your toddler walks or plays.

    This style is both comfortable and eye-catching.

    Best for: Playdates


    6. Zigzag Cornrows with Clear Beads

    Zigzag partings create extra visual interest without making the hairstyle overly complicated.

    Paired with clear beads, the hairstyle looks neat, modern, and elegant.

    Best for: School


    7. Fulani-Inspired Braids with Wooden Beads

    Inspired by traditional African hairstyles, Fulani braids feature a center braid with side braids and decorative beads.

    Wooden beads give the hairstyle a natural, earthy finish that complements every hair color.

    Best for: Cultural celebrations


    8. Double Bun Braids with Beads

    Two braided buns are always adorable on toddlers.

    The remaining braided ends are decorated with colorful beads that peek out beneath each bun, creating a fun and youthful hairstyle.

    Best for: Weekend outings


    9. Lemonade Braids with Beads

    Inspired by the popular side-swept braid style, lemonade braids can easily be adapted for toddlers.

    The braids flow in one direction while colorful beads provide movement and charm.

    Best for: Family events


    10. Crisscross Braids with Beads

    Crisscross sections create beautiful geometric patterns across the scalp.

    Once the braids are complete, matching beads finish the look, making it one of the most unique toddler hairstyles with beads.

    Best for: Special occasions


    11. Braided Pigtails with Beads

    Braided pigtails are one of the easiest toddler hairstyles to create.

    Each pigtail is finished with matching beads that bounce with every step, making this style fun and practical.

    Best for: Daily wear


    12. Crown Braids with Pearl Beads

    A braided crown wraps elegantly around the head, creating a princess-inspired look.

    Pearl beads add sophistication while still keeping the hairstyle suitable for young children.

    Best for: Weddings


    13. Triangle Part Box Braids with Beads

    Triangle partings instantly elevate traditional box braids.

    The unique sections create extra dimension, while beads at the ends complete the hairstyle beautifully.

    Best for: Fashion-forward toddlers


    14. Half-Up Braided Style with Beads

    For toddlers who enjoy wearing some hair up and some down, this hairstyle offers the best of both worlds.

    The top braids are gathered into a small ponytail while the remaining braids flow freely with decorative beads.

    Best for: Casual occasions

    you can also try this 18 Adorable & Protective Cornrow Hairstyles for Kids (Easy to Maintain)


    15. Butterfly Part Braids with Mixed Beads

    Butterfly-shaped partings have become increasingly popular because they create beautiful artistic designs.

    Adding mixed-size beads in coordinating colors gives the hairstyle a playful yet polished finish.

    Best for: Photoshoots


    How to Care for Toddler Hairstyles with Beads

    Proper maintenance helps braided hairstyles last longer while keeping your toddler’s scalp healthy.

    Follow these simple care tips:

    • Moisturize the scalp every few days with a lightweight oil or leave-in spray.
    • Sleep with a satin bonnet or satin pillowcase when possible.
    • Avoid pulling tightly on braids.
    • Clean the scalp gently using diluted shampoo or a damp cloth.
    • Replace loose beads before they fall off.
    • Remove the hairstyle after two to four weeks to avoid matting and breakage.

    Choosing the Right Beads

    Not all beads are the same. Consider these options:

    Plastic Beads

    Lightweight, colorful, affordable, and perfect for everyday hairstyles.

    Wooden Beads

    Natural-looking and lightweight, making them comfortable for younger children.

    Pearl Beads

    Elegant and ideal for formal occasions.

    Transparent Beads

    Simple, versatile, and easy to match with any outfit.

    Mixed Color Beads

    Great for creating playful and vibrant hairstyles toddlers enjoy.


    Tips for Comfortable Braiding

    Your toddler’s comfort should always come first.

    Remember to:

    • Avoid excessive braid tension.
    • Choose lightweight beads.
    • Allow breaks during longer styling sessions.
    • Keep styles age-appropriate.
    • Listen if your child says the braids feel too tight.

    Healthy hair always starts with gentle styling.


    Final Thoughts

    There are countless ways to personalize toddler hairstyles with beads, making them one of the most versatile and practical options for young children. Whether you choose classic cornrows, playful pigtails, elegant crown braids, or creative butterfly part designs, beads add charm, color, and personality to every look.

    The best hairstyle is one that keeps your toddler comfortable while protecting their natural hair. With proper care and gentle styling, these beautiful braided looks can stay neat for weeks and make every day feel a little more special.

    If you’re looking for inspiration before your next salon appointment or DIY hair day, these 15 toddler hairstyles with beads offer the perfect balance of beauty, protection, and fun.

  • 10 Timeless and Practical Middle Part Hairstyles for Kids.

    10 Timeless and Practical Middle Part Hairstyles for Kids.

    Every Parent Should Master them.

    Finding a daily hairstyle that balances style, comfort, and durability can be a challenge for any parent. You want something that looks put together for school pictures or family gatherings, but also withstands the chaos of playground adventures and afternoon naps. One often-overlooked solution that solves all these problems is the simple yet sophisticated middle part. In recent years, middle part hairstyles for kids have surged in popularity, moving beyond the “trendy” category to become a staple in modern children’s grooming. Unlike side parts that can shift throughout the day or create uneven volume, a precise central parting offers symmetry, makes hair appear fuller, and keeps strands neatly contained.

    This article will walk you through ten specific middle part hairstyles for kids, ranging from no-heat, wash-and-go styles to braided masterpieces for special occasions. Each section includes step-by-step instructions, the best hair types for each style, and pro tips to keep those parts sharp all day long. By the end, you will have a versatile toolkit of hairstyles that promote healthy hair habits and look adorable on every child.

    you will love this, 18 Adorable & Protective Cornrow Hairstyles for Kids (Easy to Maintain)

    Why Choose a Middle Part for Your Child’s Hair?

    Before diving into the list of styles, it is important to understand why the middle part works so well for children. First, a middle part naturally balances facial features, making it a flattering choice for almost all face shapes, from round to oval to heart-shaped. Second, it encourages even distribution of natural oils from the scalp to the ends, which is crucial for preventing dry, brittle hair. Third, middle part hairstyles for kids are often lower in tension than high ponytails or extreme side parts, reducing the risk of traction alopecia and breakage around the hairline. Finally, a clean middle part acts as an anchor; once you establish it, the rest of the hairstyle falls into place much more easily.

    Now, let us explore the ten best styles you can create at home.

    1. The Classic Straight Middle Part with Barrettes

    This is the simplest entry point into middle part hairstyles for kids, perfect for mornings when you are running late. The goal here is precision, not complexity. Start by using the tail of a rat-tail comb to draw a perfectly straight line from the center of the forehead to the nape of the neck. For children with cowlicks, dampen the hair slightly before parting to encourage the strands to lie flat.

    Once the part is established, apply a small amount of lightweight leave-in conditioner or water-based gel to smooth down any flyaways along the part line. Then, take two decorative barrettes or snap clips. Place one on each side of the part, about one inch behind the hairline. You can also use a single barrette slightly off-center on one side for asymmetry. This style works wonderfully on straight, wavy, or loosely curly hair. For added longevity, you can braid two small sections right along the part line before adding the clips.

    you can try this; Stressed Skin Tips That Actually Help (Simple Ways to Support Skin Recovery)

    2. Twin French Braids with a Center Start

    Twin braids are a classic, but starting them with a middle part elevates the entire look. To achieve this, first create your central part from front to back. Then, separate the hair into two equal halves, using the part as your guide. Begin a French braid on the left side, starting right at the hairline. As you braid, pull sections from both sides of the part line, ensuring the braid stays tight against the scalp. Repeat on the right side.

    This particular version of middle part hairstyles for kids is excellent for sports, swimming, or long school days because the braids stay secure for multiple days. For added flair, you can braid all the way to the ends and secure with clear elastics, or stop the French braid at the nape of the neck and continue with a simple three-strand braid. Pro tip: Pull gently on the edges of each braid loop to pancake them, making the braids look thicker and more voluminous.

    3. Low Bubble Ponytail with Defined Part

    A low bubble ponytail is a modern, playful twist on a standard ponytail, and it looks remarkably polished when combined with a sharp middle part. Start by creating your middle part and brushing all hair downward toward the back of the neck. Gather all hair into a low ponytail at the nape, securing it with a silk scrunchie to prevent breakage. The key to this style is the bubbles. Take a second elastic and wrap it two to three inches down the length of the ponytail. Then, gently tug at the hair between the first and second elastic to create a bubble shape. Repeat this process down the entire length of the ponytail.

    This is one of the most versatile middle part hairstyles for kids because it works on both thick and thin hair. For thin hair, use smaller sections and multiple elastics to create the illusion of density. For thick or curly hair, use larger gaps between elastics. The middle part ensures that the top of the head remains smooth and flat, preventing the “puffy crown” look that can happen with low ponytails.

    4. Half-Up Half-Down Middle Part Style

    Many parents struggle with keeping hair out of a child’s face without losing volume. The half-up, half-down style solves this problem perfectly. After creating a precise middle part, take a horizontal section of hair from just above the ears, pulling it straight back to the crown. Instead of pulling this section into a high ponytail, gather it at the back of the crown and secure it with a soft elastic. You now have the top half of the hair pulled back, while the bottom half flows freely.

    To make this style pop within the category of middle part hairstyles for kids, add a small twist. Before securing the ponytail, split the gathered section into two strands, twist them together, and then secure. This creates a rope twist effect. The middle part remains visible in the front, framing the child’s face beautifully. This style is ideal for wavy or curly hair textures because it showcases the natural curl pattern of the lower half while keeping the upper half controlled.

    5. Space Buns with a Clean Center Line

    Space buns are a fun, energetic style that children love, but they often end up looking messy. The secret to making space buns look intentional rather than chaotic is a strict middle part. Start by parting the hair directly down the center. Then, create a second part from ear to ear across the top of the head, dividing the hair into four quadrants: front left, front right, back left, back right. You will only use the front two quadrants for the buns.

    Gather the front left section and twist it into a tight coil, wrapping it around itself to form a bun at the top corner of the head. Secure with small bobby pins or an elastic. Repeat on the front right. The back sections can be left loose, braided, or gathered into a low ponytail. This version of middle part hairstyles for kids is particularly good for fine hair because the buns add artificial volume. For a more polished look, use a tiny bit of gel along the middle part line to keep the fringe and baby hairs smooth.

    6. The Sleek Middle Part Bun (Ballet Style)

    The classic ballet bun is the gold standard of polished middle part hairstyles for kids, ideal for recitals, weddings, or picture day. Achieving this look requires patience and a few tools: a rat-tail comb, a brush, gel, a hair net, and bobby pins. Begin with damp hair. Create a razor-sharp middle part. Brush all hair back smoothly into a high ponytail at the crown of the head. The middle part must remain visible; do not brush hair forward to hide it.

    Once the ponytail is secure, twist the length of the ponytail tightly and coil it around the elastic base to form a flat, round bun. Cover the bun with a hair net and pin the edges down with crisscrossed bobby pins. Finally, use a toothbrush or a small edge brush with a dab of gel to smooth down any baby hairs along the part line. The result is an extremely clean, professional style that can last for two days. The middle part here is crucial because it creates a symmetrical, elegant frame for the face that a side part cannot achieve.

    7. Two-Strand Twist Halo with Center Part

    For children with natural or textured hair, the two-strand twist is a protective style that can be shaped into a beautiful halo. After establishing the middle part, section the hair into two halves. On the left side, take a small section of hair from the front hairline and divide it into two strands. Twist these strands around each other, adding more hair as you move toward the back of the head, similar to a flat twist. Continue this flat twist along the hairline, following the curve of the head down toward the nape of the neck. Repeat on the right side.

    Once both twists reach the nape, you can cross them over each other and tuck the ends under to create a “halo” or “crown” effect. This is one of the most elegant middle part hairstyles for kids because it keeps all hair off the face and neck while allowing the middle part to remain a focal point. The style is also incredibly healthy for the hair, as it prevents tangling and retains moisture. You can leave the twists in for up to a week, simply refreshing the middle part with a little water and gel each morning.

    8. Middle Part with Side Cornrows

    You do not always have to braid the entire head. Sometimes, a few small cornrows on the sides are all you need to create a striking look that highlights the middle part. Begin by creating your standard center part from front to back. Then, on the left side, section off a small strip of hair along the hairline, running parallel to the middle part. Create a small, tight cornrow that starts at the forehead and ends at the ear. Secure with a small elastic. Repeat on the right side.

    Leave the rest of the hair loose, flowing down the back. This hybrid style is perfect for active kids who need the hair near their face controlled but want to keep length and movement. Within the world of middle part hairstyles for kids, this option is unique because it combines the precision of a clean part with the texture of braids. It works best on straight or slightly wavy hair. For a pop of color, weave a small piece of ribbon or colorful thread into the cornrows.

    9. The Low Twisted Ponytail

    This style offers a sophisticated, low-tension option for children with medium to long hair. Start with a wet or damp middle part to ensure maximum hold. Comb all hair downward to the nape of the neck. Divide the gathered hair into two equal sections, using the original middle part as a guide even at the back. Twist each section individually in the same direction (for example, both clockwise). Then, twist the two twisted sections around each other in the opposite direction. This creates a rope-like braid that is more secure than a regular ponytail.

    Secure the end of the twist with a soft elastic. This is one of the quickest middle part hairstyles for kids to execute once you have practiced the rope twist technique. It works well on second-day hair because the twisting motion hides any minor dirt or oil. The middle part keeps the front of the hair sleek, while the twisted ponytail adds interest to the back. For a dressier version, wrap a small section of hair from the ponytail around the elastic to hide it.

    10. The Middle Part with Beaded Ends

    Sometimes, the simplest style is the most effective. This final hairstyle is essentially the “wash and go” of middle part hairstyles for kids. After washing and conditioning the hair, apply a leave-in detangler. Using a wide-tooth comb, create a perfect middle part. Allow the hair to air dry or use a diffuser on low heat. Once dry, take small one-inch sections from the ends of the hair and thread them with colorful pony beads, wooden beads, or silicone beads.

    This style celebrates the child’s natural texture, whether it is pin-straight, coily, or anything in between. The middle part provides structure and visual symmetry, while the beads add a playful, personalized element. This is an excellent protective style for curly and coily hair because it discourages touching and playing with the ends, reducing breakage. To maintain the part, you can use a small amount of lightweight gel or aloe vera gel along the center line. Re-bead the ends as the hair grows or as beads fall off during play.

    How to Maintain a Perfect Middle Part All Day

    Creating these middle part hairstyles for kids is only half the battle; keeping the part intact is the other half. Here are three professional tips. First, always part the hair when it is damp or wet. Dry hair has more friction and memory, making it harder to train the strands to lie in a new direction. Second, invest in a high-quality rat-tail comb with metal teeth. Plastic combs can create static and uneven lines. Third, use a tiny amount of product along the part line. A water-based gel, a drop of argan oil, or a smoothing balm will weigh down flyaways without looking greasy. Finally, for children with very active lifestyles, consider “setting” the part at night by putting their hair in two loose braids that follow the center line. This reinforces the part while they sleep.

    Conclusion

    Mastering middle part hairstyles for kids is a game-changing skill for any parent or caregiver. Not only do these styles promote healthier hair by reducing tension and encouraging even oil distribution, but they also offer an incredibly versatile aesthetic that works for any occasion, from casual school days to formal events. The ten styles presented here range from beginner-friendly options like the classic barrette style to more advanced braided looks. Each one places the middle part at the forefront, proving that symmetry and simplicity can be both beautiful and functional.

    By incorporating these hairstyles into your weekly routine, you will save time in the morning, reduce hair-related tantrums, and give your child a neat, confident appearance. Remember to practice patience when first creating the part, use the right tools, and always prioritize your child’s comfort. With a little practice, you will be able to execute any of these ten middle part hairstyles for kids in under fifteen minutes. Start with the simplest style today and work your way up to the more complex braids. Your child’s hair will thank you for the care and attention to detail.

  • 15 Elegant Formal Hairstyles for Thin Hair Over 50 That Add Volume and Sophistication

    15 Elegant Formal Hairstyles for Thin Hair Over 50 That Add Volume and Sophistication

    Finding the right formal hairstyles for thin hair over 50 can feel challenging, especially when you want a style that looks elegant while also creating the appearance of fuller hair. The good news is that thin hair can be incredibly beautiful when paired with the right cut, texture, and styling techniques.

    As we age, hair often becomes finer and less dense. However, that does not mean you have to give up on glamorous updos, polished bobs, or sophisticated formal looks. Many of the most flattering formal hairstyles for thin hair over 50 are designed specifically to create movement, lift, and volume while maintaining a refined appearance.

    Whether you are attending a wedding, gala, anniversary celebration, church event, or special dinner, these hairstyles can help you look polished and confident without requiring thick hair.

    Why Formal Hairstyles Matter for Thin Hair Over 50

    Formal styling is not just about appearance. The right hairstyle can frame your face beautifully, highlight your best features, and make your hair appear much thicker than it actually is.

    For women over 50 with fine or thinning hair, the key goals are:

    • Creating volume at the crown
    • Adding texture and movement
    • Avoiding heavy styles that flatten the hair
    • Choosing shapes that complement mature facial features
    • Maintaining elegance and sophistication

    The following hairstyles achieve all of these goals while remaining timeless and flattering.

    1. Soft Layered Bob with Side Sweep

    A layered bob remains one of the most flattering formal hairstyles for thin hair over 50.

    The layers create natural movement while the side-swept front section adds softness around the face. For formal events, the bob can be styled with loose volume and a smooth finish.

    This hairstyle works beautifully because the layers prevent hair from looking flat and lifeless.

    Why It Works

    • Creates instant fullness
    • Easy to maintain
    • Frames the face beautifully
    • Suitable for nearly every face shape

    check out for this; Hairstyles for Thin Fine Hair Over 50: 25 Flattering Styles That Add Volume and Confidence

    2. Elegant Low Chignon

    The low chignon is a timeless formal hairstyle that never goes out of style.

    Positioned at the nape of the neck, this sophisticated bun creates a graceful silhouette. Women with thin hair can gently tease the crown before gathering the hair into a soft chignon.

    Adding a few face-framing strands helps create a romantic finish.

    Why It Works

    • Looks sophisticated and refined
    • Creates the illusion of thicker hair
    • Perfect for weddings and evening events
    • Suitable for medium and long hair

    3. Textured Pixie with Volume

    A pixie cut can be surprisingly glamorous for formal occasions.

    Adding texture through the crown creates lift and dimension. Styling products can help achieve a fuller appearance while maintaining a lightweight feel.

    This look proves that short hair can be every bit as elegant as longer styles.

    Why It Works

    • Modern and stylish
    • Adds height at the crown
    • Makes thin hair appear fuller
    • Easy to style

    4. Side-Parted Curled Bob

    A deep side part instantly adds volume and drama.

    Combined with soft curls, this hairstyle creates the appearance of density throughout the hair. The curls add movement while the side part provides natural lift.

    It is ideal for formal dinners, weddings, and holiday celebrations.

    Why It Works

    • Enhances volume naturally
    • Creates a youthful appearance
    • Works well with fine hair
    • Elegant yet effortless

    5. Crown-Boosted Updo

    This formal updo focuses on creating height at the crown.

    Hair is gently teased before being pinned into a soft, elegant shape. The extra lift helps thin hair appear much fuller while maintaining a sophisticated look.

    This hairstyle pairs beautifully with formal gowns and statement jewelry.

    Why It Works

    • Creates fullness at the top
    • Lengthens the face
    • Looks luxurious and polished
    • Ideal for special occasions

    6. Loose French Twist

    The French twist has been a symbol of elegance for decades.

    For women with thin hair, a loose version works best. The relaxed structure creates the illusion of volume while keeping the style modern and soft.

    The result is classic sophistication without looking overly stiff.

    Why It Works

    • Timeless formal style
    • Adds visual thickness
    • Perfect for mature women
    • Suitable for evening events

    7. Wavy Shoulder-Length Style

    Soft waves are one of the easiest ways to make thin hair appear fuller.

    A shoulder-length cut styled with gentle waves creates body and texture throughout the hair. The movement prevents the hair from lying flat against the scalp.

    This hairstyle balances elegance with a natural appearance.

    Why It Works

    • Creates fullness instantly
    • Softens facial features
    • Works for many occasions
    • Easy to achieve

    8. Half-Up Formal Hairstyle

    A half-up hairstyle offers the best of both worlds.

    The top section is gently lifted and secured while the remaining hair flows naturally. This creates height at the crown and gives the illusion of thicker hair.

    Adding soft curls enhances the overall volume.

    Why It Works

    • Adds lift and dimension
    • Comfortable to wear
    • Looks romantic and elegant
    • Suitable for medium-length hair

    9. Voluminous Layered Lob

    A long bob, or lob, is incredibly versatile.

    For formal occasions, soft layers and subtle curls can transform this everyday cut into a glamorous style. The layers help create movement while maintaining a polished finish.

    Why It Works

    • Modern and sophisticated
    • Adds body to fine hair
    • Easy to style
    • Flattering for most face shapes

    10. Soft Curled Updo

    A curled updo combines elegance with volume.

    Small curls are pinned strategically to create the appearance of thicker hair. The textured finish prevents the style from looking flat.

    This hairstyle is especially beautiful for weddings and formal celebrations.

    Why It Works

    • Creates maximum fullness
    • Romantic appearance
    • Long-lasting style
    • Perfect for special occasions

    11. Feathered Short Hairstyle

    Feathered layers add lightness and movement.

    For formal events, the layers can be styled away from the face to create a soft and sophisticated look. This technique helps thin hair appear fuller and more dynamic.

    Why It Works

    • Adds texture and volume
    • Easy to maintain
    • Youthful yet elegant
    • Suitable for fine hair

    12. Classic Side Bun

    The side bun offers a graceful alternative to traditional updos.

    Positioning the bun slightly to one side creates visual interest while giving the appearance of greater hair volume.

    This hairstyle pairs beautifully with formal dresses and statement earrings.

    Why It Works

    • Elegant and feminine
    • Creates fullness visually
    • Suitable for formal occasions
    • Easy to personalize

    13. Layered Blowout

    A professional blowout can completely transform thin hair.

    Layers are styled with lift and movement to create a full-bodied appearance. The polished finish makes this hairstyle ideal for upscale events.

    Why It Works

    • Maximum volume
    • Professional appearance
    • Enhances natural texture
    • Sophisticated finish

    14. Short Bob with Soft Waves

    A short bob becomes instantly formal when paired with gentle waves.

    The waves create width and movement while maintaining a polished look. This style works particularly well for women with naturally fine hair.

    Why It Works

    • Easy to style
    • Adds body and texture
    • Modern yet timeless
    • Great for mature women

    15. Romantic Swept-Back Hairstyle

    A swept-back hairstyle creates an elegant, red-carpet-inspired appearance.

    Hair is gently lifted away from the face and secured while maintaining soft volume throughout the crown. This style highlights facial features while creating the illusion of thicker hair.

    Why It Works

    • Sophisticated and graceful
    • Adds height and volume
    • Perfect for formal events
    • Highlights mature beauty

    Tips for Making Thin Hair Look Fuller for Formal Events

    The right styling techniques can dramatically improve the appearance of thin hair.

    Use lightweight volumizing products rather than heavy creams that can weigh hair down. Blow-dry the roots upward to create lift and consider using soft curls or waves to add body.

    A side part often creates more volume than a center part, and subtle teasing at the crown can provide extra fullness without looking dated.

    Hair accessories such as decorative clips, pearl pins, and elegant combs can also enhance formal hairstyles while drawing attention away from areas where the hair may appear thinner.

    Choosing the Best Formal Hairstyle for Your Face Shape

    Women with round faces often benefit from styles that add height at the crown. Those with square faces typically look beautiful with soft waves and face-framing layers.

    Oval faces can wear almost any of these formal hairstyles successfully, while heart-shaped faces often look stunning with side-swept styles and low buns.

    The key is choosing a hairstyle that balances your features while adding volume where it is needed most.

    Final Thoughts

    The best formal hairstyles for thin hair over 50 focus on creating volume, movement, and elegance without requiring thick hair. Whether you prefer a sophisticated chignon, a textured pixie, a layered bob, or a romantic updo, there are plenty of beautiful options that can help you feel confident and stylish.

    These hairstyles prove that thin hair can look just as glamorous as thick hair when paired with the right cut, texture, and styling techniques. With a little volume and thoughtful styling, your hair can become one of your most beautiful accessories for any formal occasion.

    Meta Description

    Discover the most elegant formal hairstyles for thin hair over 50. Explore 15 flattering styles that add volume, sophistication, and confidence for weddings, parties, and special occasions.

    Pinterest Description

    Looking for the best formal hairstyles for thin hair over 50? Discover 15 elegant hairstyles that add volume, texture, and sophistication. From classy chignons and stylish bobs to glamorous updos and soft waves, these flattering looks are perfect for weddings, parties, and special occasions. #HairstylesOver50 #ThinHair #FormalHairstyles #MatureWomen #HairInspiration #ElegantHairStyles

  • 17 Elegant Formal Hairstyles for Thin Hair That Create the Look of Fuller, More Beautiful Hair

    17 Elegant Formal Hairstyles for Thin Hair That Create the Look of Fuller, More Beautiful Hair

    Finding the perfect formal hairstyle can feel challenging when you have thin hair. Many formal looks seem designed for people with naturally thick, voluminous strands, leaving those with finer hair wondering how to achieve the same glamorous effect.

    The good news is that thin hair can look absolutely stunning in formal hairstyles. In fact, many elegant styles work even better with finer textures because they create a soft, sophisticated appearance that feels effortless and refined.

    The secret is choosing hairstyles that maximize volume, create visual fullness, and highlight your hair’s natural beauty rather than fighting against it. Whether you’re attending a wedding, prom, gala, business event, anniversary celebration, or formal dinner, the right hairstyle can completely transform your look.

    This guide explores the best formal hairstyles for thin hair, helping you find a style that adds elegance while creating the appearance of thicker, fuller locks.

    Why Formal Hairstyles for Thin Hair Require a Different Approach

    Thin hair has unique characteristics that influence styling choices. Unlike thick hair, it can become flat quickly and may struggle to hold elaborate styles without proper preparation.

    The best formal hairstyles for thin hair focus on:

    • Creating volume at the crown
    • Adding texture and movement
    • Using strategic layering
    • Incorporating curls or waves
    • Choosing lightweight updos
    • Enhancing natural fullness

    When these elements work together, thin hair can appear dramatically fuller while maintaining a polished, formal appearance.

    1. Soft Low Chignon

    The low chignon is a timeless formal hairstyle that never goes out of fashion.

    For thin hair, a softly textured chignon creates the illusion of greater density. Gentle teasing at the crown and loose face-framing pieces help build volume while maintaining elegance.

    This hairstyle works beautifully for weddings, evening receptions, and black-tie events.

    check out for; 12 Short Hairstyles for Thin Fine Hair.

    2. Voluminous Side-Swept Waves

    Side-swept waves instantly make thin hair appear fuller.

    The deep side part creates lift at the roots, while soft waves add body and dimension throughout the hair. Sweeping everything to one side concentrates volume, creating a glamorous red-carpet effect.

    This style pairs beautifully with one-shoulder dresses and statement earrings.

    3. Textured French Twist

    A modern French twist offers sophistication without requiring thick hair.

    Instead of creating a sleek twist, add texture and looseness to build volume. The slightly undone finish makes the hair appear fuller while maintaining a formal, polished look.

    It is an excellent choice for corporate events, weddings, and elegant evening occasions.

    4. Romantic Curled Updo

    Soft curls are one of the best ways to make thin hair appear thicker.

    A romantic curled updo combines multiple curled sections pinned loosely into an elegant shape. The curls naturally create texture and dimension, giving the hairstyle a fuller appearance.

    This style is especially popular for brides and bridesmaids.

    5. Crown Braid Updo

    Braids can create impressive visual volume when styled correctly.

    A crown braid wraps around the head while gently pulling sections outward to create a fuller effect. This technique makes the braid appear thicker than it actually is.

    The result is a graceful, romantic hairstyle suitable for formal celebrations and outdoor weddings.

    6. Sleek Low Bun with Volume at the Crown

    A low bun remains one of the most versatile formal hairstyles for thin hair.

    The key is adding lift at the crown before securing the bun. This small detail transforms the overall look, preventing the hairstyle from appearing flat.

    The style feels sophisticated, clean, and timeless.

    7. Half-Up Formal Hairstyle

    Half-up styles offer the perfect balance between an updo and flowing hair.

    Adding gentle curls to the lower sections creates movement and fullness, while the lifted crown adds height and structure.

    This hairstyle works beautifully for formal dances, engagement parties, and evening celebrations.

    8. Hollywood Glamour Waves

    Classic Hollywood waves are known for their luxurious appearance.

    The structured wave pattern creates visual thickness and shine. Thin hair benefits greatly from the smooth curves and controlled volume associated with this iconic style.

    Pair this hairstyle with elegant gowns and vintage-inspired accessories for maximum impact.

    9. Twisted Low Updo

    Twists create natural texture that helps thin hair appear more substantial.

    Multiple twisted sections gathered into a low updo provide dimension without requiring excessive hair density. The finished look feels sophisticated yet approachable.

    This style is suitable for weddings, cocktail parties, and formal dinners.

    10. Elegant Ponytail with Volume

    A formal ponytail can be surprisingly glamorous.

    Adding volume at the roots and incorporating soft curls throughout the ponytail creates a fuller, more luxurious appearance. Wrapping a section of hair around the elastic elevates the style instantly.

    This hairstyle offers elegance while remaining comfortable throughout long events.

    11. Loose Braided Bun

    Combining braids and buns creates a hairstyle rich in texture.

    The braid adds visual interest, while the loose bun contributes softness and volume. Pulling the braid slightly apart makes it appear thicker and more dramatic.

    This style works particularly well for garden weddings and romantic celebrations.

    12. Bouffant-Inspired Updo

    A bouffant-inspired hairstyle creates significant volume at the crown.

    Modern versions avoid excessive height while still delivering impressive fullness. The added lift draws attention upward and helps thin hair appear much thicker.

    This elegant style is perfect for formal galas and evening events.

    13. Messy Elegant Bun

    The term “messy” can be misleading because this hairstyle is actually carefully styled.

    Strategic looseness creates texture, movement, and volume throughout the hair. The slightly relaxed finish makes thin hair appear naturally fuller.

    This style strikes the perfect balance between sophistication and modern elegance.

    14. Side Bun with Soft Tendrils

    A side bun adds instant romance to any formal look.

    Positioning the bun slightly off-center creates visual interest, while soft tendrils around the face enhance softness and movement.

    This hairstyle complements a wide variety of face shapes and formal outfits.

    15. Pinned Back Curls

    Curls naturally create body, making them ideal for thin hair.

    Pinning back selected sections while allowing the remaining curls to cascade creates a balanced look that feels both formal and youthful.

    This hairstyle works well for proms, weddings, and evening parties.

    16. Waterfall Braid with Waves

    A waterfall braid introduces intricate detail without overwhelming thin hair.

    When paired with soft waves, the braid creates depth and dimension that make the hair appear fuller. The style feels feminine, elegant, and sophisticated.

    It is particularly beautiful for outdoor ceremonies and special celebrations.

    17. Classic Bridal-Inspired Updo

    Even if you’re not a bride, bridal-inspired hairstyles offer timeless elegance.

    These updos focus on soft volume, carefully placed curls, and refined structure. Accessories such as pearl pins, delicate combs, or subtle floral pieces enhance the overall appearance.

    The result is a polished formal hairstyle that photographs beautifully from every angle.

    Styling Tips to Make Thin Hair Look Fuller

    The right styling techniques can dramatically improve the appearance of thin hair during formal events.

    Start with Volumizing Products

    Use lightweight volumizing mousse or root-lifting spray before blow-drying. These products help create a foundation of fullness without weighing the hair down.

    Blow-Dry for Maximum Lift

    Drying hair upside down or using a round brush can create significant volume at the roots.

    Use Texture Wisely

    Texture sprays provide grip and body, helping formal hairstyles maintain their shape throughout the event.

    Add Soft Curls

    Even subtle curls increase the appearance of thickness and movement.

    Avoid Heavy Products

    Excessively heavy creams and oils can flatten thin hair and reduce volume.

    Consider Hair Accessories

    Decorative clips, pearl pins, jeweled combs, and elegant headbands can enhance formal hairstyles while drawing attention to the overall look rather than hair density.

    Choosing the Right Formal Hairstyle for Your Face Shape

    Round Face

    Styles with height at the crown help elongate the face. Voluminous updos and side-swept hairstyles work particularly well.

    Oval Face

    Most formal hairstyles complement an oval face shape. This allows greater flexibility in choosing styles.

    Square Face

    Soft curls, loose tendrils, and romantic updos help soften angular features.

    Heart-Shaped Face

    Low buns and side-swept styles balance proportions beautifully.

    Long Face

    Hairstyles with width rather than excessive height create a more balanced appearance.

    Common Mistakes to Avoid

    Many people with thin hair unintentionally choose styles that emphasize rather than disguise their hair’s finer texture.

    Avoid:

    • Extremely tight hairstyles
    • Heavy styling products
    • Overly sleek finishes
    • Flat center parts without volume
    • Overcomplicated updos
    • Excessive teasing that damages hair

    Instead, focus on softness, texture, and strategic volume.

    Final Thoughts

    Choosing the right formal hairstyles for thin hair can make a remarkable difference in both appearance and confidence. Thin hair has its own unique beauty, and with the right styling approach, it can look elegant, sophisticated, and surprisingly voluminous.

    Whether you prefer a classic chignon, romantic curls, glamorous waves, or a modern textured updo, there are countless options that flatter thin hair while creating the illusion of fullness.

    The most successful formal hairstyles for thin hair combine volume, movement, and softness to create a polished look that feels effortless. By selecting styles that work with your hair rather than against it, you can enjoy a beautiful, confidence-boosting hairstyle for any special occasion.

  • 15 Stunning Wedding Hairstyles for Black Women That Will Turn Heads on Your Big Day

    15 Stunning Wedding Hairstyles for Black Women That Will Turn Heads on Your Big Day

    Your wedding day is one of the most important moments of your life, and every detail matters, especially your hair. The right hairstyle can complement your dress, highlight your features, and make you feel confident as you walk down the aisle. Fortunately, there are countless beautiful wedding hairstyles for Black women that celebrate natural texture, protective styling, elegance, and personal style.

    From classic updos to glamorous curls and braided masterpieces, Black women have endless options when it comes to bridal hair. Whether you’re planning a traditional ceremony, a beach wedding, a garden celebration, or a modern city event, there’s a perfect look waiting for you.

    This guide explores 15 gorgeous wedding hairstyles for Black women that combine timeless beauty with today’s bridal trends.

    Why Choosing the Right Bridal Hairstyle Matters

    Your hairstyle plays a major role in your overall bridal look. It should complement your wedding gown, veil, accessories, and makeup while staying comfortable throughout the day.

    When selecting wedding hairstyles for Black women, consider:

    Your natural hair texture

    The wedding venue and weather

    Your dress neckline

    Whether you’ll wear a veil

    Your personal style

    Hair length and volume

    The best bridal hairstyle is one that makes you feel beautiful while reflecting who you are.

    you will love this; Trending Wedding Hairstyles for Women That Are Defining Bridal Beauty in 2026

    1. Classic Low Chignon

    The low chignon remains one of the most elegant wedding hairstyles for Black women. This timeless updo sits neatly at the nape of the neck and creates a sophisticated bridal appearance.

    A low chignon pairs beautifully with lace gowns, cathedral veils, and pearl accessories. The style keeps hair secure all day while highlighting your facial features and neckline.

    This hairstyle works exceptionally well on relaxed hair, silk-pressed natural hair, and extensions.

    2. Natural Curly Updo

    pic by; n.hairmajestyy

    Natural curls deserve the spotlight on your wedding day. A curly updo allows you to showcase your texture while creating an elegant bridal silhouette.

    The curls are pinned upward to create volume and dimension while maintaining a soft, romantic appearance. Fresh flowers, jeweled pins, or delicate combs can enhance the look even further.

    This is one of the most popular wedding hairstyles for Black women who want to celebrate their natural beauty.

    3. Braided Crown

    A braided crown creates a regal appearance that feels fit for a queen. The braid wraps around the head like a halo, producing a romantic and graceful bridal style.

    This hairstyle offers excellent durability and can withstand long ceremonies, outdoor weddings, and hours of dancing.

    Bridal crowns, decorative pins, and small flowers blend beautifully with this hairstyle.

    4. Glamorous Hollywood Waves

    Hollywood waves bring vintage glamour to modern weddings. The smooth, sculpted waves create a luxurious appearance that photographs beautifully from every angle.

    This style is ideal for brides seeking old-Hollywood elegance while maintaining a contemporary feel.

    Hollywood waves pair especially well with strapless gowns and dramatic bridal makeup.

    5. High Bun with Accessories

    A sleek high bun is a favorite among brides who want a polished and sophisticated look.

    The height creates an elongating effect that flatters many face shapes. Adding crystal hairpieces, pearl pins, or a sparkling tiara transforms the bun into a statement bridal hairstyle.

    Among wedding hairstyles for Black women, this option combines simplicity with undeniable elegance.

    6. Fulani Braids Bridal Style

    image by;@michelle_km_ismail

    Fulani braids have become increasingly popular for weddings due to their beauty and cultural significance.

    This style features detailed braiding patterns that can be customized with beads, gold cuffs, pearls, or bridal accessories.

    The intricate design creates a memorable bridal look while offering a protective style that remains flawless throughout the celebration.

    7. Half-Up Half-Down Curls

    The half-up half-down style offers the best of both worlds.

    The upper section is pinned away from the face while cascading curls flow down the back. This creates movement, volume, and a soft romantic appearance.

    Brides who want to wear a veil often find this hairstyle particularly practical because it provides a secure foundation for accessories.

    8. Side-Swept Curls

    Side-swept curls create dramatic elegance and timeless romance.

    The curls are gathered over one shoulder, allowing your neckline and jewelry to shine. This style works beautifully with both natural curls and curled extensions.

    It remains one of the most photographed wedding hairstyles for Black women because of its flattering silhouette.

    9. Sleek Ponytail Bridal Look

    Modern brides continue embracing sleek ponytails as a chic wedding option.

    A polished high or low ponytail creates a contemporary appearance while maintaining bridal sophistication.

    Adding hair wraps, jeweled accessories, or soft curls at the ends elevates the look and makes it wedding-ready.

    10. Textured Afro Bridal Style

    A beautifully shaped afro can create a breathtaking bridal statement.

    Instead of hiding natural texture, this hairstyle celebrates it. The afro can be enhanced with decorative combs, floral accents, or crystal accessories.

    For brides who embrace natural hair, this is among the most empowering wedding hairstyles for Black women.

    11. Twisted Updo

    Twists create a refined and elegant bridal hairstyle that offers both texture and structure.

    The twists can be arranged into intricate patterns that add visual interest and dimension. This style works particularly well for natural hair and protective styling.

    The result is sophisticated, secure, and perfect for long wedding celebrations.

    12. Braided Low Bun

    Combining braids with a low bun creates a unique bridal hairstyle that blends tradition and modern elegance.

    The braided details add texture while the bun provides a polished finish. This hairstyle looks stunning with veils and bridal headpieces.

    It is also highly practical because it stays neat throughout the day.

    13. Waterfall Curls

    Waterfall curls create a luxurious bridal appearance with soft, flowing movement.

    The cascading curls add volume and romance while maintaining an effortless feel. This hairstyle works beautifully with long hair or extensions.

    Brides seeking a glamorous yet feminine look often gravitate toward waterfall curls.

    14. Locs Bridal Updo

    Brides with locs have endless styling possibilities for their wedding day.

    A loc updo can be sculpted into elegant shapes while showcasing the beauty of mature locs. Decorative pins, pearls, and floral accents can enhance the style further.

    This hairstyle demonstrates how versatile and sophisticated locs can be in bridal fashion.

    15. Side-Part Curly Bob

    Short-haired brides can achieve incredible elegance with a side-part curly bob.

    The side part creates volume while the curls add softness and sophistication. This hairstyle frames the face beautifully and pairs well with statement earrings.

    It proves that wedding hairstyles for Black women do not require long hair to make a lasting impression.

    you also might like; 25 Elegant Wedding Hairstyles for Older Women That Feel Timeless and Beautiful

    How to Choose the Perfect Wedding Hairstyle

    Selecting your bridal hairstyle should involve more than simply following trends. Consider scheduling a hair trial several weeks before the wedding to test different looks.

    Think about how your hairstyle will complement your veil, accessories, and gown. Weather conditions are also important. Outdoor summer weddings may require more secure styles, while indoor ceremonies offer greater flexibility.

    Most importantly, choose a hairstyle that reflects your personality and makes you feel confident.

    Bridal Hair Care Tips Before the Wedding

    Healthy hair creates the best foundation for any bridal style.

    Start a deep-conditioning routine several months before the wedding. Trim split ends regularly and avoid excessive heat damage.

    Protective styles can help maintain length and moisture leading up to the big day. It’s also important to schedule your final hair appointment with a trusted stylist who understands your desired bridal look.

    Preparation ensures your chosen hairstyle looks flawless in person and in photographs.

    Final Thoughts

    The beauty of wedding hairstyles for Black women lies in their incredible versatility. Whether you prefer elegant updos, natural curls, intricate braids, glamorous waves, or protective styles, there is a bridal hairstyle perfectly suited to your vision.

    Your wedding hairstyle should celebrate your individuality, enhance your confidence, and help create unforgettable memories. With these 15 stunning options, you’ll be well on your way to finding the perfect look for one of the most special days of your life.

    The most beautiful bridal hairstyle is ultimately the one that makes you feel radiant, confident, and ready to say “I do.”