Category: medium hairstyles

  • The Goldilocks Zone: Mastering Medium Hairstyles for Thick Hair

    The Goldilocks Zone: Mastering Medium Hairstyles for Thick Hair

    12 Game‑Changing Cuts for Your Luscious Mane

    For those blessed with thick hair, the struggle is real. You have volume for days, but also weight that can give you a tension headache by noon. Long hair can turn into a heavy, shapeless curtain, while short crops often require aggressive thinning that ruins your natural texture. And let’s be honest – thick hair takes forever to dry, eats up product like a sponge, and has a mind of its own in humidity.

    Enter the Goldilocks zone: medium length.

    Ranging from the chin to a few inches past the shoulders, medium length is the perfect compromise. It’s long enough to weigh down the puffiness, but short enough to prevent the dreaded “pyramid head” triangle effect. It’s the sweet spot where thick hair finally becomes an asset, not a burden.

    If you are ready to tame the mane without sacrificing the drama, here are 12 of the best medium‑length hairstyles for thick hair – each one explained with why it works, how to ask your stylist for it, and exactly how to style it at home.


    The Cuts

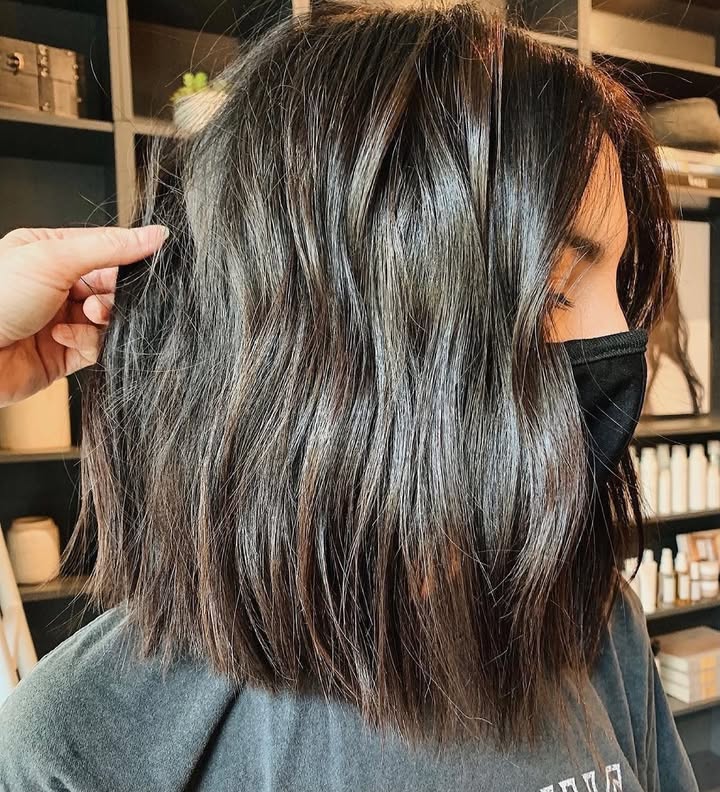
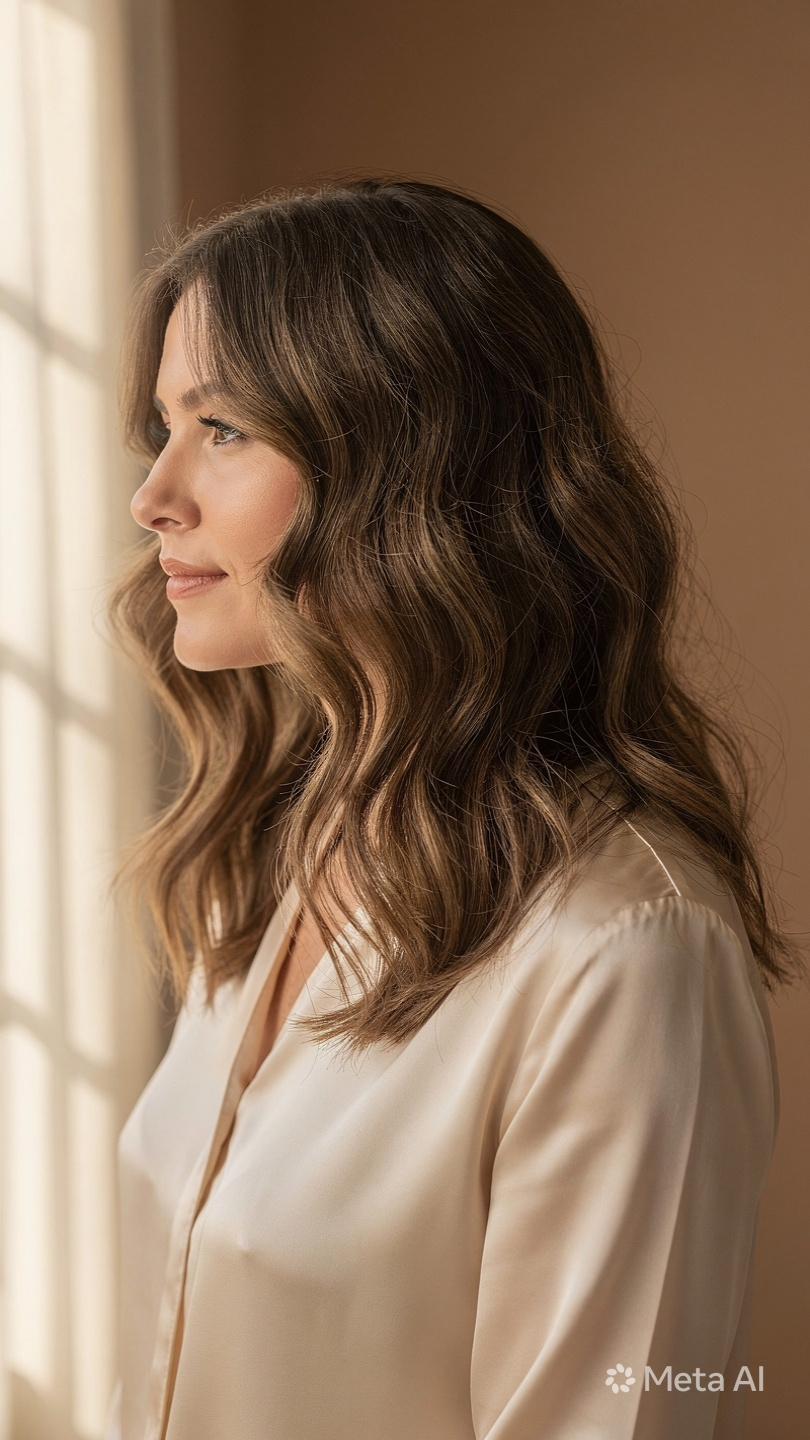
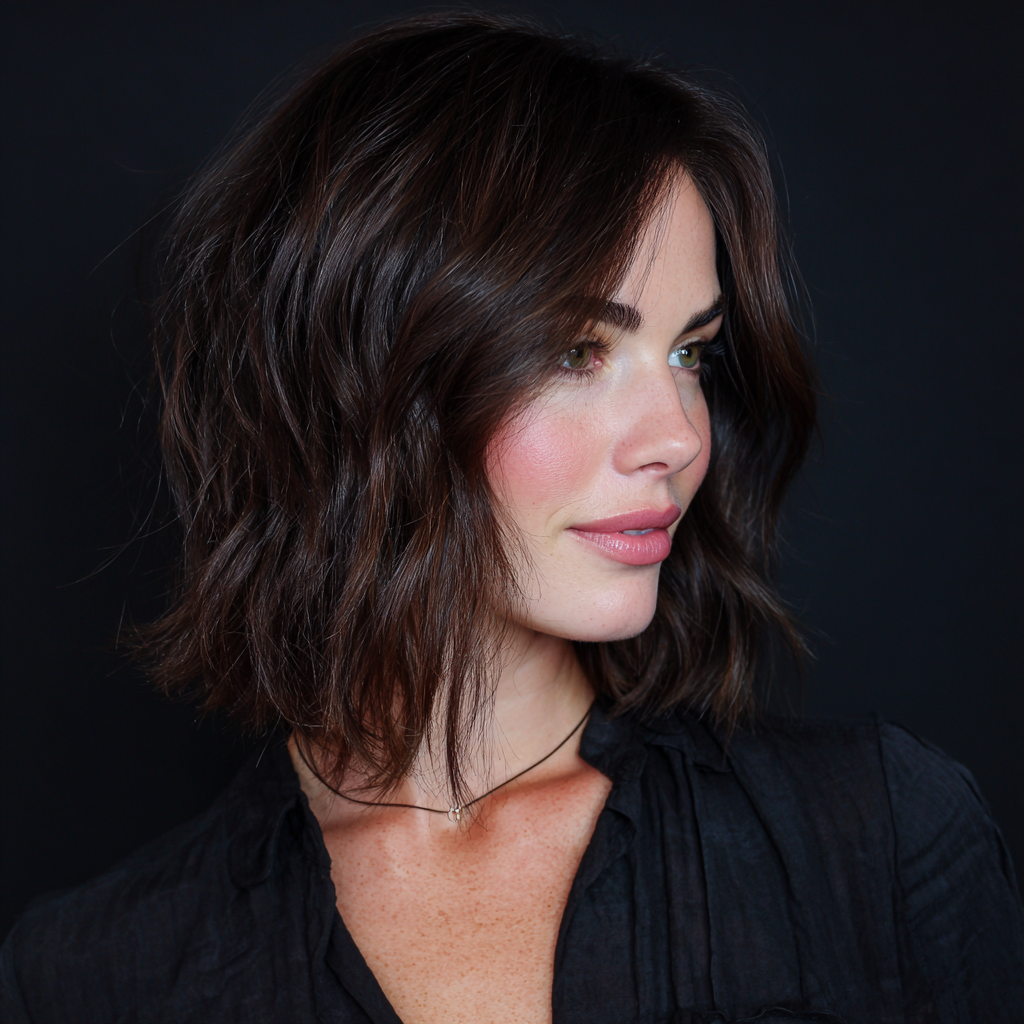
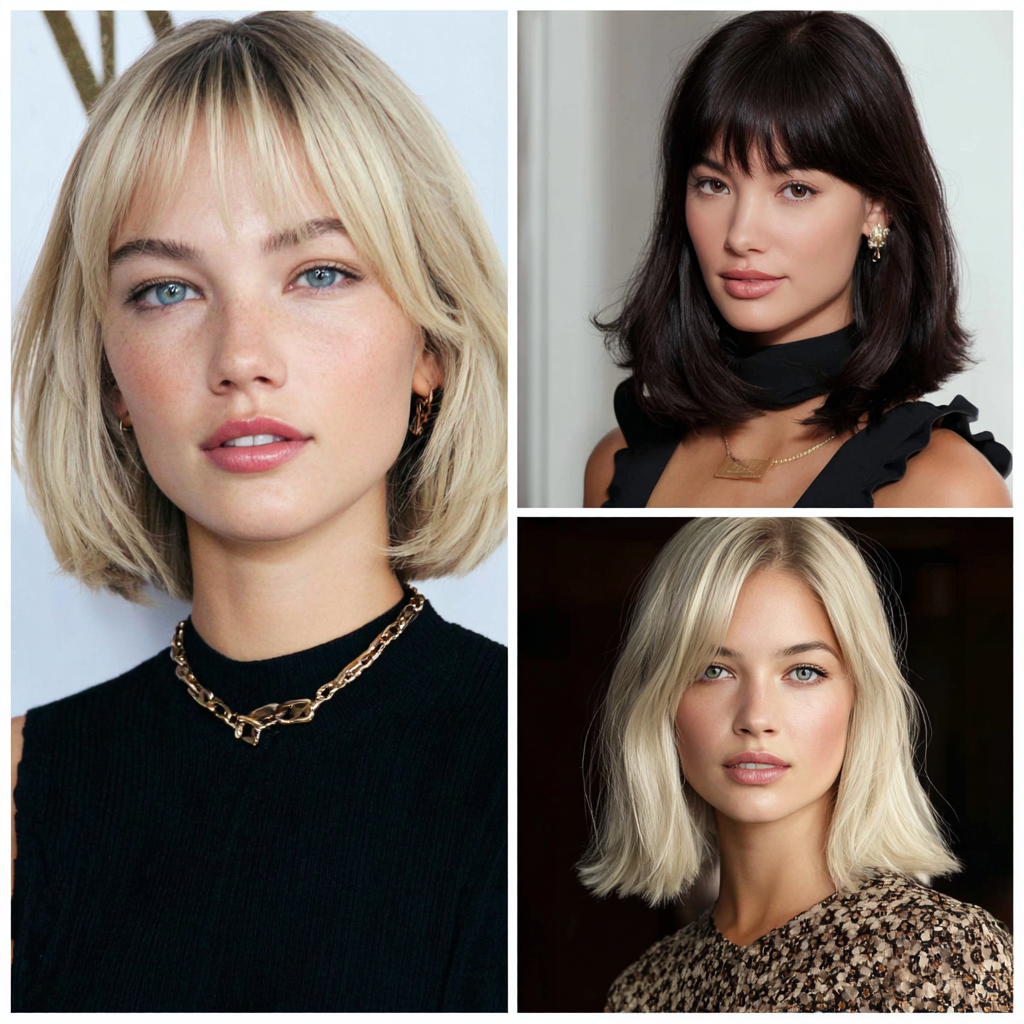
    1. The Textured “Lob” (Long Bob)

    The lob is the undisputed champion for thick‑haired individuals. By ending the cut at the collarbone – not the armpit, not the chin – you remove the heaviness that drags your face down while keeping enough length to pull it back.

    • Why it works: It removes the “brick‑like” weight from your ends, allowing your natural wave or curl to bounce up slightly. The lob also visually lifts the jawline, making it a favorite for round or square faces.
    • The Ask: Request internal layers (layers hidden inside the cut) and point‑cutting at the ends. Avoid blunt, shelf‑like ends at all costs. Ask your stylist to “chip into the ends vertically.”
    • Styling: A middle part with a little sea salt spray gives you that effortless “French girl” texture. For a sleeker look, use a paddle brush and blow‑dry straight, then tuck one side behind your ear.

    learn more on; Effortless Elegance: Medium Hairstyles for Busy Women in 2016.

    image by; rachelwstylist

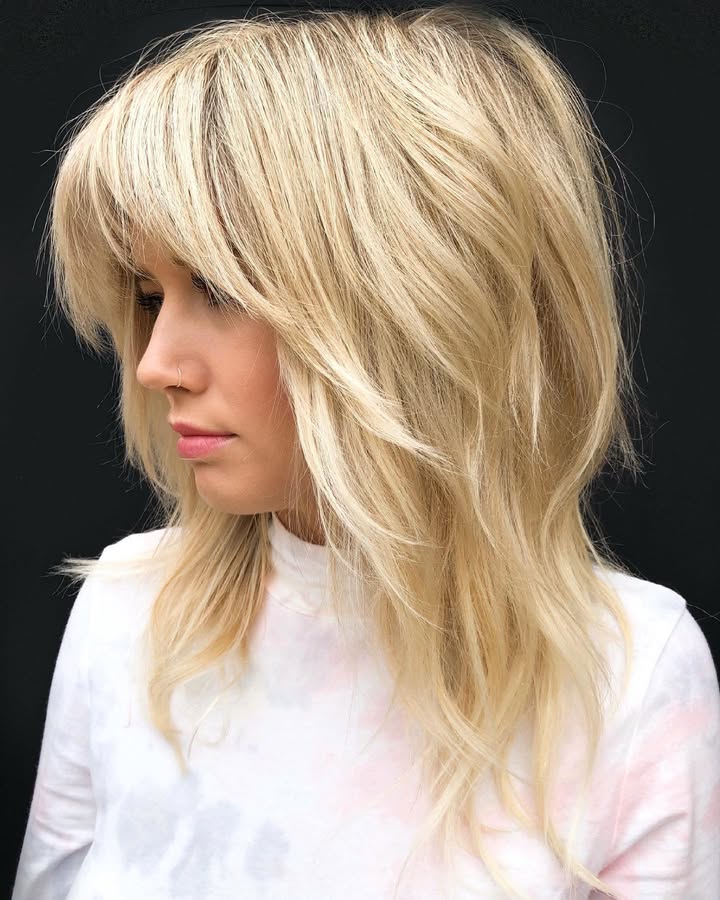
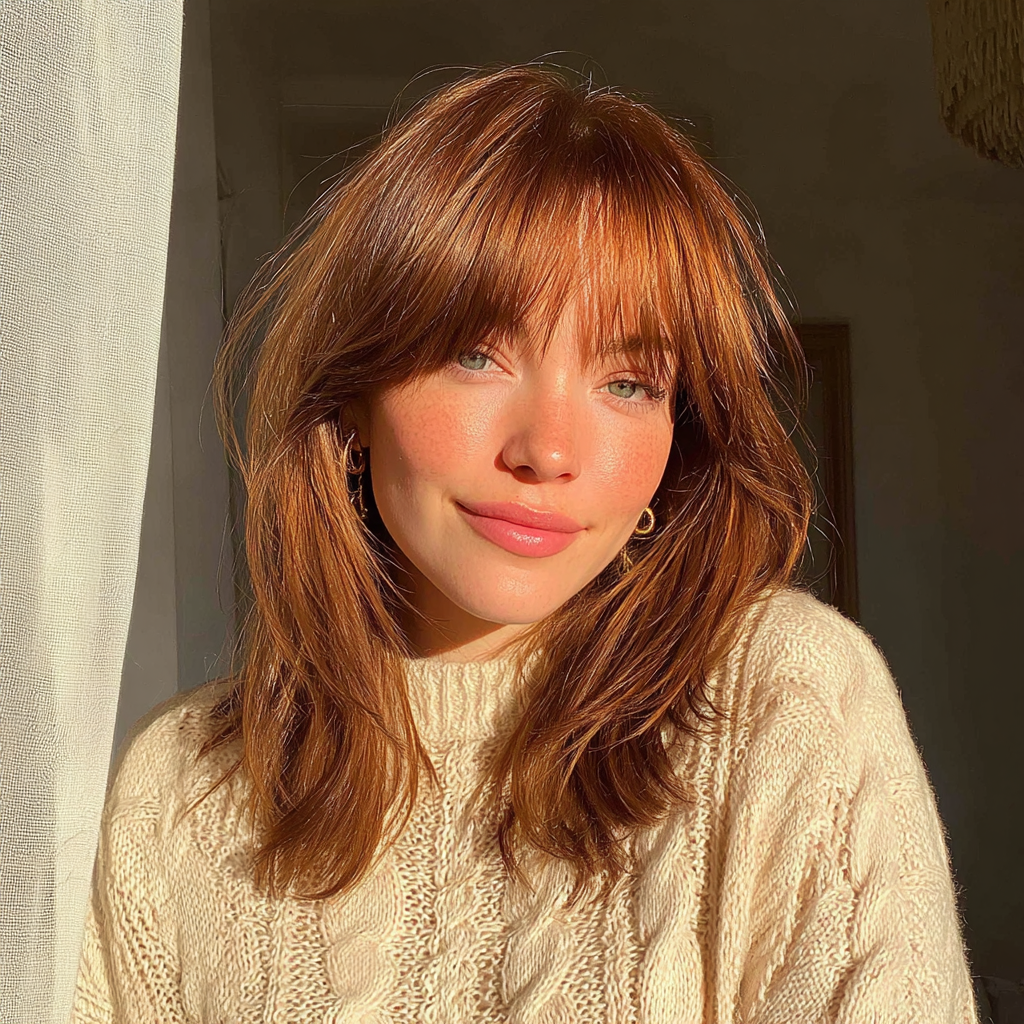
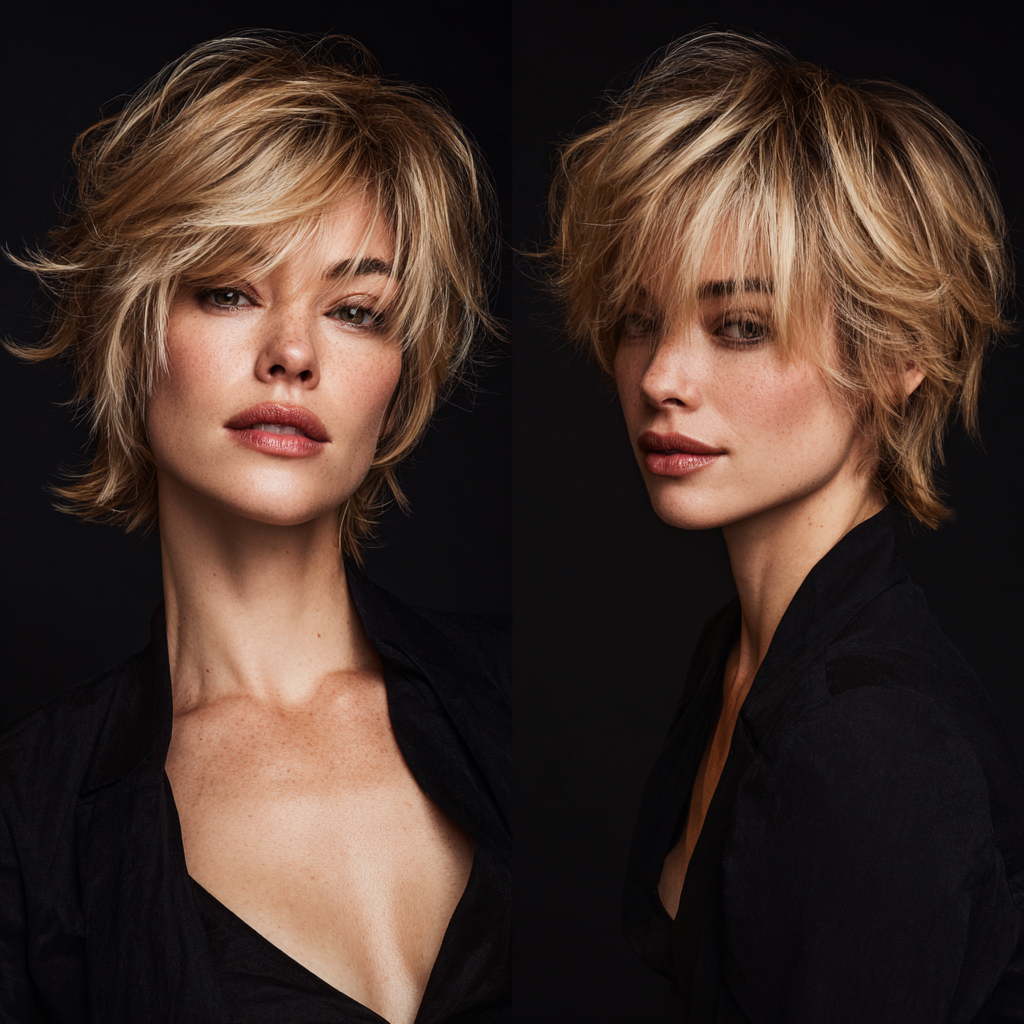
    2. The Modern Shag with Curtain Bangs

    The shag is a rebellion against slick, flat hair – which means it is a love letter to thick hair. This 70s revival has been updated for the 2020s with softer edges and more intentional disconnection.

    • Why it works: Thick hair holds the choppy, disconnected layers of a shag perfectly without falling flat. The layers remove bulk from the interior of the hair, making it lighter, airier, and full of rock‑and‑roll attitude.
    • The Ask: Look for a stylist who specializes in “razor cutting.” A razor removes weight better than shears, especially on dense hair. Pair it with curtain bangs that sweep to the side – they should hit just below your brow bone.
    • Styling: Rough dry your hair upside down. Use a texture spray or a dry pomade to piece out the ends. The messier, the better. For second‑day hair, sprinkle a little dry shampoo at the roots and shake it out.
    pic by; dolledby.rara

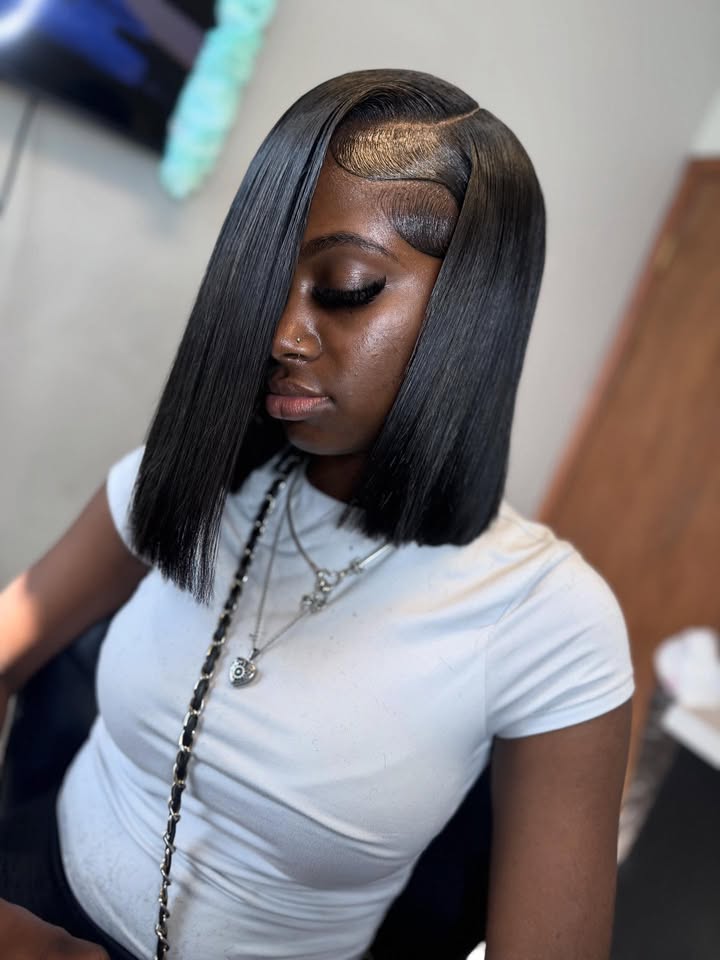
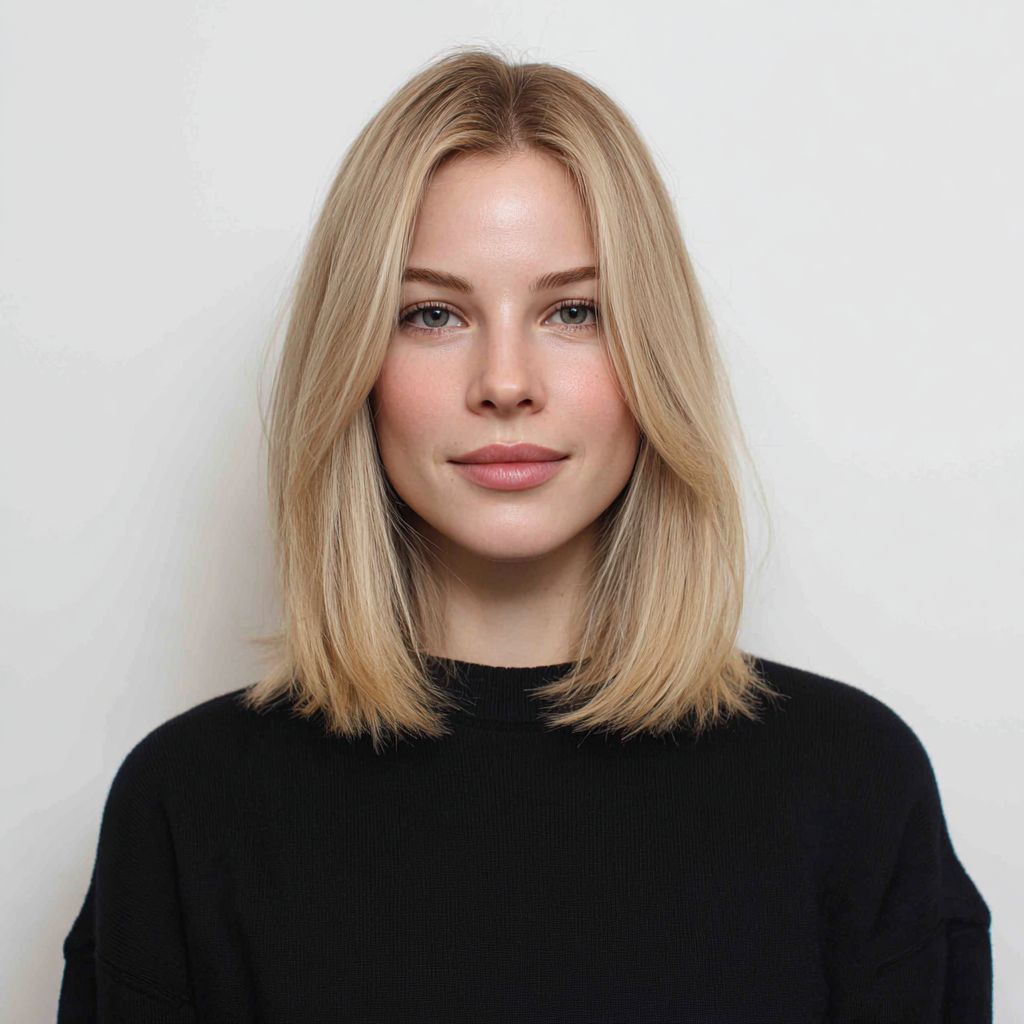
    3. The Blunt Cut (With a Secret Weight‑Removal Trick)

    Wait – blunt cuts usually make thick hair look like a helmet, right? Not if you hide the layers. This is the ultimate “expensive” look for those who want polish without the pyramid.

    • Why it works: A blunt perimeter gives you that chic, glossy, “Rich Mom” vibe, but you need “invisible under‑cutting” or “weight removal” on the interior. The outline stays sharp while the inside breathes.
    • The Ask: Tell your stylist: “I want the outline to look solid and blunt, but please remove the bulk from the underneath sections so it doesn’t poof out.” This is often done with slide‑cutting or a special thinning shear that removes weight only from the mid‑lengths.
    • Styling: This cut was made for air‑drying. Apply a smoothing cream (Oribe, Bumble & Bumble, or even a drop of argan oil) and let it dry naturally. The blunt ends will keep it looking polished even if the interior has a little wave.

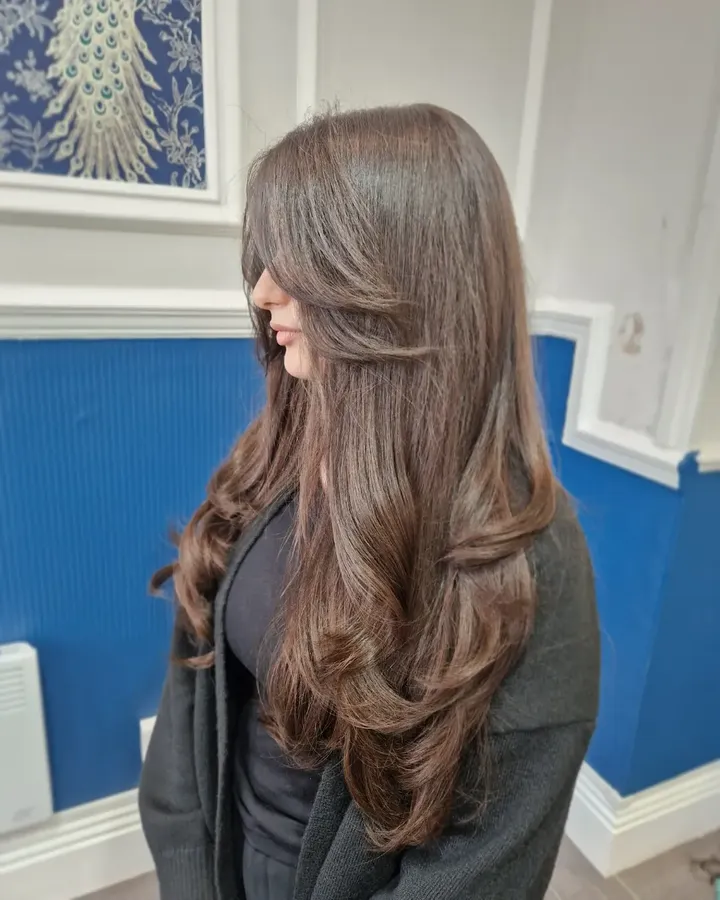
    4. The Butterfly Cut (Viral TikTok Sensation)

    Viral on TikTok for a reason, this cut mimics the wings of a butterfly – shorter, face‑framing layers on top, longer layers in the back. When you move your head, the layers “flutter.”

    • Why it works: It creates “swing” and movement. Thick hair usually stays static when you turn your head; the butterfly cut changes that completely. It also adds incredible volume at the crown without extra product.
    • The Ask: This requires a “round layer” technique where the top layers (around your ears) are significantly shorter than the bottom (which stays around the collarbone). Ask for “long layers with a lot of lift at the crown.”
    • Styling: Use a round brush to blow out the ends away from your face. You will get massive volume at the crown but light, bouncy ends. Finish with a flexible hold hairspray.
    image by; hairbykiarra

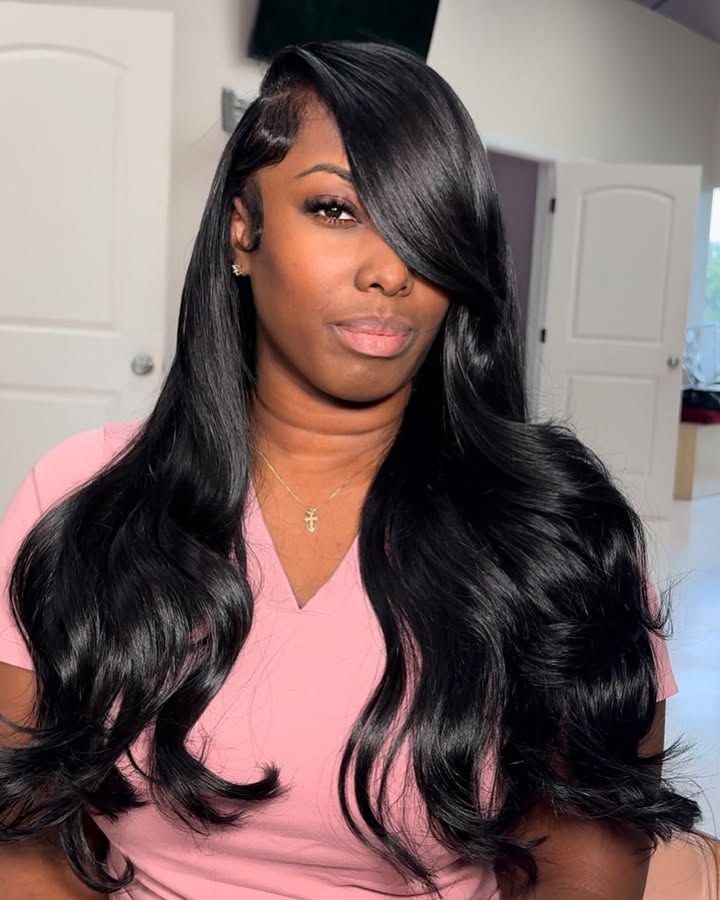
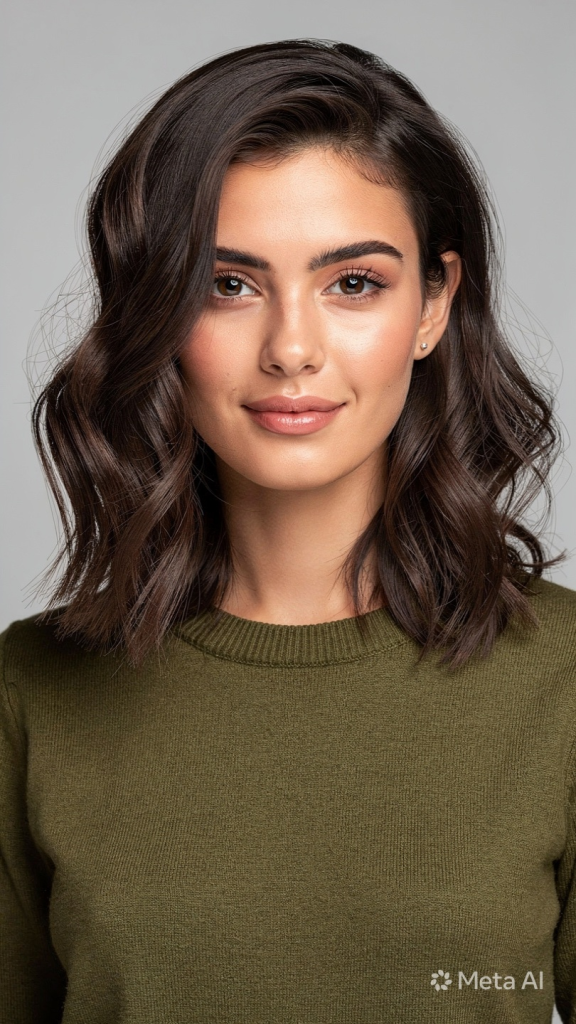
    5. The Deep Side‑Part with Voluminous Waves

    While middle parts are trendy, thick hair often looks heaviest when split down the middle. A deep side‑part is a styling trick, not a cut, but it transforms medium hair instantly.

    • Why it works: It breaks up symmetry. The hair falls across the forehead and to one side, creating an S‑curve that visually slims the face and removes bulk from the temples. It also hides any unevenness in your natural part.
    • The Ask: Keep your length at “shoulder grazing.” Ask for slight tapering around the ears to prevent the hair from flaring out like a mushroom. No need to change the overall shape; the part does the work.
    • Styling: Blow‑dry the hair across your head (to the opposite side of your intended part), then flip it back. This creates “lift” at the root that lasts for days. Add large, loose waves with a 1.5‑inch curling iron.

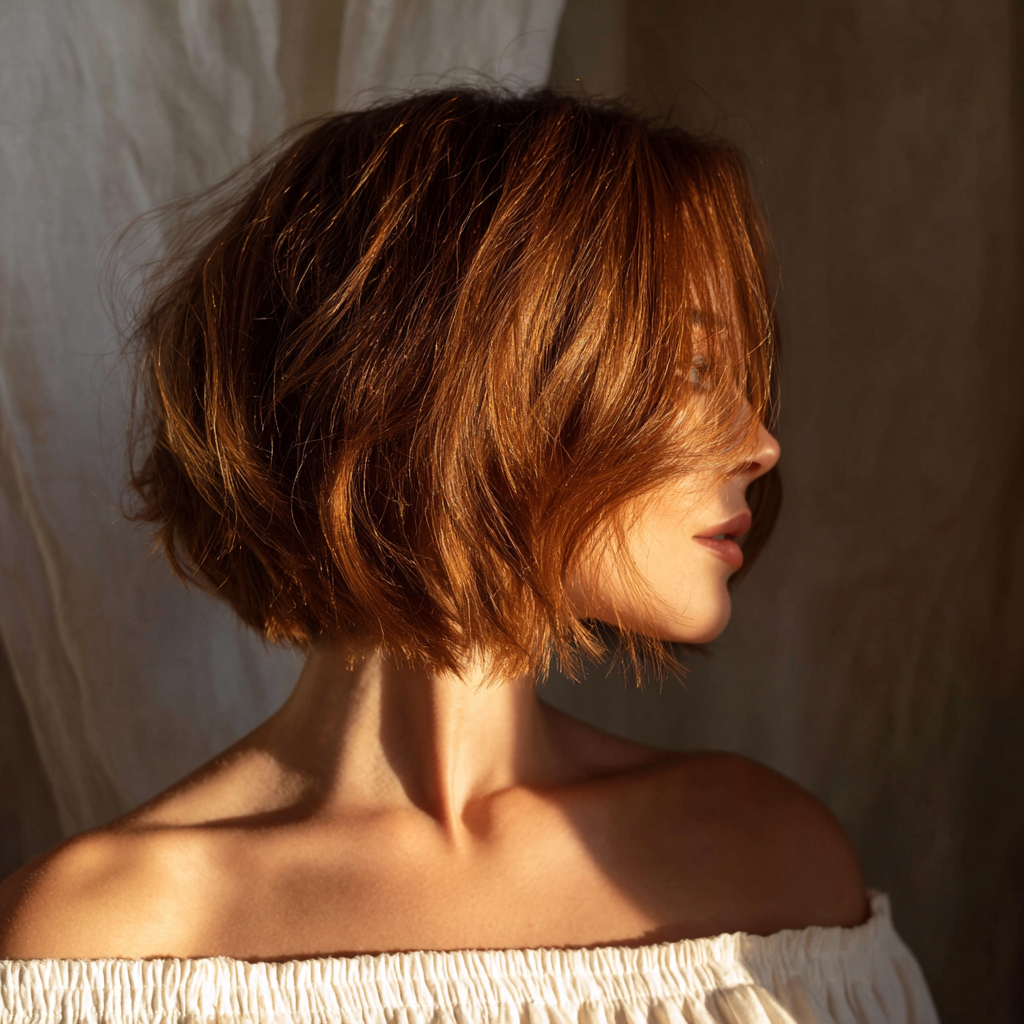
    6. The Italian “Mamma” Bob (Curtain of Volume)

    This style is beloved in Rome and Milan – a chin‑to‑shoulder bob with a soft, rounded silhouette that looks like a velvet curtain framing the face. It’s sophisticated and dramatic.

    • Why it works: Thick hair is the only hair that can truly hold this shape. The cut is slightly shorter in the back (a “stacked” nape) and longer in the front, creating a gentle slope that showcases your density.
    • The Ask: Request a “reverse graduated bob” – shorter at the nape, longer at the chin. Do not let your stylist use thinning shears on the top layer; keep the ends full and heavy.
    • Styling: Blow‑dry with a large round brush, rolling the ends under. The result is a shiny, bouncy curtain that moves as one unit. Use a heat protectant spray and a few drops of glossing serum.

    7. The Layered “Hush Cut”

    A relative of the shag, the hush cut is all about soft, whisper‑thin layers that remove weight without creating obvious step‑cuts. It’s the quiet, elegant sister of the rocker shag.

    • Why it works: On thick hair, traditional layering can leave “shelves” or holes. The hush cut uses a technique called “weaving” – taking very fine slices of hair and cutting them at a 45‑degree angle. The result is invisible movement.
    • The Ask: Say to your stylist: “I want a hush cut – soft, blended layers that take out the bulk but don’t look layered.” This works best on hair that is at least shoulder length.
    • Styling: Air‑dry with a lightweight mousse (look for “volume” or “flexible hold”). The hidden layers will create natural bends. You can also rough‑dry with your fingers for a just‑rolled‑out‑of‑bed look.

    8. The Curly or Wavy Medium “Deva” Cut

    If your thick hair is also curly or wavy, a standard dry cut will ruin you. You need a curl‑specific technique that respects your natural pattern.

    • Why it works: Curly thick hair shrinks up to 50% when dry. A medium cut (chin‑length when dry) gives you the perfect balance – enough weight to prevent triangle‑head but short enough to let your curls spring.
    • The Ask: Find a stylist trained in DevaCurl, Rezo, or Ouidad methods. Ask for a “dry cut” – they cut each curl individually in its natural state. Request “weight removal” from the under‑layers but keep the perimeter soft.
    • Styling: Use the “praying hands” method with a gel or curl cream, then diffuse upside down. Never brush dry curls. Pineapple your hair (loose ponytail on top of your head) at night.

    read more; 15 Stunning Long Wolf Cut Ideas That Are Taking Over in 2026

    9. The Asymmetrical Lob

    One side shorter than the other – a bold, architectural choice that works surprisingly well on very dense hair because it breaks up the visual weight.

    • Why it works: Symmetry emphasizes bulk. Asymmetry distracts the eye and creates a diagonal line that slims and elongates. The shorter side (usually chin‑length) also makes the longer side (collarbone‑length) feel lighter.
    • The Ask: Be precise: “I want a one‑inch difference between the left and right sides. The shorter side should hit my chin; the longer side at my collarbone.” Make sure the back is blended so it doesn’t look like two separate haircuts.
    • Styling: Straighten with a flat iron for a graphic, modern look. Or add loose waves – the asymmetry becomes even more interesting with texture. Tuck the shorter side behind your ear for extra drama.

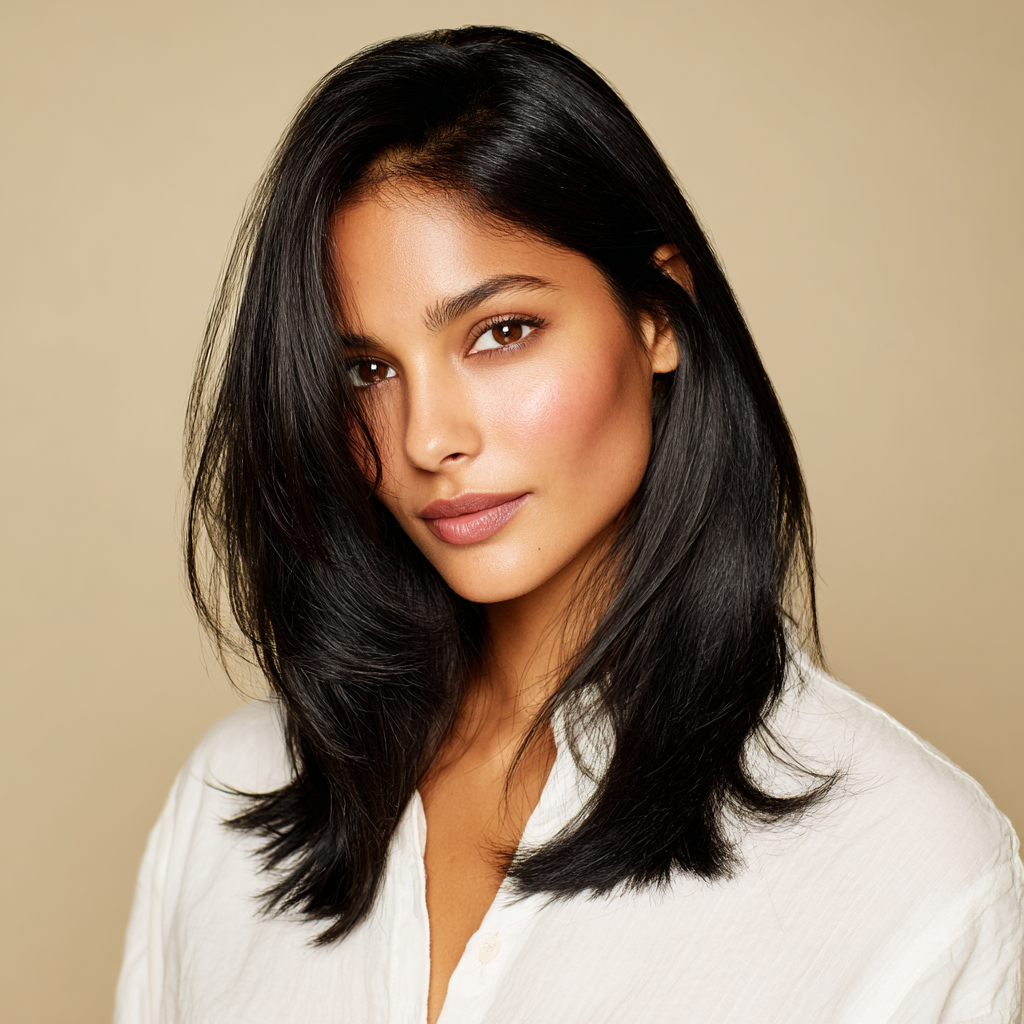
    10. The Low‑Maintenance “One‑Length” with Face‑Framing

    This is for the thick‑haired woman who hates styling. It’s a single length all around (no layers), but with delicate, wispy pieces cut around the face only.

    • Why it works: One‑length cuts usually create the pyramid shape on thick hair – but the face‑framing pieces break the outline just enough to trick the eye. The back remains heavy and flat, which actually helps control bulk.
    • The Ask: Tell your stylist: “Cut the back and sides to one length at the shoulders. Then, take a very small triangle of hair from the front hairline and cut soft, face‑framing layers that start at my cheekbones.”
    • Styling: Honestly, you can wash and go. A dab of leave‑in conditioner, comb through, and air‑dry. The face‑framing pieces will dry faster and give you a “styled” look with zero effort.

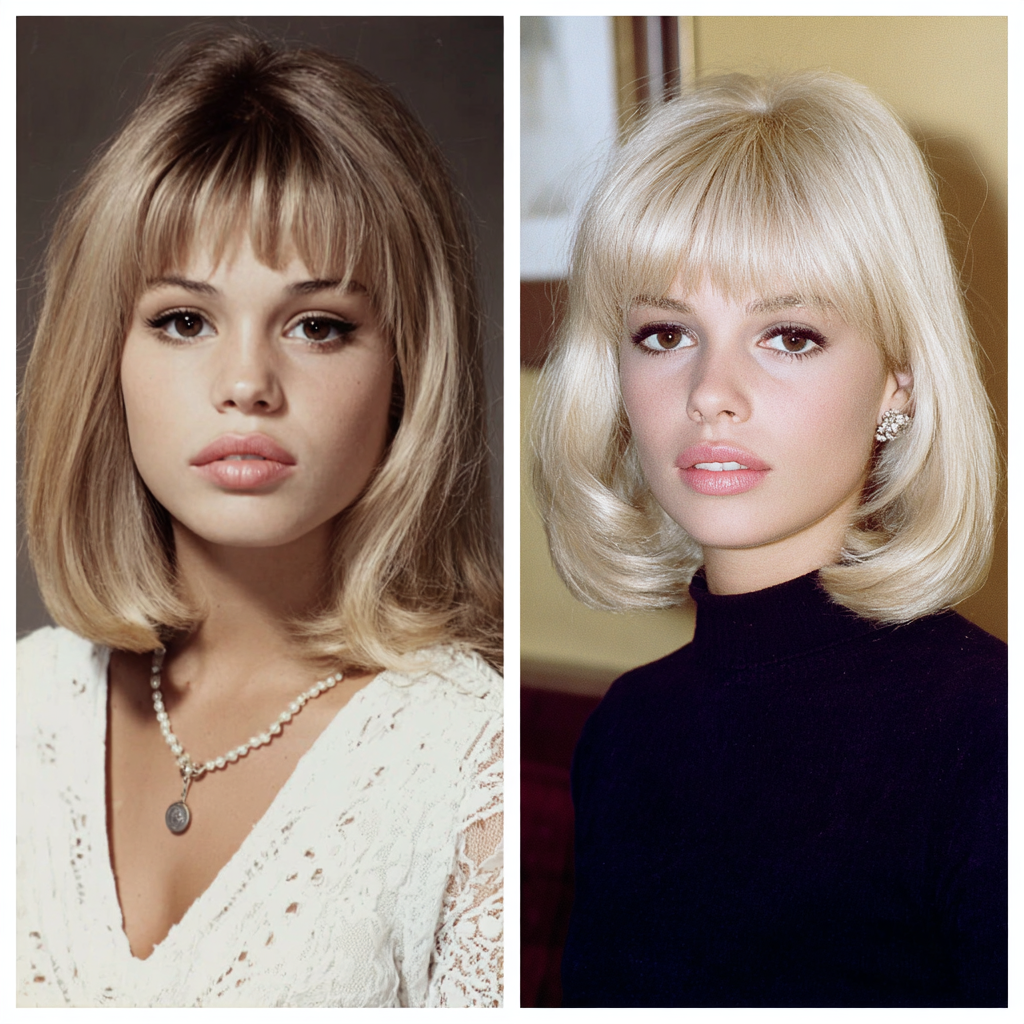
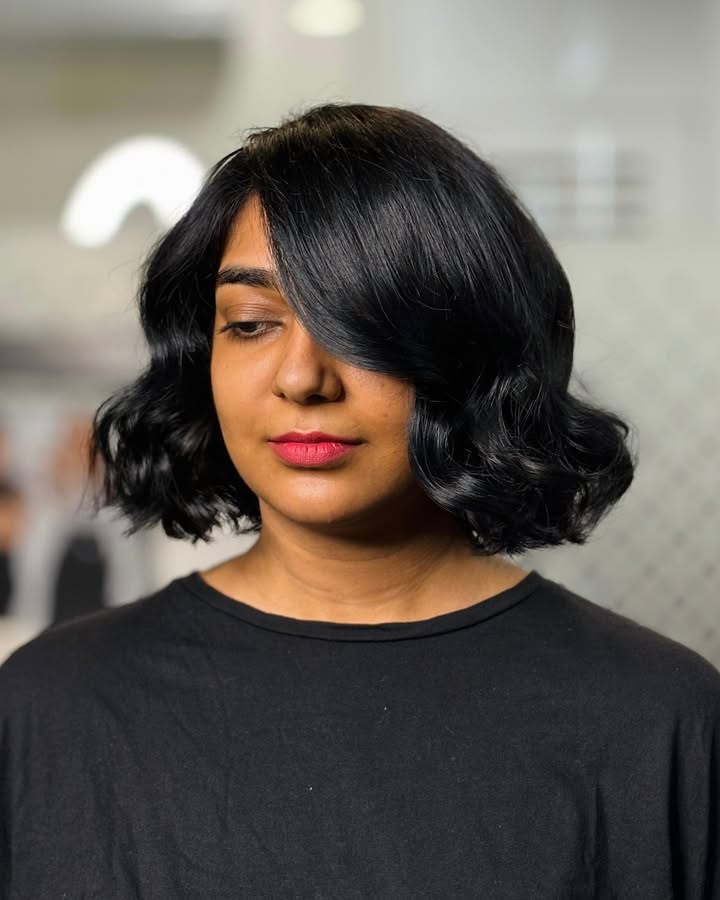
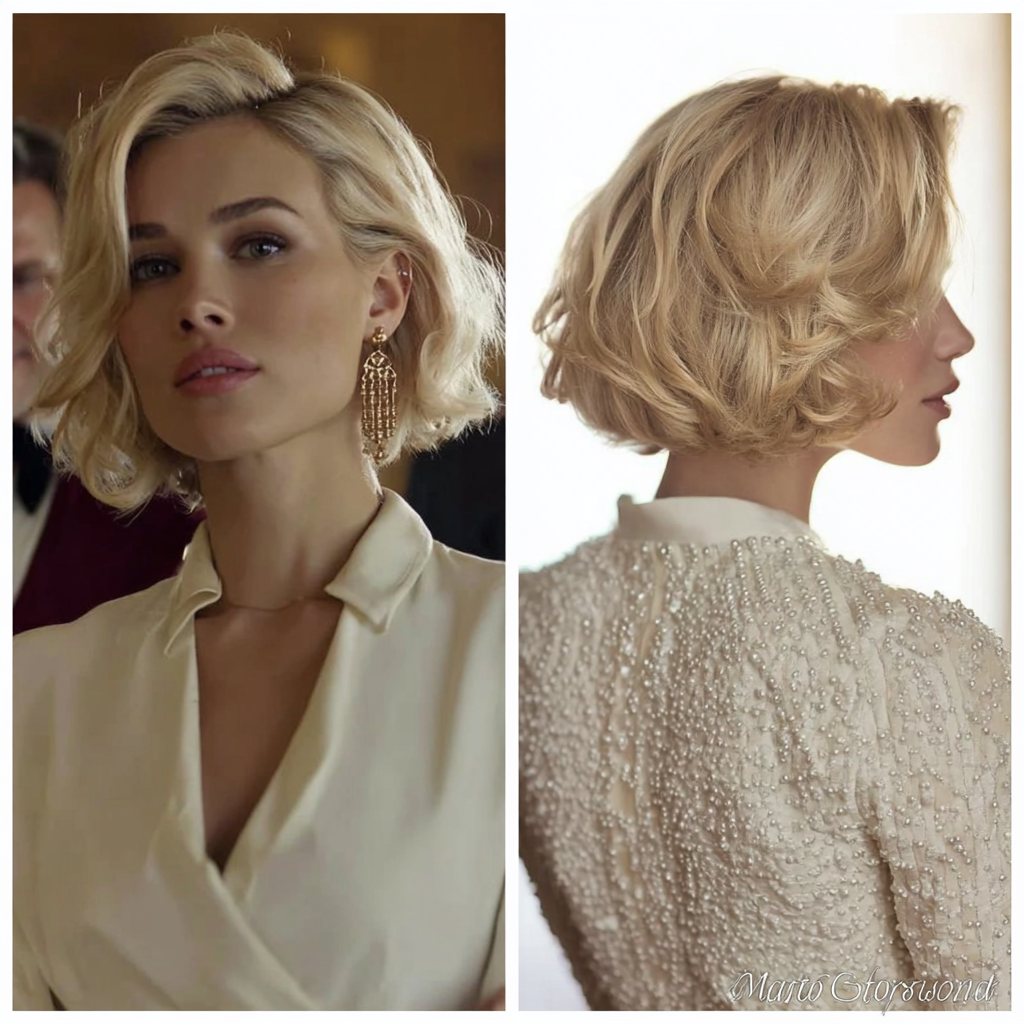
    11. The French “Jacqueline” (Bardot Bob)

    Inspired by Brigitte Bardot – a slightly tousled, chin‑length bob with a deep side part and a heavy, rolled undercurve. It’s the ultimate Parisian style.

    • Why it works: Thick hair holds the “roll” beautifully. Where thin hair would fall flat, your dense strands maintain that curved-under shape all day. It also works perfectly with curtain bangs or a long fringe.
    • The Ask: Request a “classic French bob – chin length, with a slight undercurve in the cut itself.” The cut should be slightly shorter in the back (stacked) and longer at the front corners. Add a soft, wispy fringe that skims the eyebrows.
    • Styling: The key is to blow‑dry with a round brush under the ends while rolling the brush away from your face at the roots. Finish with a texturizing spray for that “I just woke up like this” feel.

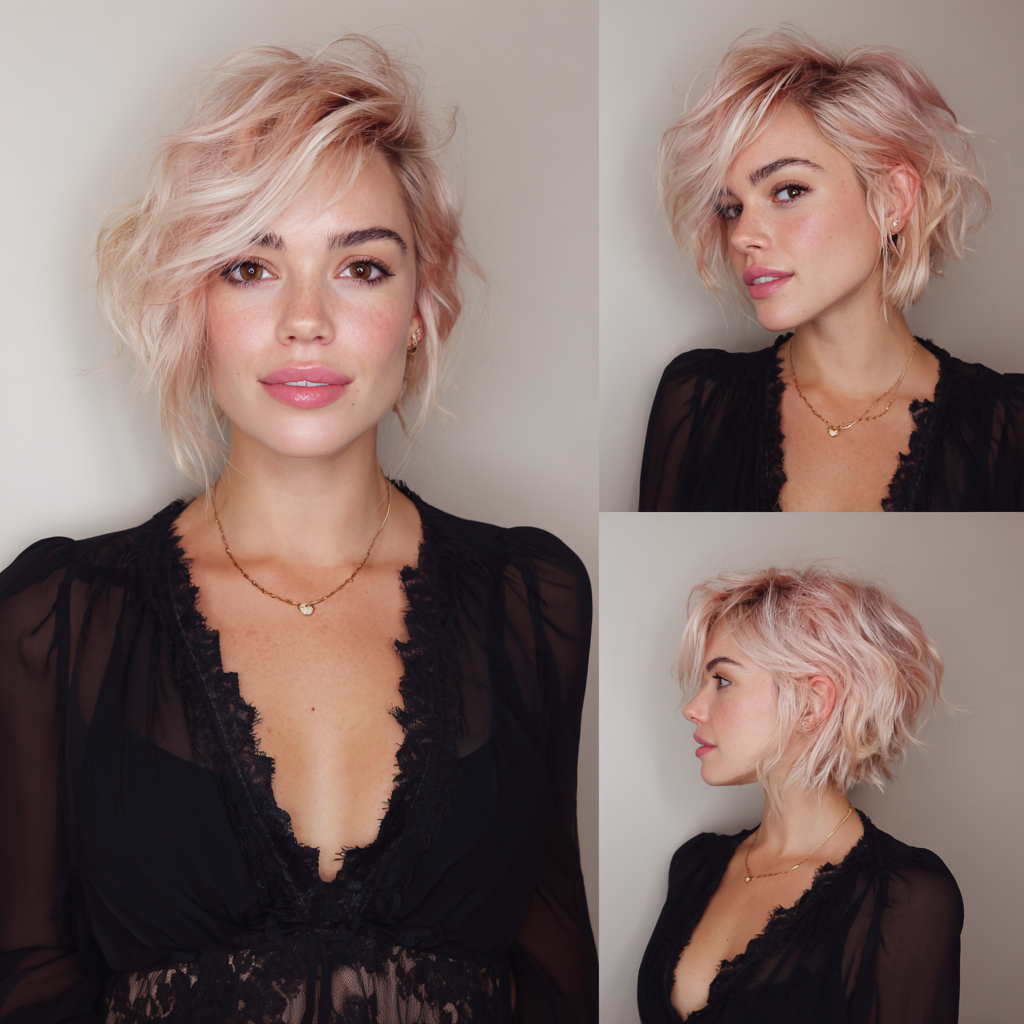
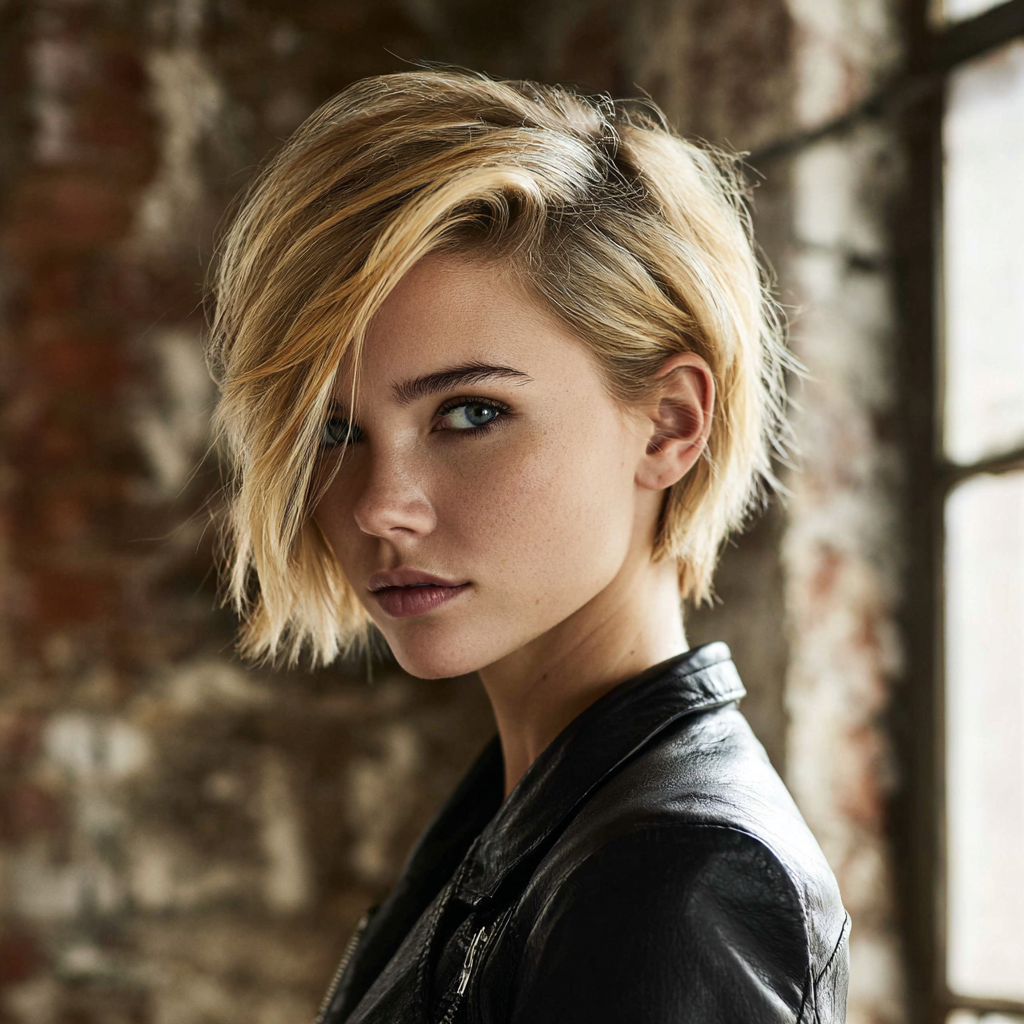
    12. The “Bixie” (Bob + Pixie Hybrid)

    The bixie is a bob that is extremely short at the nape and ears, but retains length at the crown and front. It’s for the truly bold thick‑haired woman who wants minimal bulk.

    • Why it works: By keeping length only on top and in the front, you remove 60% of your hair’s weight. The result is feather‑light, edgy, and incredibly easy to style. Thick hair gives the bixie structure that fine hair cannot achieve.
    • The Ask: “Give me a bixie – short and tapered at the nape (like a pixie), but with the front pieces reaching my chin (like a bob).” Ask for point‑cutting on the top layers to avoid a helmet effect.
    • Styling: Use a small amount of matte paste or clay to piece out the top. Rough‑dry forward. You can also slick it back with gel for a high‑fashion look. This cut requires trims every 4‑6 weeks.

    Golden Rules for Styling Thick Medium Hair (Expanded)

    No matter which of the 12 styles you choose, these five rules will keep your thick hair looking intentional, not overwhelming.

    1. Thin Strategically, Never Aggressively

    Avoid the “thinning shears” that leave you with fuzzy, broken ends. Instead, ask your stylist to use a straight razor (for straight/wavy hair) or slide cutting (for curly hair). Thinning shears create weak points; razors remove weight while keeping the cuticle intact.

    2. Embrace Your Natural Texture

    Thick hair is rarely stick‑straight. If you have wave, use a gel or mousse (not cream) to define it. Creams are too heavy; they sit on top of thick strands and cause buildup. Look for products with “flexible hold” or “weightless volume.”

    3. The “Doughnut” Rule

    If your hair looks like a perfect triangle (wide at the bottom, flat on top), you need more layers near the occipital bone (the back bump of your skull). That’s where the weight needs to be released. Tell your stylist: “Please remove bulk from the occipital area.”

    4. Invest in a Quality Hairdryer

    Thick hair takes forever to dry, and a cheap dryer will leave you with frizz and arm fatigue. Look for a dryer with at least 1875 watts, ionic technology, and a concentrator nozzle. The Dyson Supersonic or Shark HyperAir are worth the splurge – they cut drying time by half.

    5. Sleep on Silk (or Satin)

    Cotton pillowcases absorb moisture and create friction, leading to frizz and breakage. A silk or satin pillowcase (or a silk bonnet) preserves your style for 2‑3 extra days. For curly or wavy thick hair, try “pineappling” (loose ponytail on top of your head) inside a silk scarf.


    Product Recommendations for Thick Medium Hair

    • Shampoo & Conditioner: Look for “weightless moisture” or “balancing” formulas. Avoid anything with “smoothing” or “anti‑frizz” as those often contain heavy silicones. Try Pureology Hydrate Sheer or Living Proof Full Shampoo.
    • Leave‑in Conditioner: Use a spray, not a cream. It’s a 10 Miracle Leave‑In (lite version) or Ouai Leave‑In Conditioner.
    • Heat Protectant: Non‑negotiable. Chi 44 Iron Guard or Bumble & Bumble Bb. Heat Shield.
    • Texture Spray: For shags and butterfly cuts – Oribe Dry Texturizing Spray (pricey but worth it) or Not Your Mother’s Beach Babe (drugstore hero).
    • Mousse/Gel for Curls: Innersense I Create Hold (gel) or Herbal Essences Totally Twisted Mousse.
    • Finishing Oil: Just a drop – Verb Ghost Oil or Moroccanoil Treatment Light.

    Face Shape Guide for These 12 Hairstyles

    Face ShapeBest Matches from Above
    Round#1 Textured Lob, #5 Deep Side‑Part, #9 Asymmetrical Lob, #11 French Jacqueline
    OvalLiterally all 12 – you’re lucky
    Square#2 Modern Shag, #4 Butterfly Cut, #6 Italian Bob, #10 One‑Length with Face‑Framing
    Heart#3 Blunt Cut (secret weight removal), #7 Hush Cut, #8 Curly Deva Cut, #12 Bixie
    Long/Oblong#6 Italian Bob, #11 French Jacqueline, #5 Deep Side‑Part (adds width)

    Maintenance Schedule for Thick Medium Hair

    • Trims: Every 8‑12 weeks to prevent the ends from becoming too heavy and pulling the shape down.
    • Deep conditioning: Once a week. Thick hair can handle it. Use a protein‑free mask if your hair is low‑porosity (e.g., SheaMoisture Manuka Honey).
    • Clarifying wash: Every 2‑3 weeks. Thick hair accumulates buildup invisibly. Use Ouai Detox Shampoo or apple cider vinegar rinse.

    The Verdict

    Don’t fight your thickness – sculpt it. The medium‑length cut is a partnership with your genetics. Whether you choose the rock‑and‑roll shag (#2), the sophisticated lob (#1), the viral butterfly cut (#4), or the bold bixie (#12), you stop trying to hide your volume and start using it as your primary accessory.

    Thick hair is a privilege disguised as a problem. With the right cut, you go from “I have too much hair” to “Look at all this glorious hair.”

    Good morning, indeed. Now go call your stylist – and take this article with you.

  • Fine‑but‑Dense Hair.

    Fine‑but‑Dense Hair.

    The Ultimate Guide to Medium Length Styles That Unlock Hidden Volume

    You wash your hair. It feels weightless and soft in the shower. You blow‑dry it. Suddenly, it’s a fluffy, unmanageable cloud that won’t hold a shape. An hour later, your roots are flat against your scalp, and the ends have expanded into a frustrating triangle. Welcome to the daily paradox of fine‑but‑dense hair.

    • Fine means each individual strand has a small diameter. It is soft, silky, easily bent, and quickly weighed down by heavy products or long lengths.
    • Dense means you have a lot of those fine strands – often two or three times as many as the average person. Your ponytail circumference might be impressive, but the individual hairs are delicate.

    Together, these two traits create a unique challenge: too much hair, but each strand is weak. Heavy creams flatten your roots. Traditional layers can look choppy and see‑through. Too much length pulls out any root lift you manage to create. Go too short, and your fine‑but‑dense hair poofs into a shapeless helmet.

    The solution is not to treat your hair as simply “thick” or “thin.” The solution is a set of medium length hairstyles engineered specifically for fine‑but‑dense hair. This guide gives you ten precision cuts, six golden styling rules, a product shopping list, and a maintenance schedule. By the end, you will know exactly how to make your hidden density work for you.


    The 10 Best Medium Length Hairstyles for Fine‑but‑Dense Hair

    Below are ten hairstyles. Each one includes why it works, exactly what to say to your stylist, and how to style it at home. No hashtags, no gimmicks – just proven techniques.

    Discover more on; 15 Best Short Hair Ideas for Plus Size Women That Feel Stylish and Confidence-Boosting

    1. The Blunt Lob with Internal Micro‑Layering

    Most stylists will tell you to add many visible layers to remove bulk from thick hair. That is a mistake for fine‑but‑dense hair. Too many layers make the ends look wispy and thin, defeating the illusion of fullness. Instead, keep a strong, blunt perimeter but remove weight inside the hair.

    Why it works: The blunt ends create the visual illusion of thickness, while micro‑layers (cut only half an inch to one inch deep) prevent the dreaded pyramid shape. Your density stays hidden as body, not bulk. The blunt line also prevents the ends from spreading apart, which is a common problem with fine strands.

    What to say to your stylist: “I want a blunt collarbone lob, but please add internal micro‑layers just to remove weight – no visible steps. Use slide‑cutting or point‑cutting, not thinning shears.”

    How to style: Blow‑dry with a round brush, focusing on lifting the roots upward and backward. Once dry, run a flat iron over just the ends to seal the blunt line. The result is a swingy, polished shape that looks much thicker than it actually is.

    2. The Hidden Undercut Bob (Nape Weight Removal)

    Yes, you read that correctly. An undercut – but only the bottom inch of your nape, completely invisible when your hair is down. This is one of the most effective secrets for fine‑but‑dense hair.

    Why it works: Fine‑but‑dense hair gets unbearably heavy at the back of the neck. That weight pulls down the entire hairstyle, flattening the crown and stretching out any waves. Shaving or clipping a small triangle of hair from the underlayer removes thirty percent of the weight instantly, leaving the top layers full, bouncy, and free to move.

    What to say to your stylist: “Please shave or clip a two‑inch wide, one‑inch tall triangle at my nape, just below the occipital bone. Leave the top layers long enough to cover it completely. I want this hidden – no one should see the undercut when my hair is down.”

    How to style: Wear it down – the undercut stays invisible. The difference in weight will feel like you removed a brick from your head. You can also pull the top layers into a low ponytail, and the undercut will keep the ponytail from sagging.

    3. The Graduated A‑Line Bob (Shorter in Back, Longer in Front)

    An A‑line bob – also called a graduated bob – is cut shorter at the nape and angles down to the chin or collarbone. For fine‑but‑dense hair, this shape is nothing short of magic.

    Why it works: By keeping the back shorter, you remove the heaviest density right where it causes the most flatness – the occipital ridge. The longer front pieces give you movement, the ability to tuck behind your ears, and a face‑framing effect that slims the jawline. The graduation also creates natural lift at the crown because there is simply less hair weight pulling backward.

    What to say to your stylist: “Cut a graduated A‑line bob – the back should be at my nape, angling down to my chin in front. No heavy stacking; keep the graduation soft and blended. Do not use thinning shears on the perimeter.”

    How to style: Blow‑dry the back sections forward (toward your face) to encourage volume. Use a flat iron to slightly curl the longer front pieces away from your face. A dab of lightweight pomade on the ends will keep them from fraying.

    4. The Ghost Layer Cut (Invisible Long Layers)

    Traditional long layers are usually terrible for fine‑but‑dense hair because they create “holes” – visible gaps where the density disappears. The ghost layer technique solves that problem entirely.

    Why it works: Ghost layers are cut at a very steep angle, almost horizontal, using a technique called slide‑cutting. The stylist glides the scissors along the strand, removing a tiny amount of weight without creating a visible layer line. Your density stays intact and solid, but the hair moves fluidly, like water. No one can see the layers, but everyone notices the movement.

    What to say to your stylist: “Give me ghost layers – long, invisible layers using slide‑cutting. I do not want to see any step marks or layer lines. Just remove the internal bulk so my hair swings without losing its solid outline.”

    How to style: Air‑dry or rough‑dry with your fingers. The ghost layers will create natural, random texture without looking choppy. For a more polished look, use a large‑barrel curling iron to add loose waves – the invisible layers will hold the wave beautifully.

    5. The Deep Side‑Part with Root Crimping

    This is primarily a styling technique, but it is so effective for fine‑but‑dense hair that it deserves a full spot on this list. The cut itself is simple: a one‑length shoulder skim. The magic happens in the styling.

    Why it works: A deep side‑part breaks the symmetry that makes fine‑but‑dense hair look flat and heavy on top. Adding a “root crimp” – using a small crimping iron or a texturizing powder at the roots only – gives lift that lasts all day. The density of your hair actually helps here, because there are enough strands to hide the crimped texture underneath the top layer.

    What to say to your stylist: “Just a blunt shoulder‑length cut. No layers. I will handle the styling myself. Keep the perimeter clean and even.”

    How to style: After blow‑drying, take a half‑inch crimping iron and crimp only the roots – one inch from the scalp – along your deep side‑part. Focus on the underside of the part line. Flip your hair over, shake it out, and you will have forty‑eight hours of volume. Finish with a light flexible‑hold hairspray.

    6. The Bixie for Fine‑but‑Dense Hair (Bob + Pixie Hybrid)

    The bixie – a hybrid of a bob and a pixie – is typically recommended for very thick hair, but it works brilliantly for fine‑but‑dense hair when done correctly. It is short at the nape and ears, with length kept on top and in the front.

    Why it works: This cut removes the overwhelming density from the back of the head (where it flattens everything) while keeping length in the front to frame your face. The short back also makes the fine strands look thicker because there is less length to weigh them down. The contrast between the short, tapered back and the longer front pieces creates a dramatic, modern silhouette.

    What to say to your stylist: “Give me a bixie – tapered close at the nape and over the ears, but keep the top and front pieces at chin length. Use texturizing shears only on the very ends, never near the roots. I want the front to feel soft and piecey.”

    How to style: Rub a pea‑sized amount of matte paste or clay between your palms and rake it through the top sections. Let the front pieces fall naturally. Do not comb it – finger‑styling preserves the texture. This cut requires trims every four to six weeks to maintain the shape.

    7. The Curtain Bang Lob with Point‑Cut Ends

    Curtain bangs are usually recommended for thick, coarse hair, but fine‑but‑dense hair can wear them beautifully if the bangs are point‑cut (vertical snips into the ends) rather than cut bluntly.

    Why it works: Blunt bangs on fine‑but‑dense hair look heavy, crease easily, and require constant re‑washing. Point‑cut curtain bangs are wispy, soft, and blend seamlessly into the lob. Your natural density keeps the bangs from looking too thin or sparse – they have just enough fullness to frame your face without overwhelming it.

    What to say to your stylist: “Cut curtain bangs that start at my cheekbones and blend into a collarbone lob. Use point‑cutting on the bangs so they are soft and piecey. The bangs should be longest at the outer corners and shortest in the middle.”

    How to style: Blow‑dry the bangs side‑to‑side using a small round brush. A spritz of dry texture spray will keep them separated and airy. For second‑day bangs, just wet them at the sink, blow‑dry them again, and go.

    8. The Waterfall Layered Cut (Asymmetric Long Layers)

    The waterfall cut is a series of very long, very soft layers that cascade like – you guessed it – a waterfall. There is no blunt perimeter; everything flows from shorter at the crown to longer at the shoulders.

    Why it works: For fine‑but‑dense hair, a blunt perimeter can feel heavy and restrictive. The waterfall cut removes all the weight from the ends, so your hair moves like silk. The density provides the body; the cut provides the freedom. This is the closest you can get to “effortless, air‑dried waves” without a curling iron.

    What to say to your stylist: “I want a waterfall cut – all long, soft layers with no blunt line. The shortest layer should be at my chin, the longest at my shoulders. Use a razor or slide‑cutting only. No thinning shears at all.”

    How to style: This cut was made for air‑drying with a lightweight foam or mousse. Scrunch the product in while your hair is sopping wet, then let it dry naturally. You will get soft, beachy waves without heat. If you need more volume, diffuse the roots upside down.

    image by; page3cbe

    you will love this; Easy Medium Hairstyles for Older Women That Always Look Polished

    9. The French “Jacqueline” Bob for Fine‑but‑Dense Hair

    Inspired by Brigitte Bardot, the French Jacqueline bob is a slightly tousled, chin‑length bob with a deep side part and a heavy, rolled undercurve. It is the ultimate Parisian style, adapted for fine‑but‑dense hair.

    Why it works: Fine‑but‑dense hair holds the “roll” of a French bob beautifully. Where thin hair would fall flat, your dense strands maintain that curved‑under shape all day. The deep side part and the undercurve work together to create the illusion of even more density, because the hair is directed inward rather than spreading out.

    What to say to your stylist: “Give me a classic French bob – chin length, with a slight undercurve cut into the shape. The back should be slightly shorter than the front. Add a soft, wispy fringe that skims the eyebrows. Use point‑cutting on the fringe.”

    How to style: The key is to blow‑dry with a round brush under the ends while rolling the brush away from your face at the roots. Finish with a texturizing spray for that “I just woke up like this” feel. A few drops of lightweight oil on the ends will add shine without weight.

    10. The “Twist” Layered Cut (Alternating Long and Short Layers)

    This is an advanced technique where the stylist alternates very long layers with slightly shorter layers in a repeating pattern, like a DNA helix. It is not a common request, but it is a game‑changer for fine‑but‑dense hair.

    Why it works: Traditional layering removes weight from a continuous plane, which can create gaps. The twist cut removes weight in an alternating pattern, so that no two gaps line up. The result is maximum weight removal with zero visible holes. Your fine‑but‑dense hair becomes light, airy, and completely solid in appearance.

    What to say to your stylist: “I want a twist layer cut – alternating long and short layers, not a continuous graduation. This requires precision sectioning. Please use a razor or slide‑cutting, and show me the pattern before you cut.”

    How to style: This cut is very forgiving. You can blow it out straight for a sleek look, or let it air‑dry with a salt spray for a messy, editorial vibe. The alternating layers will create natural volume at the crown without any effort.


    Six Golden Rules for Styling Fine‑but‑Dense Hair

    No matter which of the ten hairstyles you choose, these six rules will keep your fine‑but‑dense hair looking intentional, not overwhelming.

    Rule 1: Never Use Heavy Creams or Butters

    Products labeled “smoothing,” “anti‑frizz,” or “nourishing” are usually packed with shea butter, coconut oil, or heavy silicones. These ingredients will collapse your fine strands into a greasy, flat mess within hours. Instead, look for mousses, foams, and texture sprays labeled “volume,” “weightless,” or “full body.”

    Rule 2: Wash Less Often, But Clarify More

    Fine‑but‑dense hair gets oily at the roots and dry at the ends simultaneously. Wash every two to three days with a volumizing shampoo. Once a week, use a clarifying shampoo (such as K18 or Ouai Detox) to remove buildup from dry shampoo, hard water, and styling products. Buildup is the number one cause of flat roots in fine‑but‑dense hair.

    Rule 3: Blow‑Dry Upside Down – Then Use the Cool Shot

    After towel‑drying, flip your head over and blow‑dry the roots first, using high heat and low speed. When your hair is ninety percent dry, switch to the cool shot button and blast your roots while still upside down. The cold air seals the cuticle and locks in lift. Then flip your hair back and finish the ends.

    Rule 4: Avoid Thinning Shears at All Costs

    Thinning shears – those toothed scissors that look like a comb – create broken, fuzzy ends on fine hair. They will make your density look ragged, not full. Always ask for point‑cutting, slide‑cutting, or a razor instead. If your stylist reaches for thinning shears, stop them immediately.

    Rule 5: Use a Root Lifter or Volumizing Powder

    A root lifting spray (such as Living Proof Full Root Lift) or a volumizing powder (like Oribe Dry Texturizing Powder) is your best friend. Sprinkle or spray directly onto the roots, massage in with your fingertips, and watch your density turn into lift. These products work by creating microscopic grip between strands, which fine‑but‑dense hair desperately needs.

    Rule 6: Sleep on Silk or Satin

    Cotton pillowcases absorb moisture and create friction, leading to frizz, tangles, and flattened roots. A silk or satin pillowcase (or a silk bonnet) preserves your style for two to three extra days. For extra volume in the morning, gather your hair into a loose, high ponytail on top of your head – called “pineappling” – before you sleep. The silk surface allows the hair to slide rather than crush.


    Product Picks Specifically for Fine‑but‑Dense Hair

    Below is a curated shopping list. Every product has been chosen because it adds volume, removes weight, or protects without flattening.

    Product TypeBest ChoiceWhy It Works for Fine‑but‑Dense Hair
    ShampooDavines VoluRemoves oil without stripping natural moisture
    ConditionerVerb Volume ConditionerUltra‑light formula, rinse out quickly
    Leave‑in conditionerUnite 7Seconds DetanglerA spray, not a cream – no weight
    MousseMoroccanoil Volumizing MousseAdds grip and body without crunch
    Root lifter (spray)Living Proof Full Root LiftHeat‑activated, lasts two days
    Root lifter (powder)Oribe Dry Texturizing PowderSprinkles on for instant lift
    Dry shampooKlorane Dry Shampoo with NettleAbsorbs oil only at the roots
    Texture sprayAmika Un.Done Volume & Texture SprayGives fine strands “grit” for hold
    Heat protectantChi 44 Iron GuardLightweight, non‑greasy
    Finishing oil (just one drop)Verb Ghost OilVanishes into hair, no residue

    Face Shape Recommendations for Fine‑but‑Dense Hair

    Different face shapes work best with different medium lengths. Use this table as a quick reference.

    • Round face: Blunt Lob with Internal Micro‑Layering, Hidden Undercut Bob, Deep Side‑Part with Root Crimping, Bixie
    • Oval face: All ten styles work well – you have the most flexibility
    • Square face: Graduated A‑Line Bob, Curtain Bang Lob, Waterfall Layered Cut, French Jacqueline Bob
    • Heart face: Ghost Layer Cut, Hidden Undercut Bob, Bixie, Twist Layered Cut
    • Long face: Graduated A‑Line Bob, Deep Side‑Part with Root Crimping, Curtain Bang Lob, French Jacqueline Bob

    Maintenance Schedule for Fine‑but‑Dense Hair

    Keeping your fine‑but‑dense hair in peak condition requires a consistent routine. Here is a week‑by‑week guide.

    • Trims: Every eight to ten weeks. Fine‑but‑dense hair shows split ends quickly, and frayed ends make the density look messy rather than lush.
    • Deep conditioning: Once every two weeks. Use a protein‑free mask if your hair is low‑porosity. Fine hair can be easily over‑proteinized, leading to brittleness. Look for masks labeled “hydrating” rather than “repairing.”
    • Clarifying wash: Once a week. Fine‑but‑dense hair accumulates invisible buildup from dry shampoo, texture sprays, and hard water. Use a clarifying shampoo like Ouai Detox or K18.
    • Root touch‑up: Every two to three days. A quick blast of dry shampoo or volumizing powder at the roots will reset your volume.

    Troubleshooting Common Fine‑but‑Dense Problems

    Problem: My hair looks full when I leave the house, but it falls flat by lunchtime.
    Solution: You are using products that are too heavy, or you are not using a root lifter. Switch to a mousse and a root powder. Also check your blow‑drying technique – you must use the cool shot.

    Problem: My ends look see‑through and stringy.
    Solution: You have too many visible layers, or your stylist used thinning shears. Ask for a blunt perimeter with internal micro‑layering next time. In the meantime, trim at least half an inch off the ends.

    Problem: My hair is frizzy and poofy no matter what I do.
    Solution: Fine‑but‑dense hair is often naturally wavy but gets brushed out. Stop brushing dry hair. Instead, comb it only when wet with conditioner. Use a gel or mousse to define the wave, then do not touch it until it is completely dry.

    Problem: My ponytail is heavy and gives me a headache.
    Solution: This is a classic sign that you need a hidden undercut. Removing that small triangle at the nape will reduce ponytail weight by nearly a third. Also try using two small elastics instead of one thick one – spread the weight.


    Final Verdict

    Fine‑but‑dense hair is not a problem – it is an opportunity. You have the fullness that fine‑haired people envy and the softness that thick‑haired people crave. The key is to stop treating your hair like either extreme. Do not layer it to death (that creates see‑through ends). Do not leave it one length (that creates the triangle). Instead, use the medium length cuts above to unlock your hidden density – volume without weight, movement without frizz, and lift that lasts all day.

    Your perfect title for this article is “Fine‑but‑Dense Hair: The Ultimate Guide to Medium Length Styles That Unlock Hidden Volume” – and the focus keyword to remember forever is fine‑but‑dense hair. Because that phrase, and that phrase alone, describes exactly what you are working with.